This year we hosted our first EVER Halloween party! Halloween isn’t traditionally a very big holiday in New Zealand but being from the States, I had to show the kiwis what it was all about: dressing up, eating candy, lots of decorations and having any excuse to get everyone together for a party! So, we did just that!
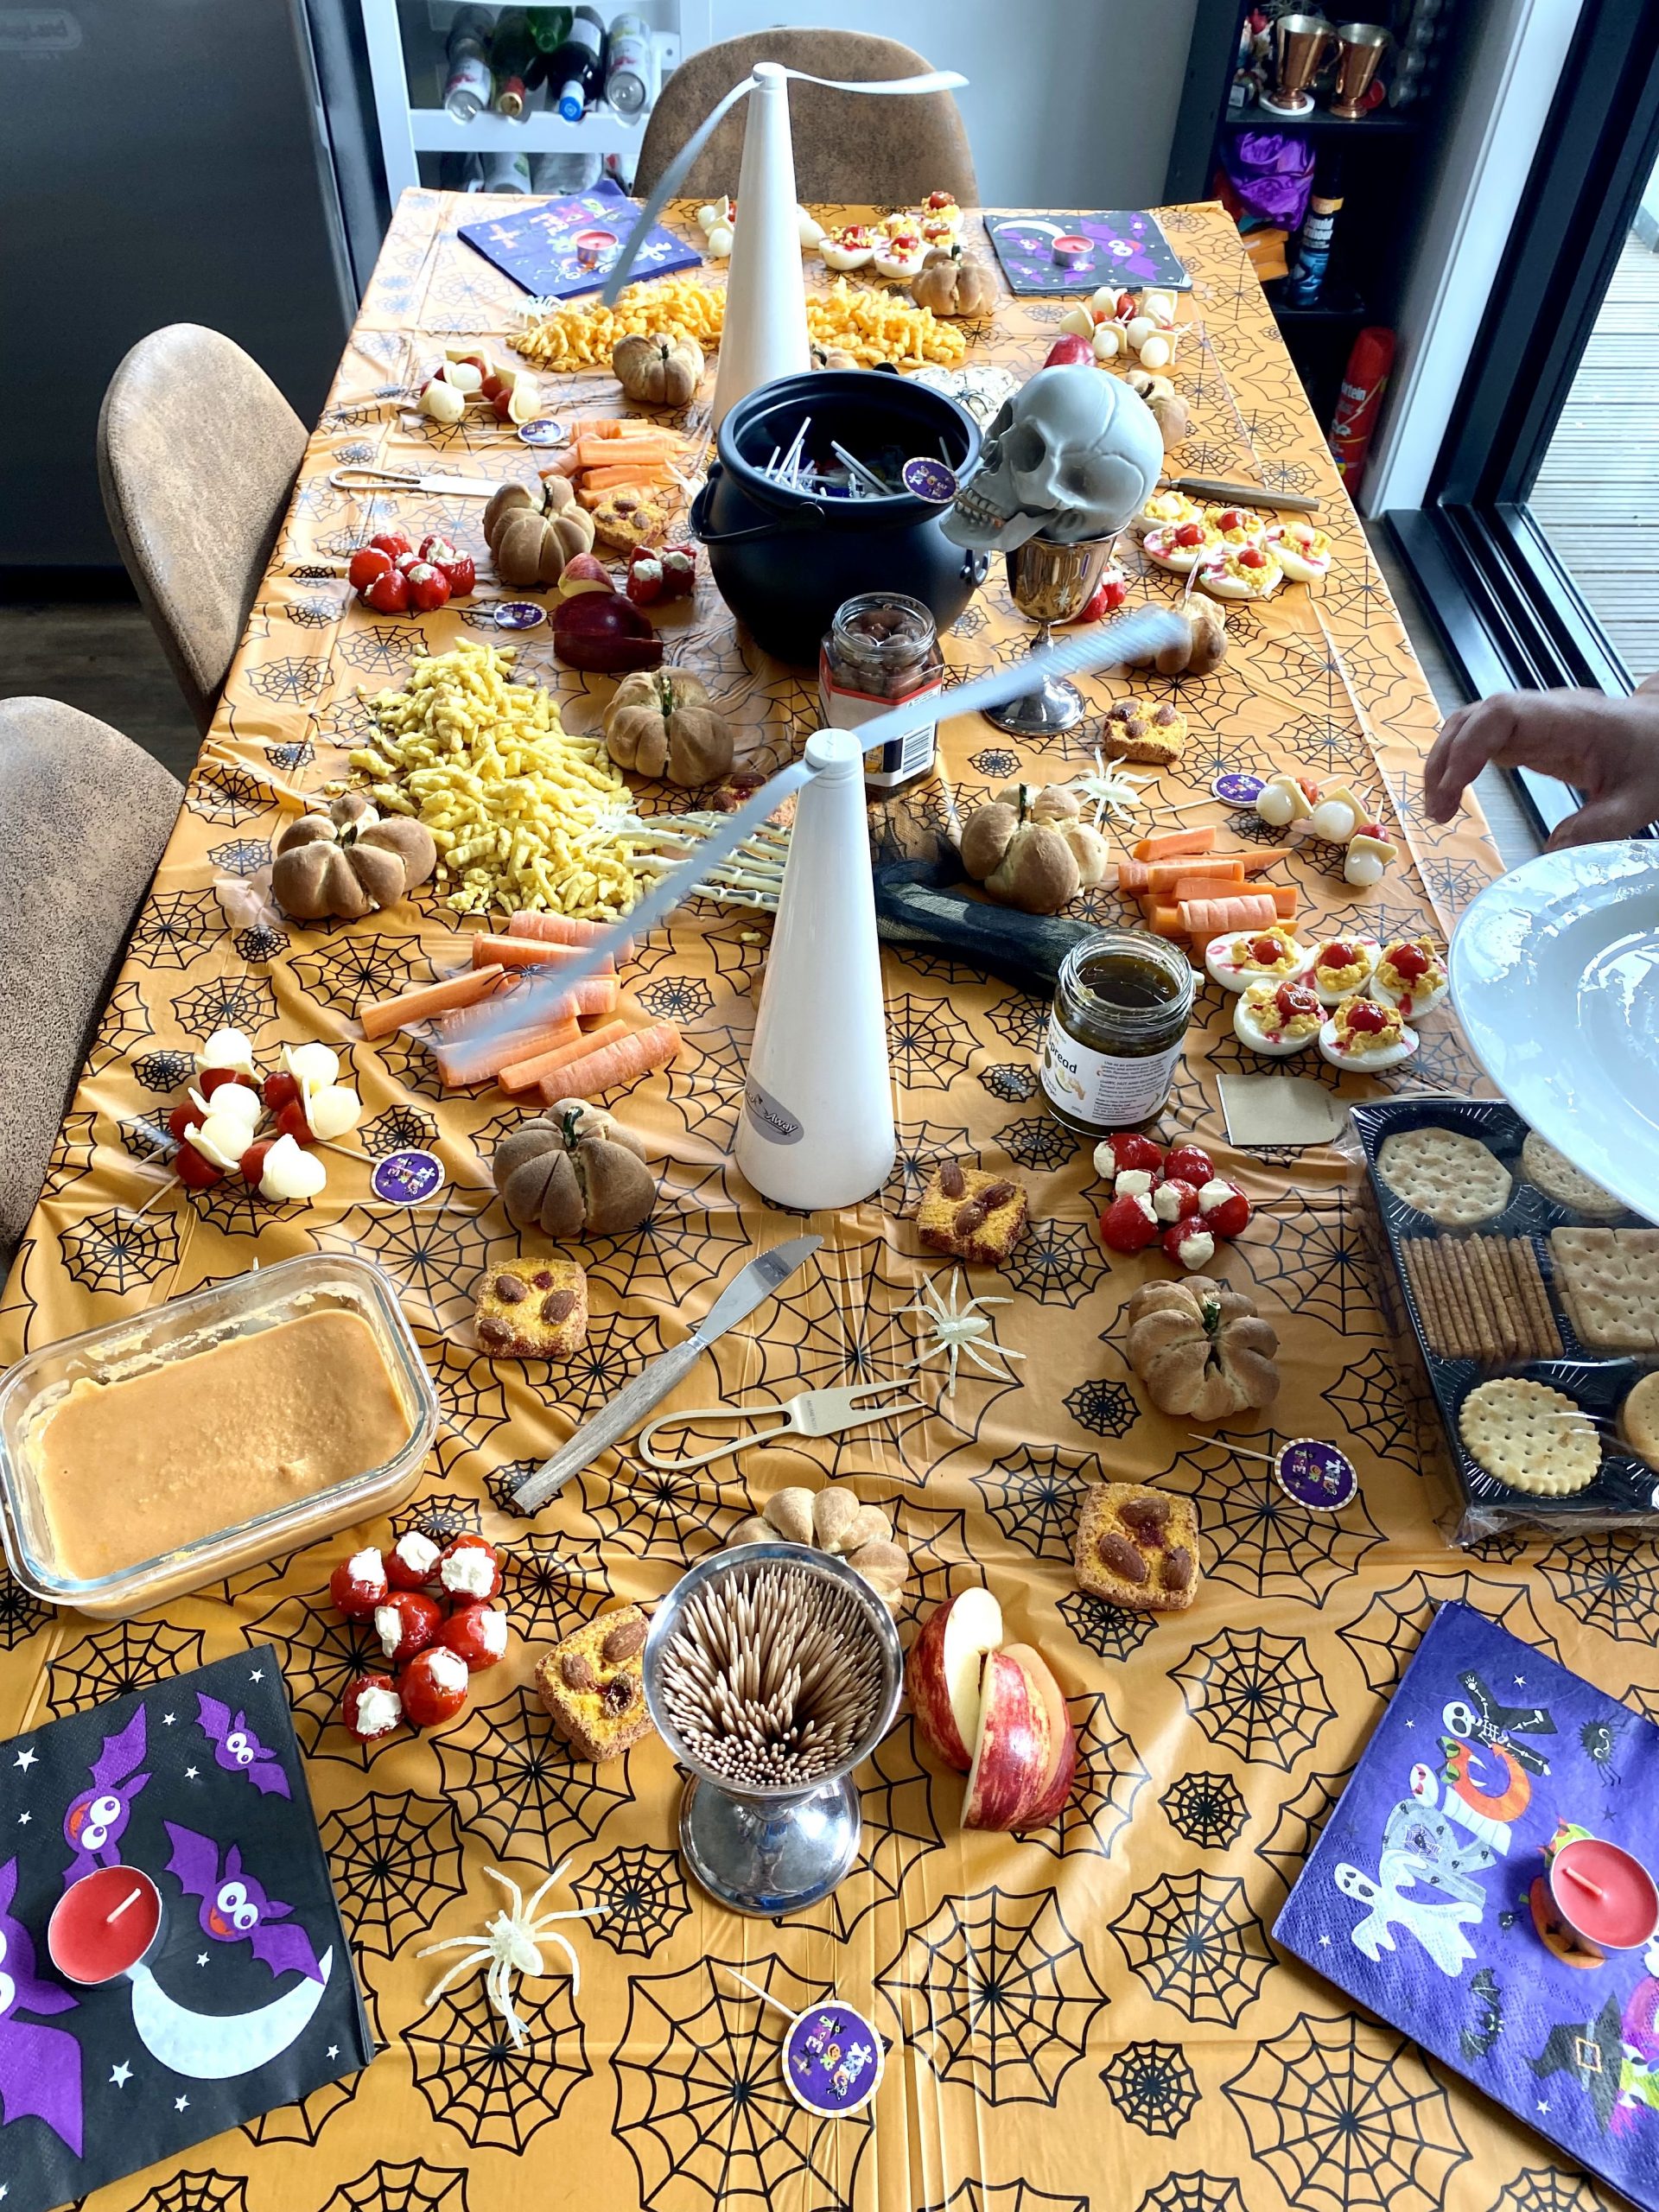
My favorite parts about the party (besides seeing everyone have fun and dress up), were the grazing table filled with Halloween-inspired treats and our DIY homemade Aladdin costumes (including our dog’s Abu costume, of course)!
Our Costumes
We try to be as eco-friendly as possible which made making these costumes even more exciting! Kona’s, our dog, costume was made out of an old purple pillow case, an old brown sheet, and a red cardboard box. All of which we no longer wanted and were going to donate/recycle. My husband, Robbie’s, costume was made from the same materials except his pants were made from old white winter sheets! And his shirt was just a painting shirt he already had lying around (which he cut the sleeves off of). My costume was a mix of things I already had (like the headband, jewelry, and shirt) and two op shop finds (the pants and a scarf which I used as a belt). Although our costumes weren’t perfect, we enjoyed making them and wearing them!
The Food
I highly recommend turning your table into a full-on grazing “board” for your next party! Whether you supply everything needed for grazing or your guests each bring something to contribute, it’s a perfect way to have a mix of everything and allow for the optimum snacking experience.
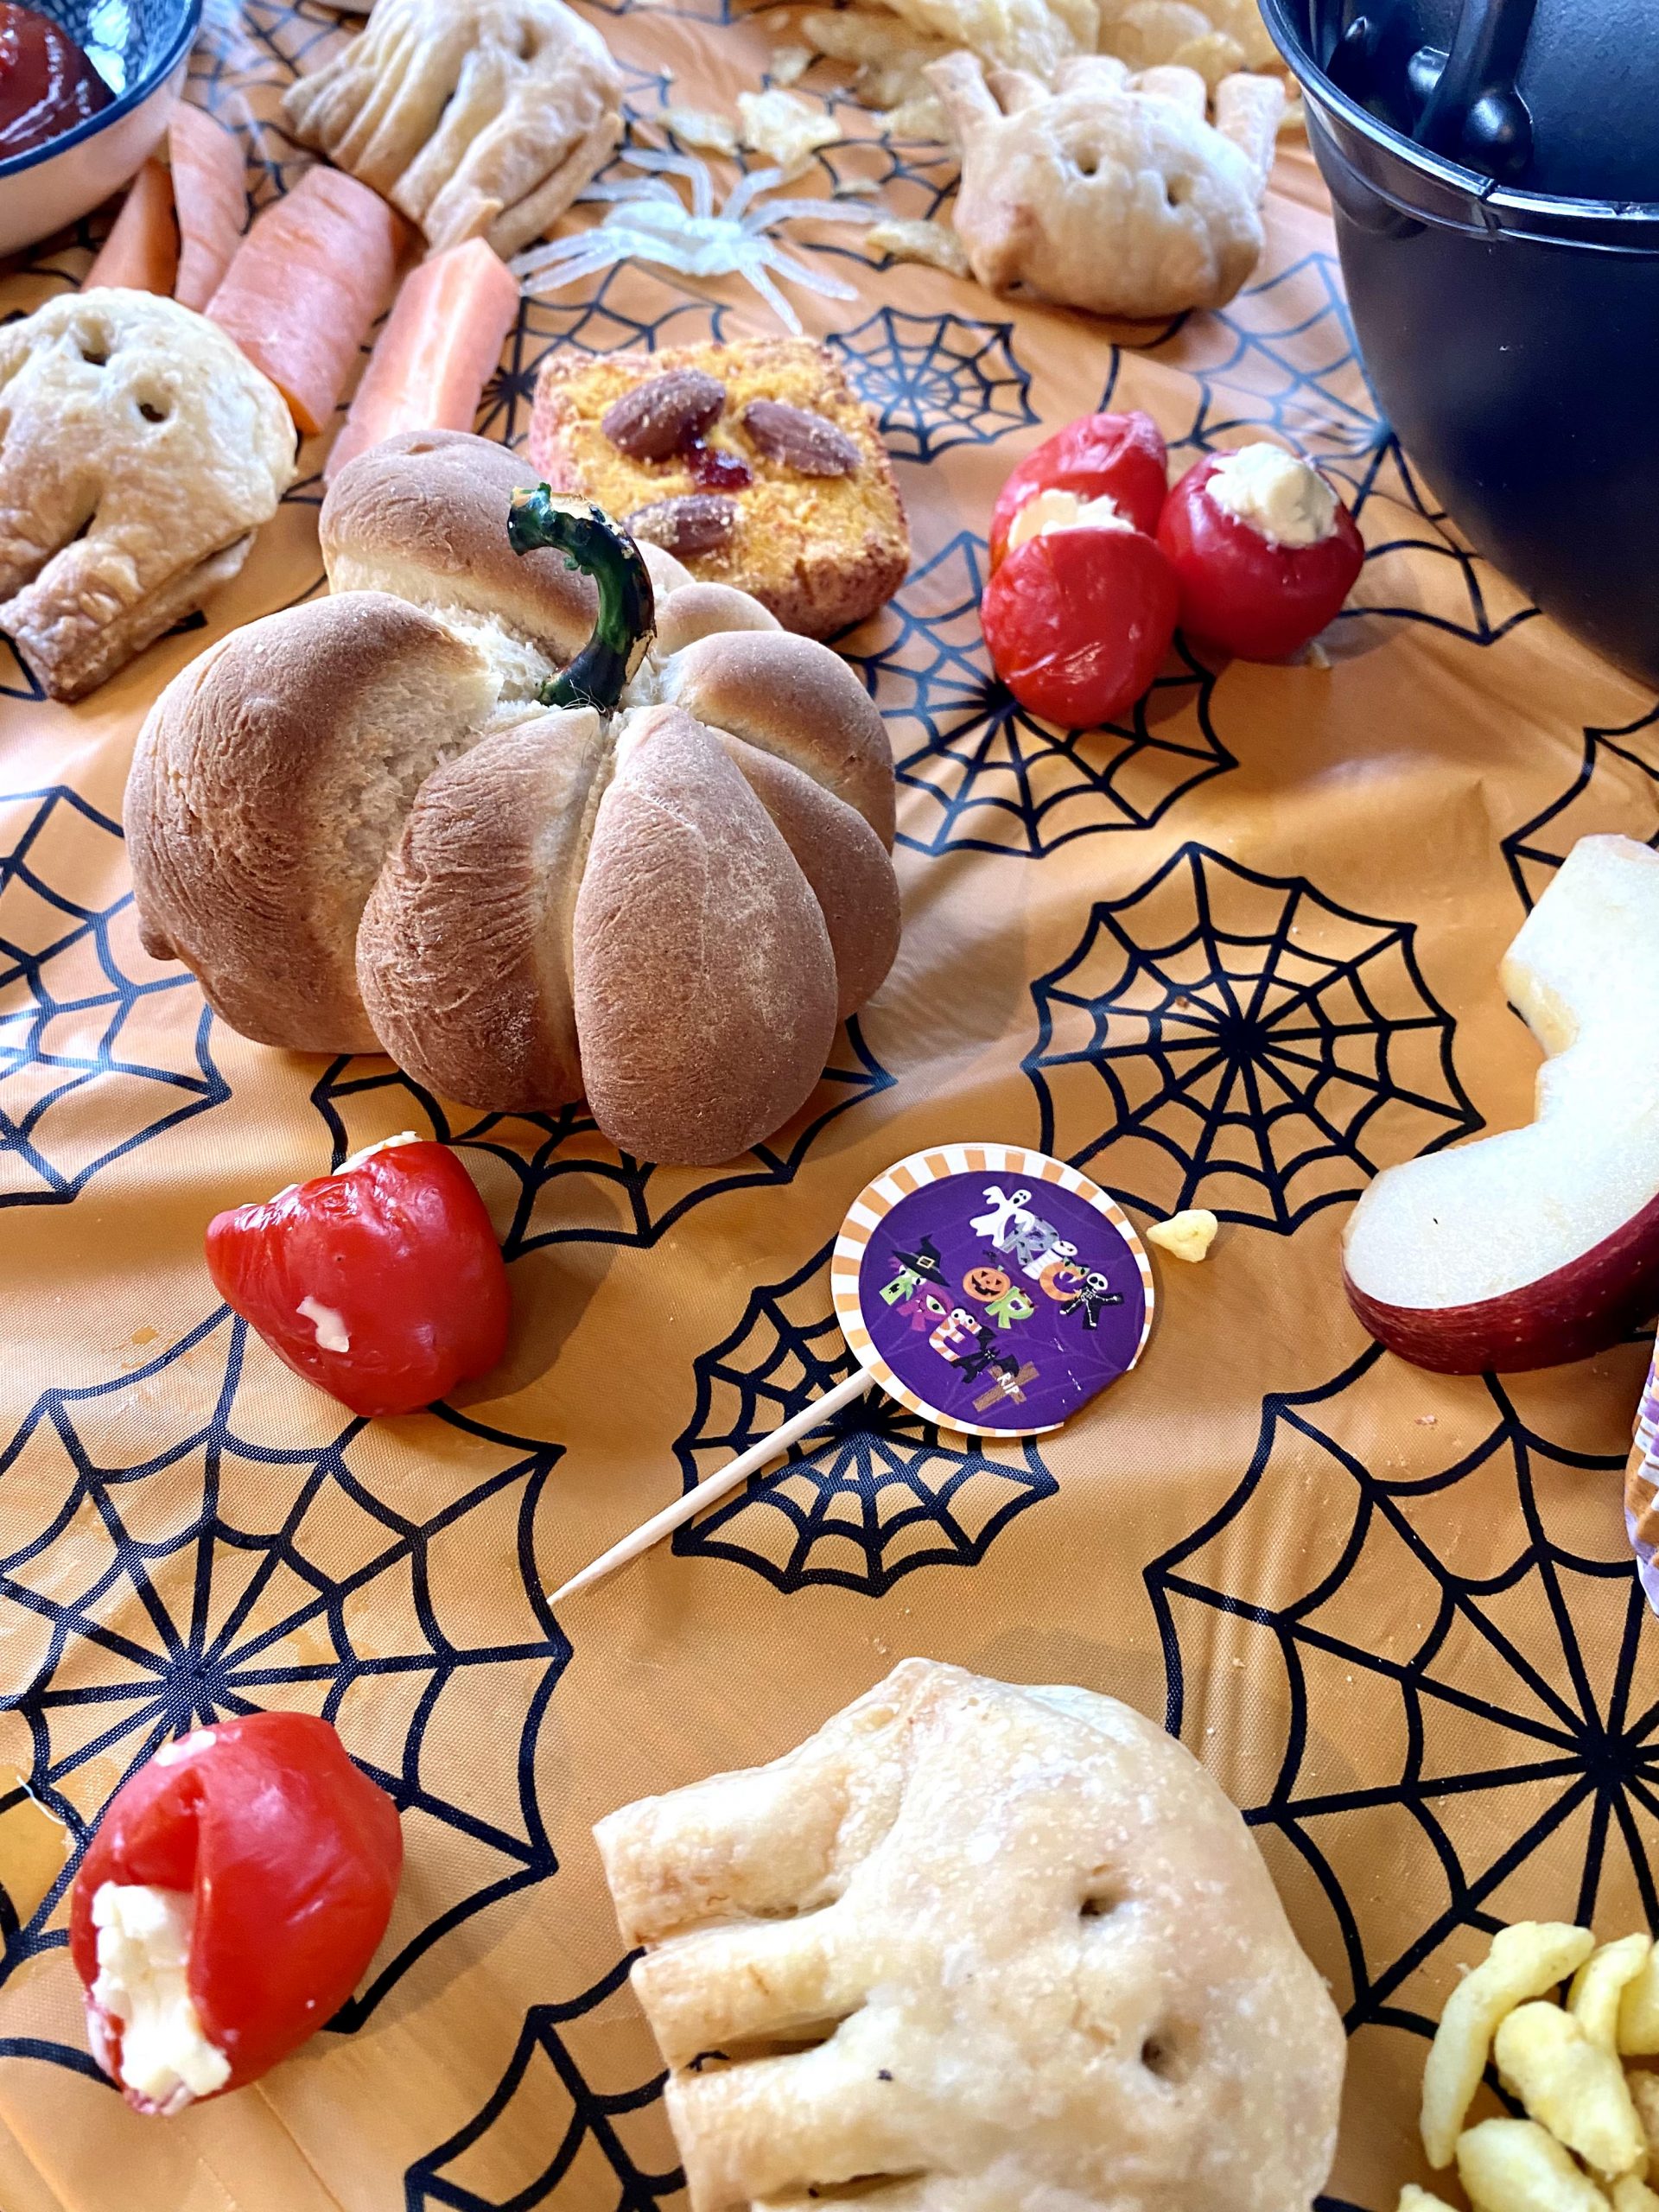
For some Halloween inspired food, we made adorable pumpkin shaped bread (they were way easier than I thought), ghost pastries, deviled egg eyeballs, carrot fingers, and hot dog fingers!
To make the pumpkin-shaped bread, just make your dough of choice and tie around it with string before baking it. When they’re done baking, remove the string and the dough/bread will be in the shape of a pumpkin. Best part is, every pumpkin is naturally different so not all of them need to be “perfect.” Then, add something to represent a stem (we chopped up pretzels and died them green. A celery stick (or little shaved piece of celery/green apple skin/etc) or something already green would be a better option though.
When dinner time came around, we pulled out the hot dog “bloody” fingers!
To make these, simply cut the “fingernail” out of the top of the hot dog and cut slits where the bends in the fingers would be. Then, cook the hot dogs and watch them transform. Sprinkle with ketchup and they’re ready to be devoured.
You’ll also see below in the video that Robbie made four different drinks on tap (three beers and one cider) which were a HUGE hit as well! It’s so fun to bring out the kegerator for parties.
The Decor
I don’t have much to say about the decor to be honest. We did the usual, balloons, spider webs, spiders, Halloween table cloths, rats, tombstones, and more.
We hope you had a lovely Halloween and got some inspiration from our party that you can use in the future too!
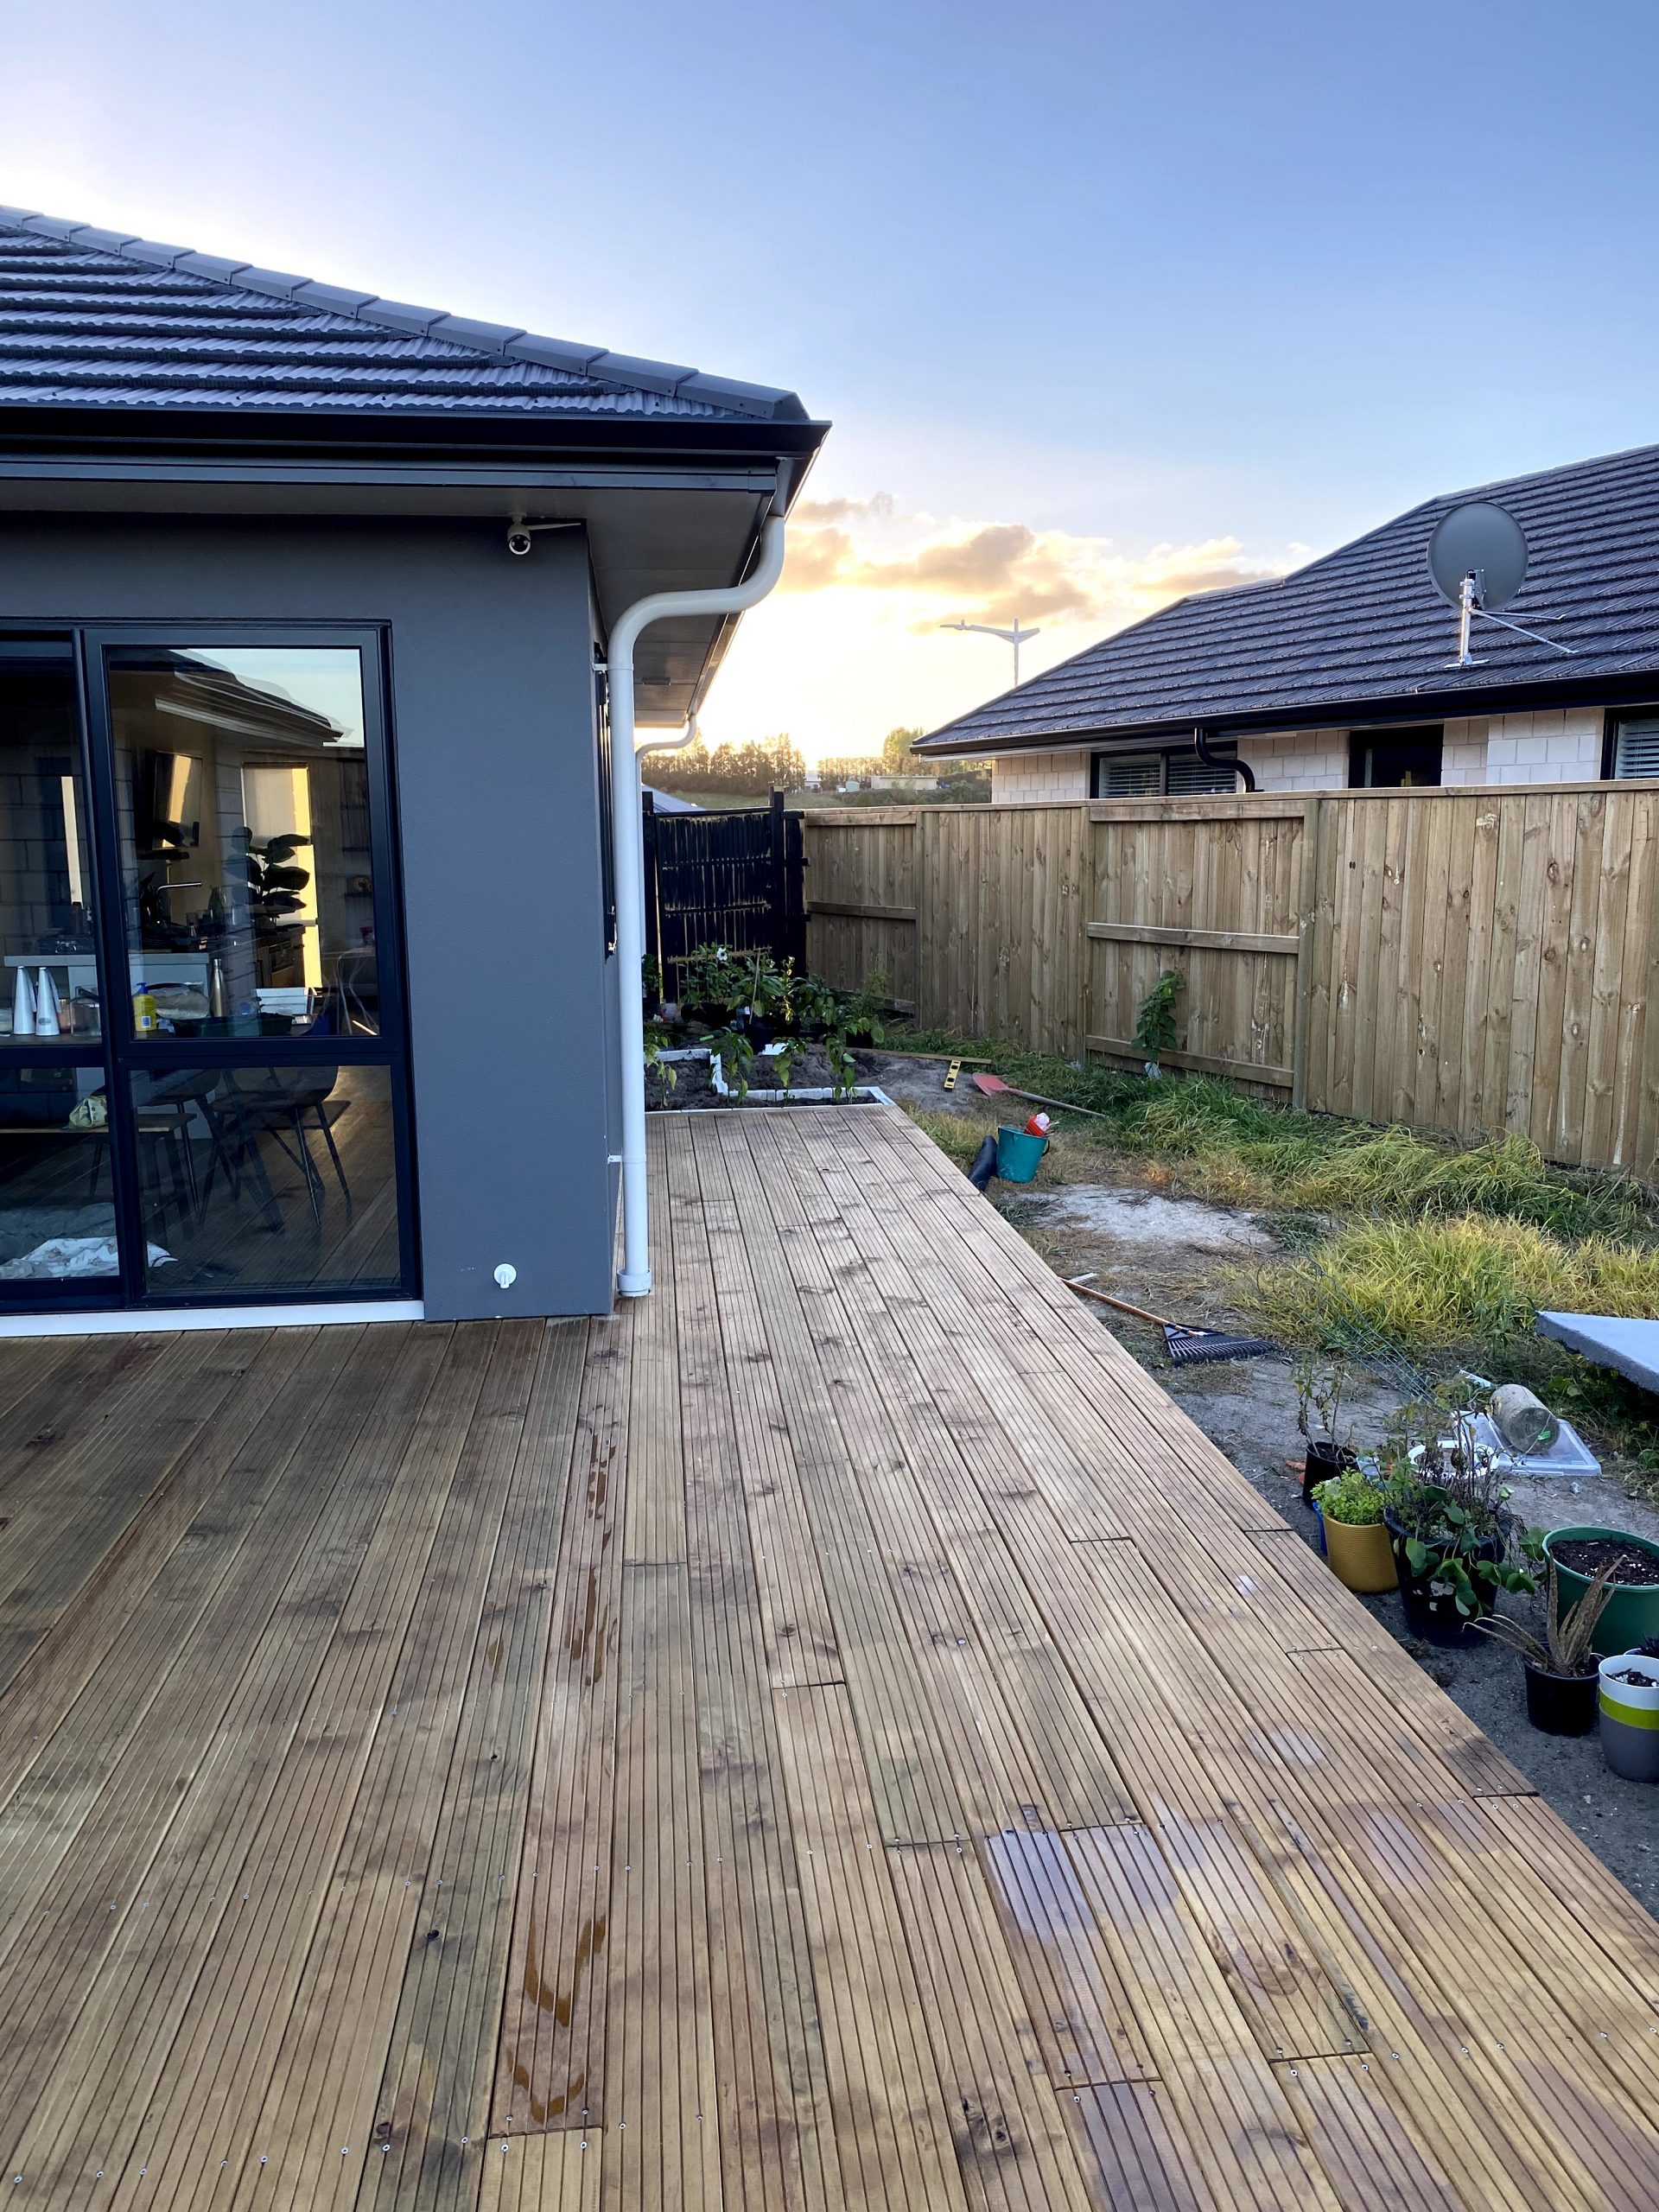
If you have been following along our home building process for the last two years on Instagram (@its.mary.taylor), you probably know that we finally moved it! Although we moved into a brand new home, there were some things we just didn’t have the budget for. This included all of the landscaping and our deck! From building the deck to staining the deck, it’s taken us over a month of everyday work to get it to where we want it to be.
The good news is, the deck is stained! We’re so thrilled that the deck is finally stained to match our flooring inside. We LOVE the color! But much like everything in our building, home buying, and DIY experiences this far, we have learned a lot!
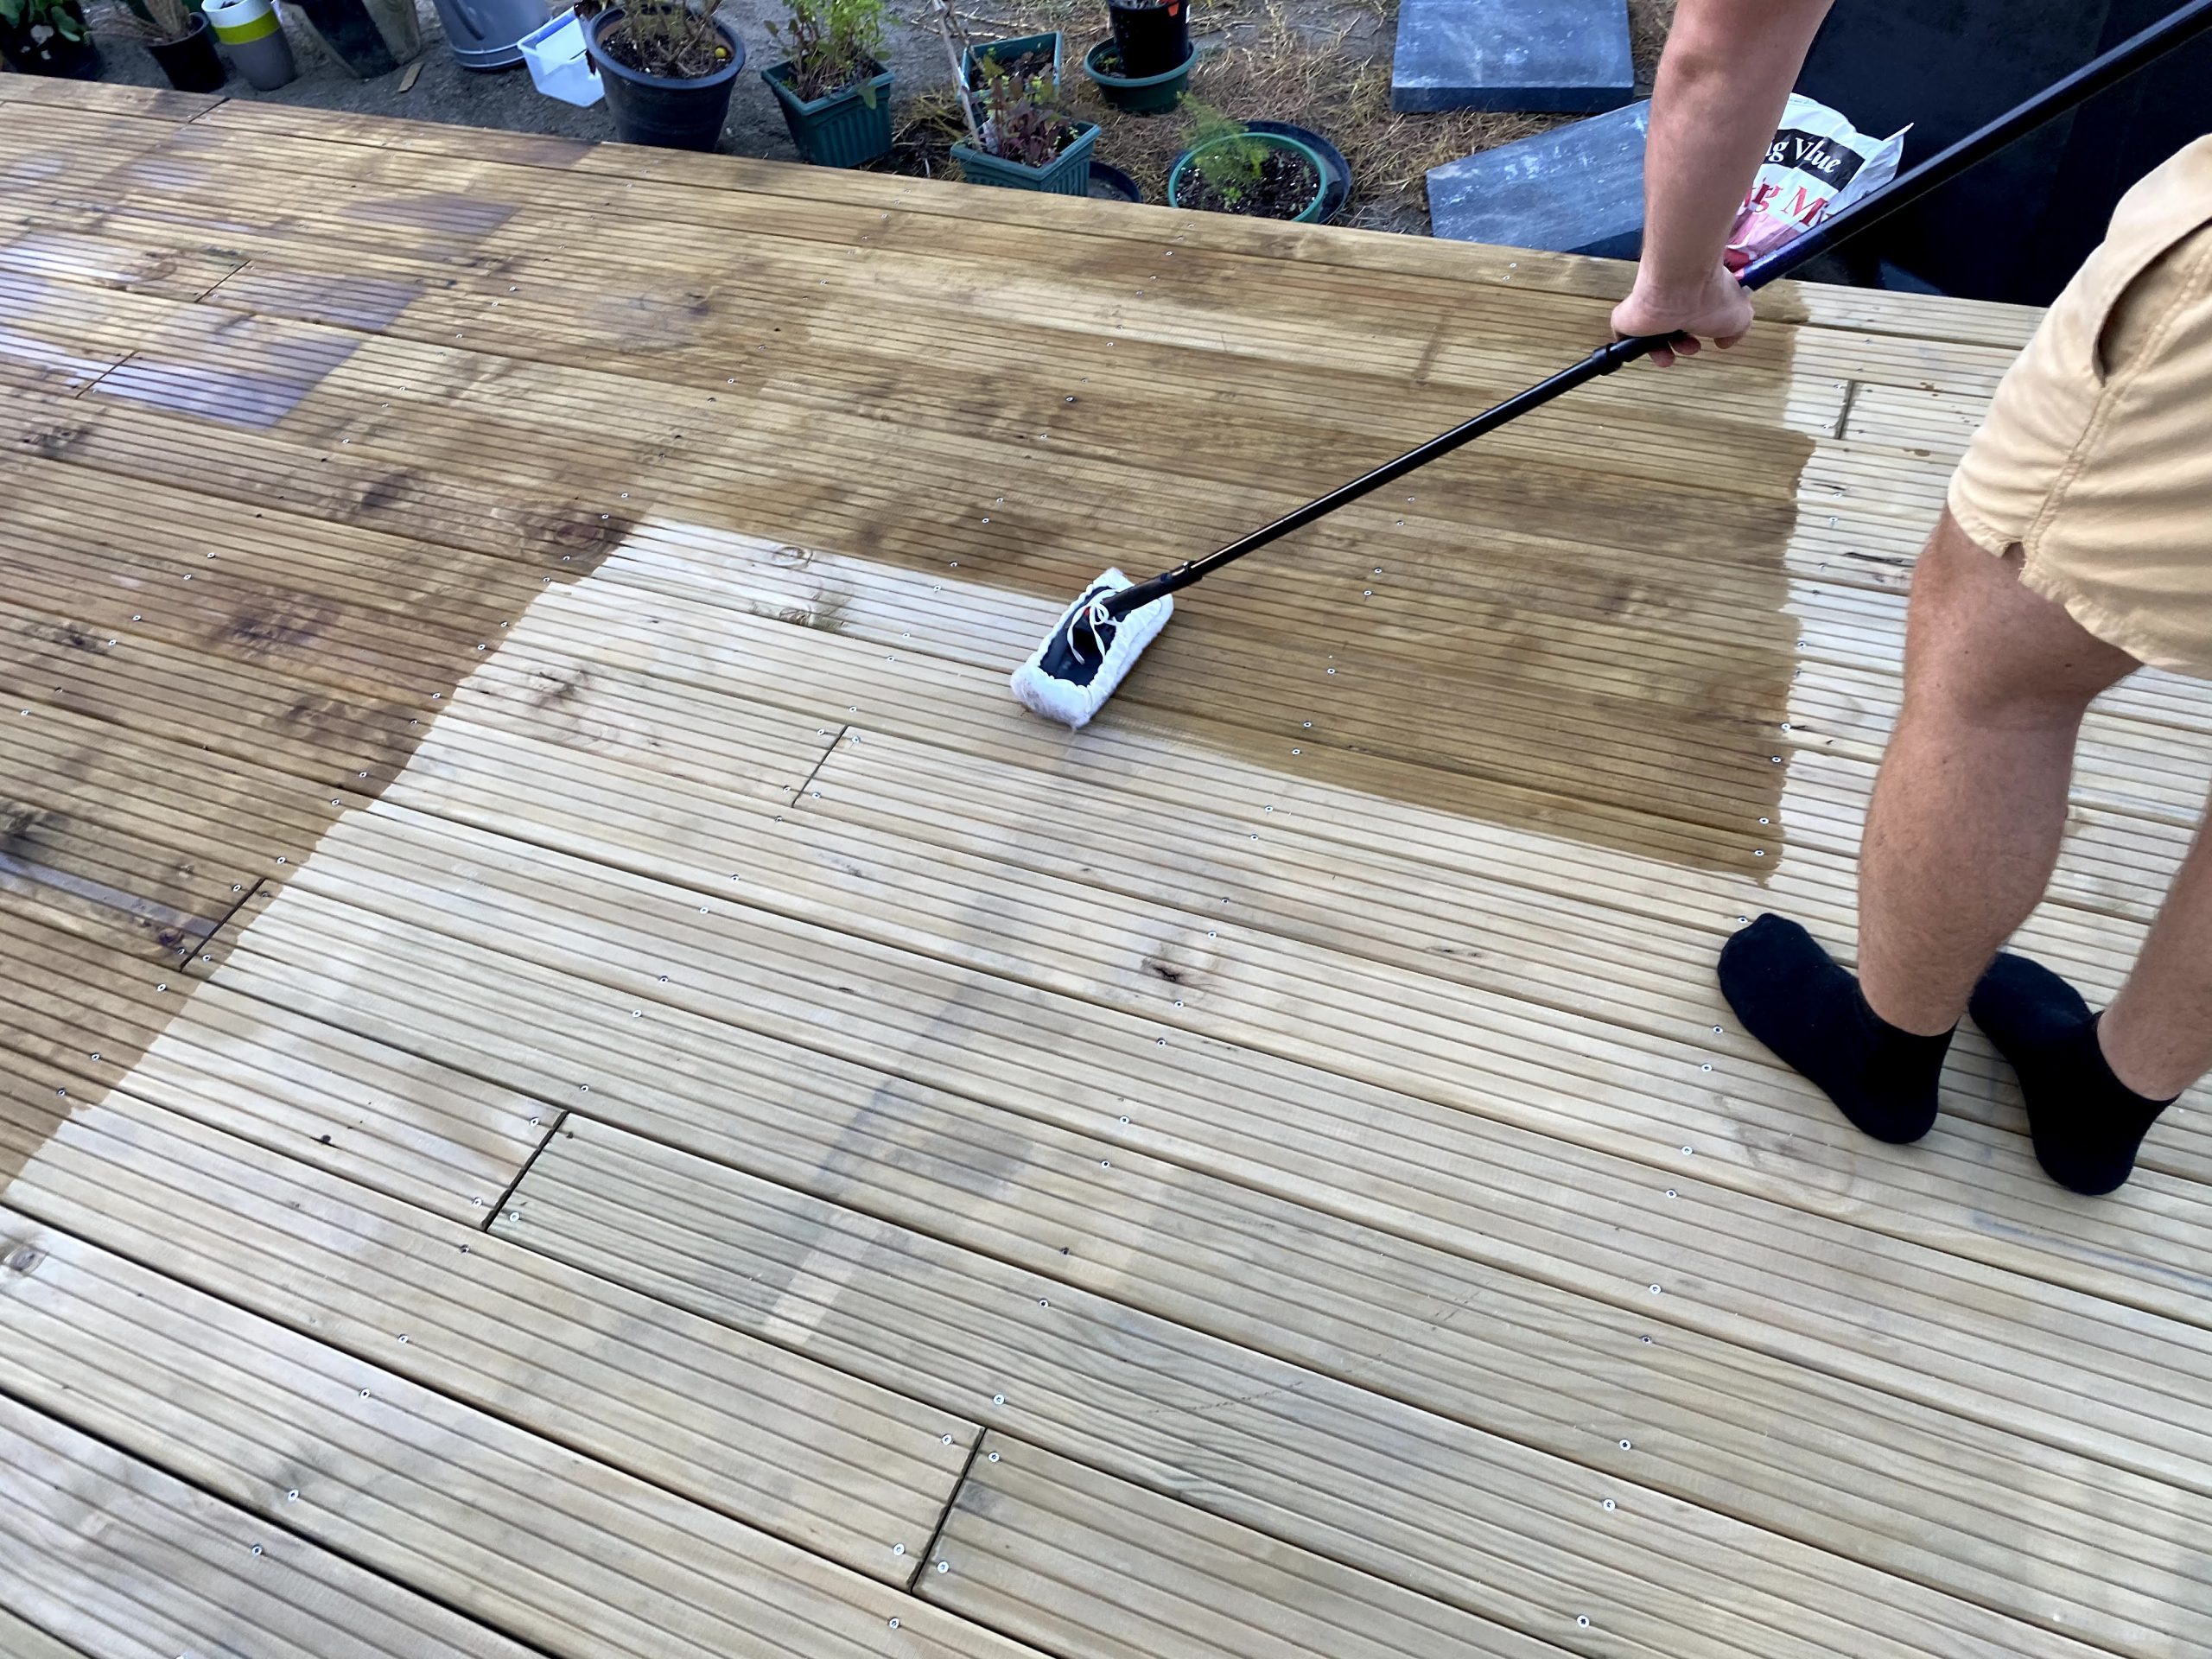
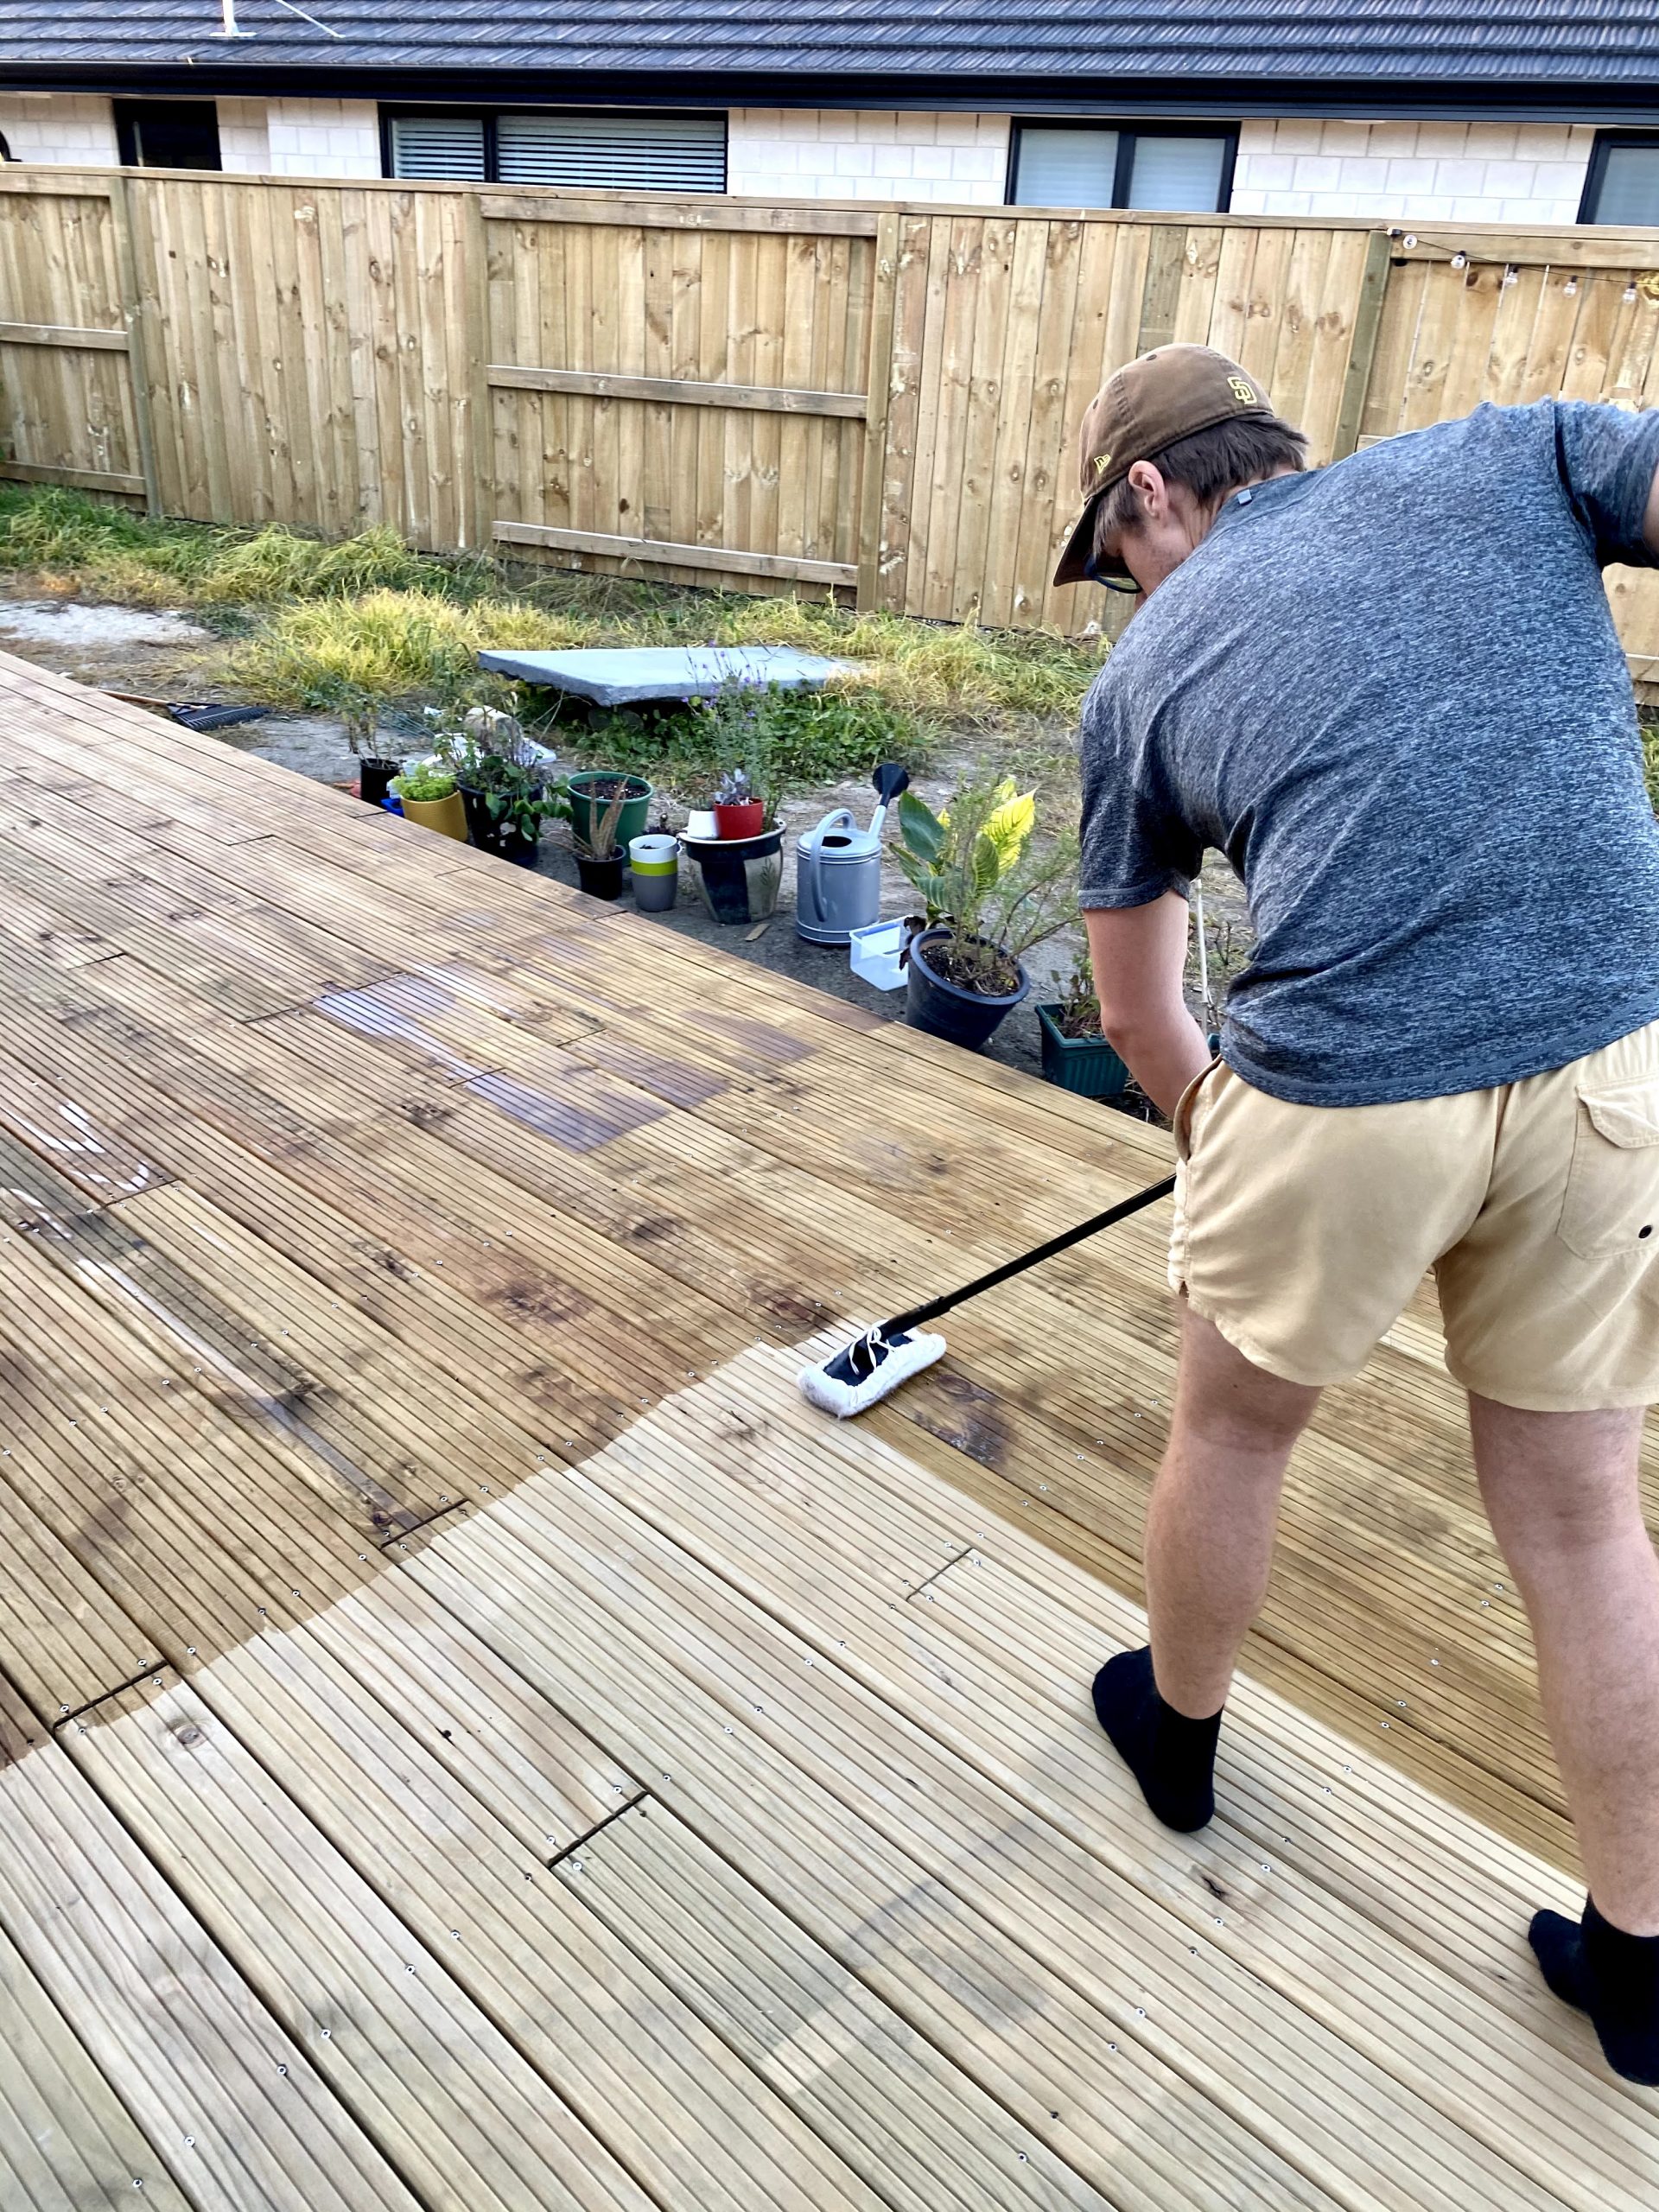
Bad news, it’s not perfect. And, that’s okay. DIY projects are a learning process so if you’re wondering how to stain a deck or how to fix a deck that you stained wrong, we have some tips for you!
If this is your first time staining a deck, check out these tips below to learn from our deck staining mistakes!
Stain entire rows of wood, rather than in sections
Mix the container as much as possible before starting (if the container says not to create bubbles, do not just roll the container on its side – turn it upside down, mix it by hand, anything to get it to fully mix.
Clear the deck 24 hours before you start to let it fully dry out e.g. under pot plants
Sweep the deck before you start to remove any extra debri
When staining wood that’s next to something (against your house for example) use some cardboard or painters tape or something so that no stain gets on the house
If the stain is turps based, have plenty of bottles of extra turps nearby in case there an accident (stain gets on your house, the tin tips over, etc) so if you need to, you can dilute/clean off the stain
If your stain is too dark in some areas (and your stain is turpentine based), you can rub extra turps onto the stained area with a lint-free rag/cloth or your cleaned (not filled with stain) staining brush
You can see two things in the above image:
There’s a water mark where our umbrella was beforehand (we did not remove items the day before staining).
Robbie stained by section not by board. If you scroll above, you’ll see where there are clear sectioned-off marks of stain and we are now having trouble fixing. Don’t be us. Learn from our mistakes!
The water mark has fixed itself by drying out before we applied the second coat of stain. We can try to fix the other mistake by re-staining the parts of the deck that are a bit lighter with a light coat of extra deck stain.
Are you DIYing parts of your home too? I would love to see what you’re doing! Let’s connect on Instagram!
If you enjoyed reading this and would like more information on home, lifestyle, advice, tips, tricks, and more, follow me on Instagram @Its.Mary.Taylor and on Facebook at Mary Taylor! I can’t wait to see you there!
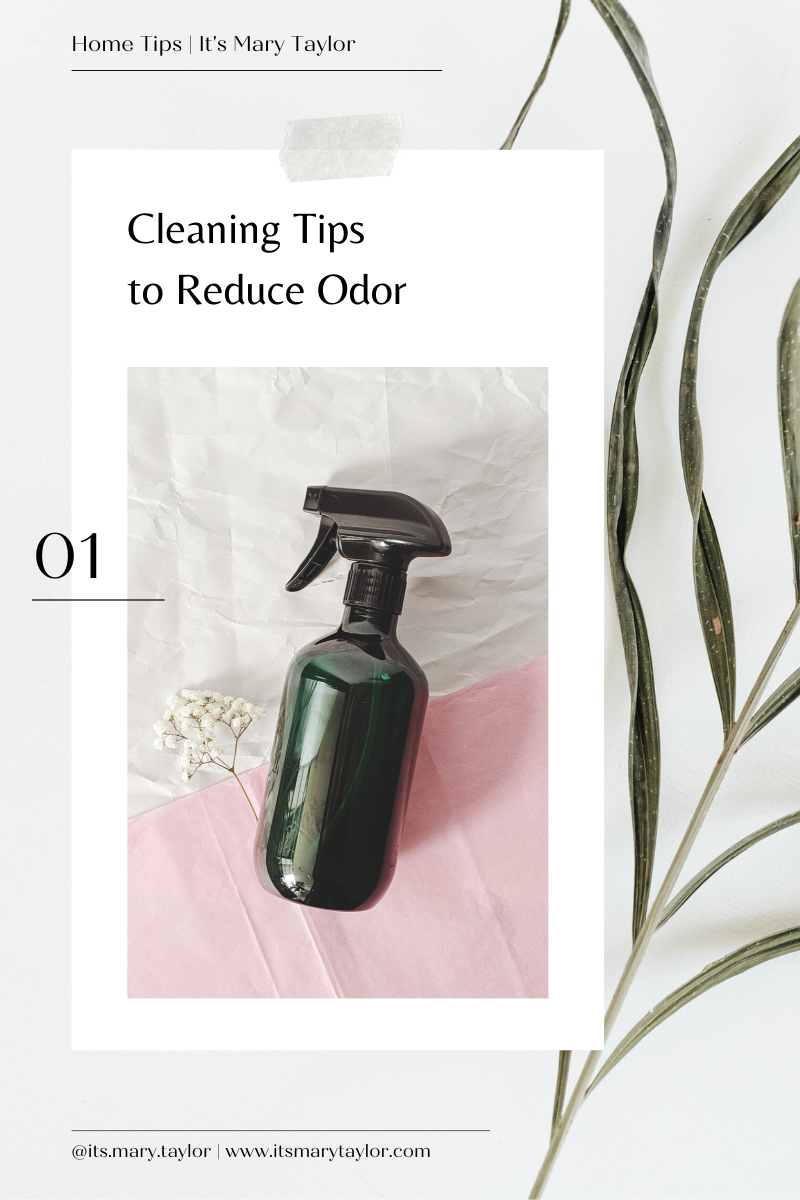
I asked on Instagram stories the other day if you’d like to see some cleaning tips and you voted YES! We (I say we but I mean I) have been doing a lot of cleaning (and organizing) lately in the new house. We’re pretty much organized but the ongoing cleaning (especially from the dust brought in from building the deck and lack of grass) has been overwhelming.
Here's what I did/do!
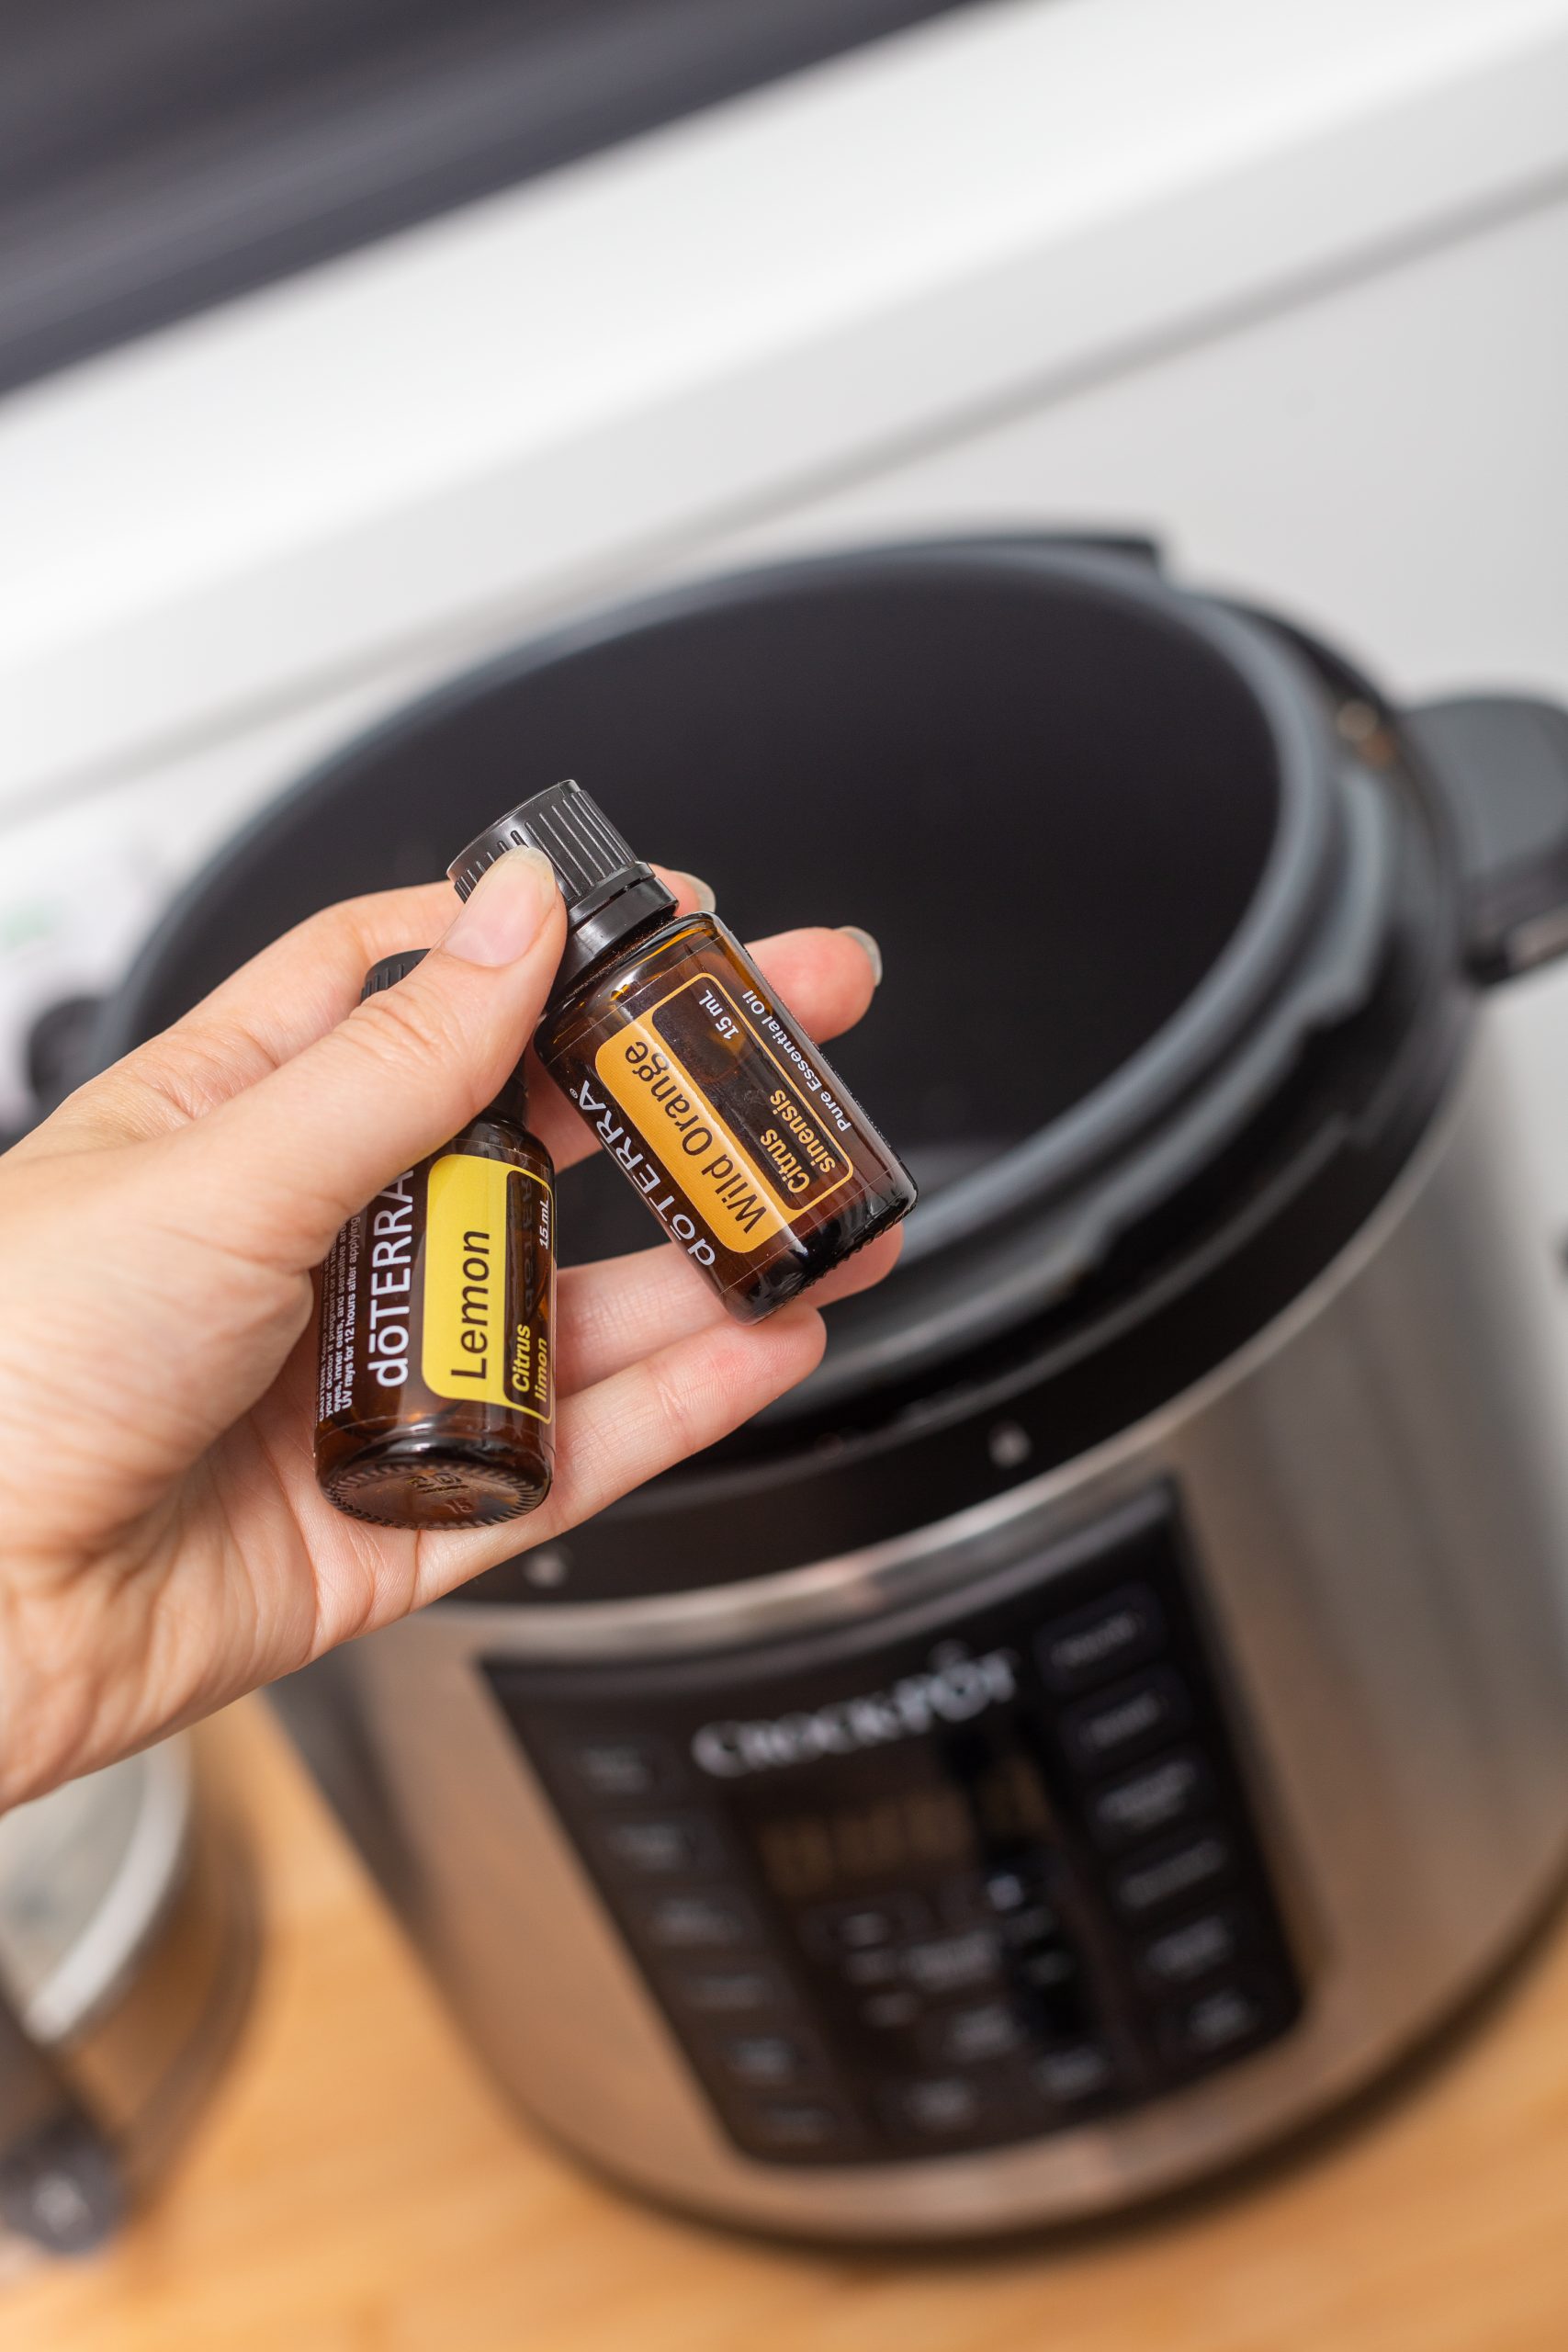
Deep cleaned my Crockpot Express using 1 cup of white vinegar, 1 cup of water, and 8 drops of citrus essential oils (lemon and wild orange – you don’t need to be specific on the amount of drops). If you don’t have essential oils you can use half a lemon and one orange’s rind. Turn it on steam for 5 minutes, let it naturally release for 2 minutes, and quick release until it’s able to be removed. Then, drump out the mixture and rinse. This will remove odors from your pressure cooker!
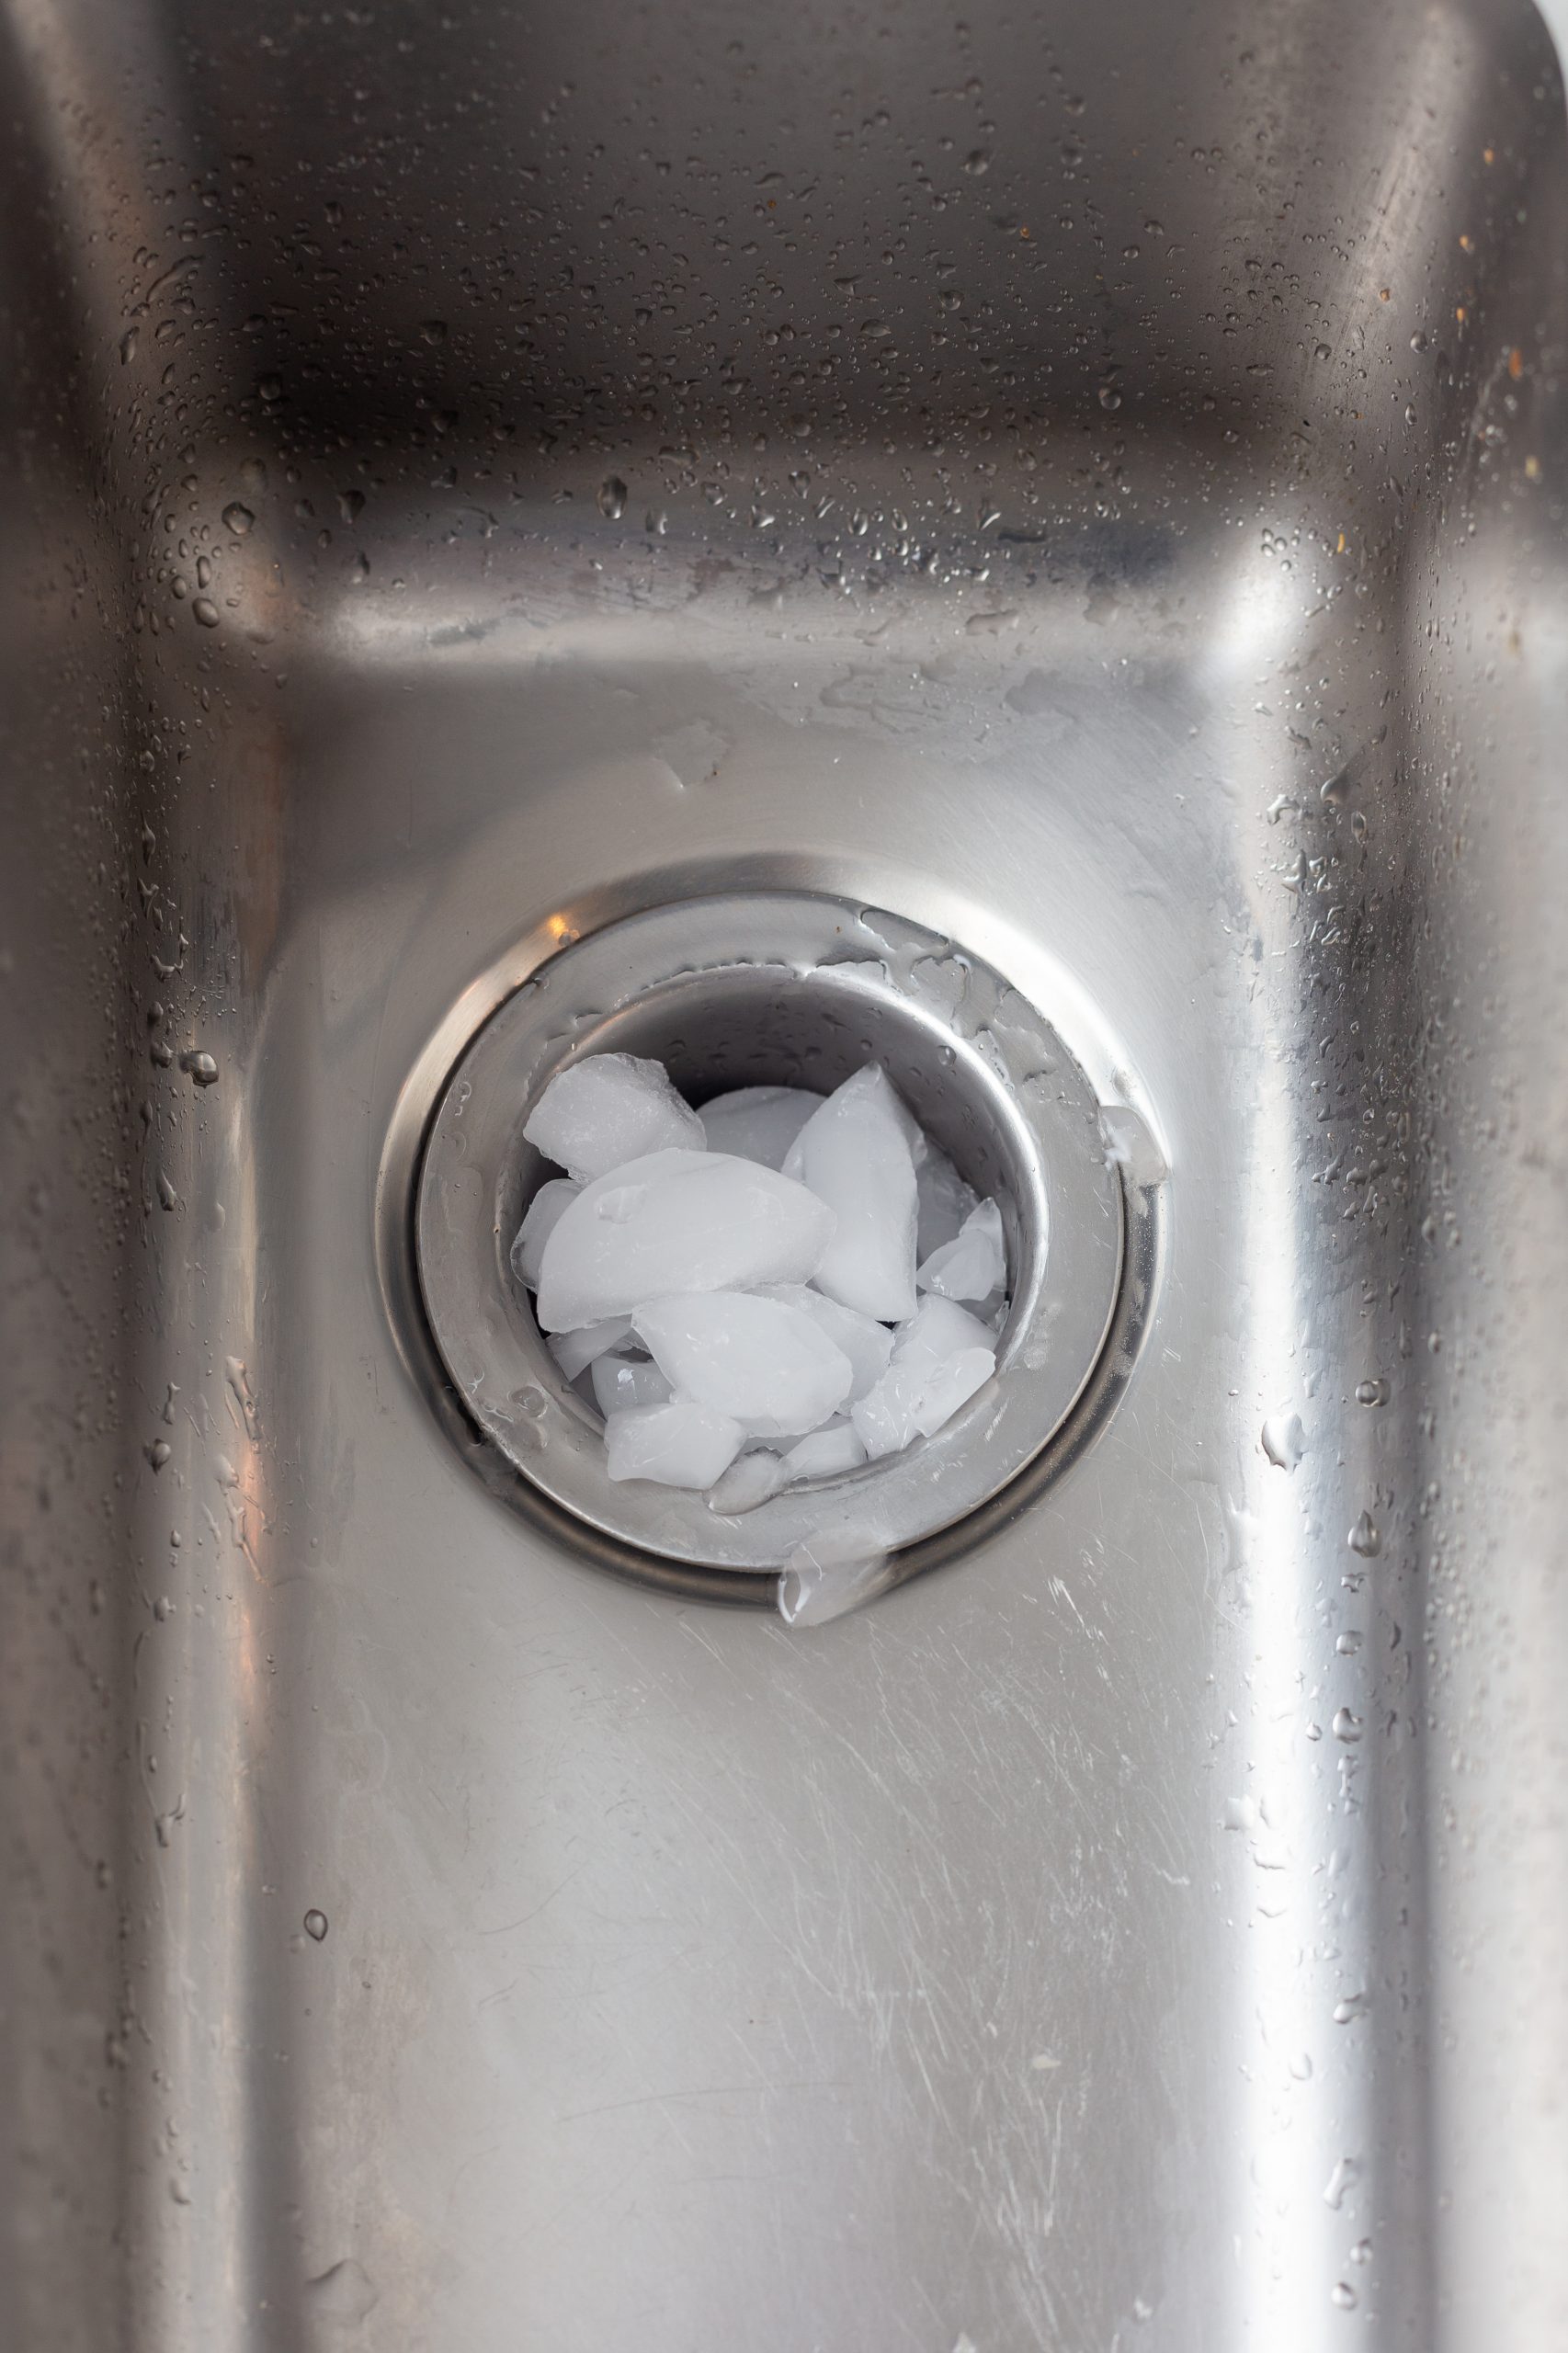
Cleaned our garbage disposal using ice. Fill your garbage disposal with ice, turn it on, and run water through it (some say hot water, some say you don’t even need water – try it both ways). The ice is so cold it actually helps sharpen the blades. You can also toss down some citrus peels or a few drops of citrus/Purify oils to eliminate odor and leave a fresh smell.
Stinky trash can? If your trash is in a drawer/pulls out and you have room below it, fill a small container with baking soda and drop a few drops of essential oils in the container. Cover with mesh, plastic with holes in it, or another breathable material. Baking soda absorbs nasty smells! You can also put a paper towel underneath your trash bag and drop a few drops of oils onto that (lemon, doTERRA Purify, Young Living Purification, Tea Tree, Eucalyptus, etc are great options)
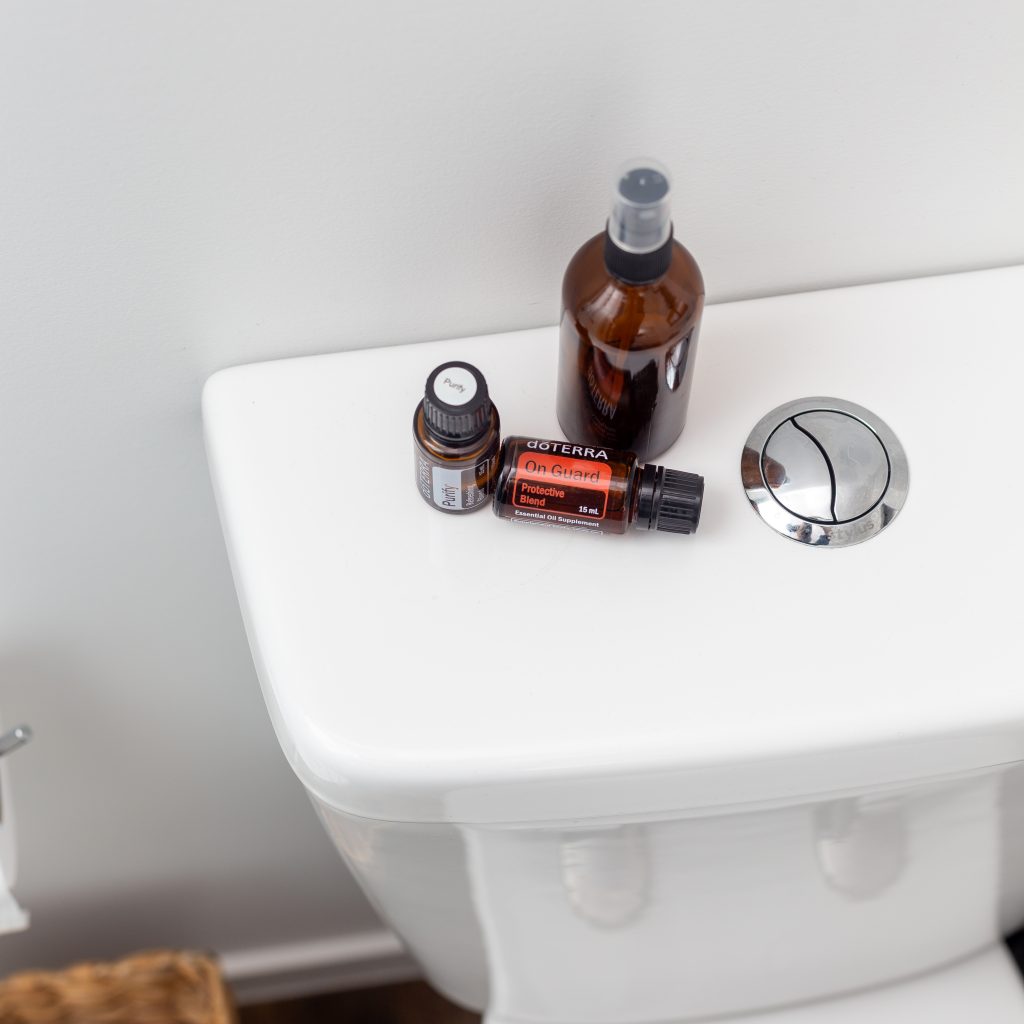
My favorite DIY odor reducing spray! This is an all around perfect spray for every day use – musty clothes, smelly bathrooms, stinky trash, room freshener, and so much more. You’ll need doTERRA Purify, doTERRA On Guard, water, and alcohol (optional – great for a hand sanitizer option or to kill more germs). Put them all in a spray bottle and shake before use. Easy as that. You can put as many drops as you want to get the desired smell you would like. This DIY deodorizer is life changing (okay, my opinion but seriously, you have to try it – I use it all the time).
Do you like this kind of post and want to see more recipes, hacks, and tips on IG instead of just on my blog? What kinds of things should I focus on next? Let me know on this post on Instagram.
If you enjoyed reading this and would like more information on home, lifestyle, advice, tips, tricks, and more, follow me on Instagram @Its.Mary.Taylor and on Facebook at Mary Taylor! I can’t wait to see you there!
I’m so excited to dive into our visions for our laundry room! If you’re looking for laundry room inspiration or garage conversions for your laundry area, this is the right place. If you’re new here, welcome! My husband, Robbie, and I are building our very first home together. You can read about our experience so far and see more of our home inspiration here. To see where you can buy similar (or the same) products that are featured in all of my home inspiration posts as well as all credits on images, head to my inspiration shop here. View and purchase ALL of my Amazon home decor inspiration and ideas here!
Some of the links included in this blog are commissioned links. This means I may earn a small commission when you use them. I cannot see who purchases what and it doesn’t cost you anything to click on them.
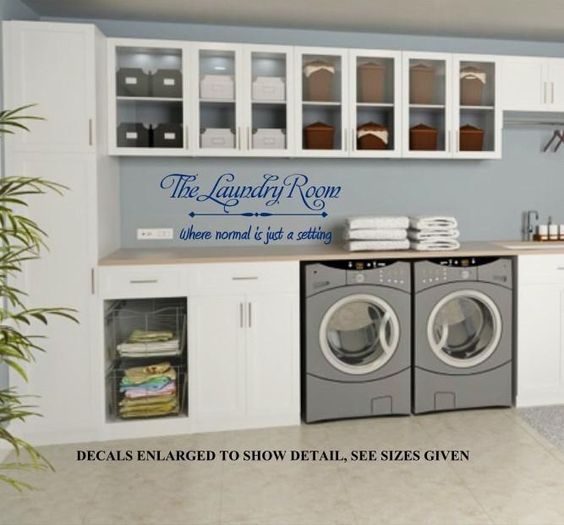
Now, our laundry room is actually just part of our garage but I want to focus on the things we want to do to make a laundry area within it. I even have some tips and tricks to creating a modern and stylish laundry room space in your garage! First of all, take a look at our inspiration board below:
View credits for the images by clicking on this image
Here are some of my ideas on how to make your garage into a laundry room:
Multi-functional organization – what I mean by this is to create an area that can serve multiple purposes such as having a countertop on top of your washer and dryer so that when you have extra space for folding, washing, etc.
Click this image to shop my inspiration board
2. Positioning – place your washer and dryer in a place that will not only be functional when it’s used but also when it’s not in use. Will you stack your washer and dryer or have them placed side-by-side? Do you want them tucked away or out in the open? Think how and where your doors open up and close. You want to make sure that you don’t place your washer/dryer where you’ll need to move, close, or open something else in order to use it.
3. Design & style – if you choose to keep some of your washing products on display, make them pretty! Here’s a list of beautiful laundry room ideas on Amazon!
4. Display when not in use – It’s important to think about what else you’ll be using your garage for. If you’re storing a car in your garage, you probably don’t need to worry too much (or at all) about hiding your washer and dryer when it’s not in use. But, if you’re using your garage as a hang out room (or a brewery/movie theater like us), you might want to consider covering them up. This should play into the design and style! Check out the ideas below that I have found for covering up a washer and dryer that are actually cute!
If you enjoyed reading this and would like more information on home, lifestyle, advice, tips, tricks, and more, follow me on Instagram @Its.Mary.Taylor and on Facebook at Mary Taylor! I can’t wait to see you there!
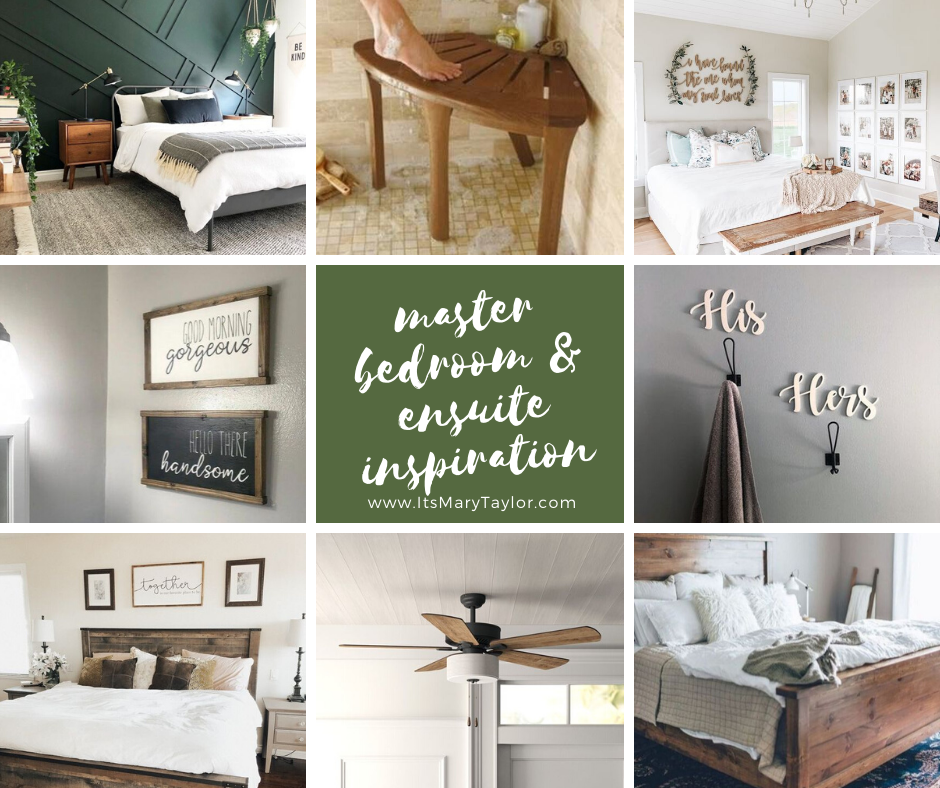
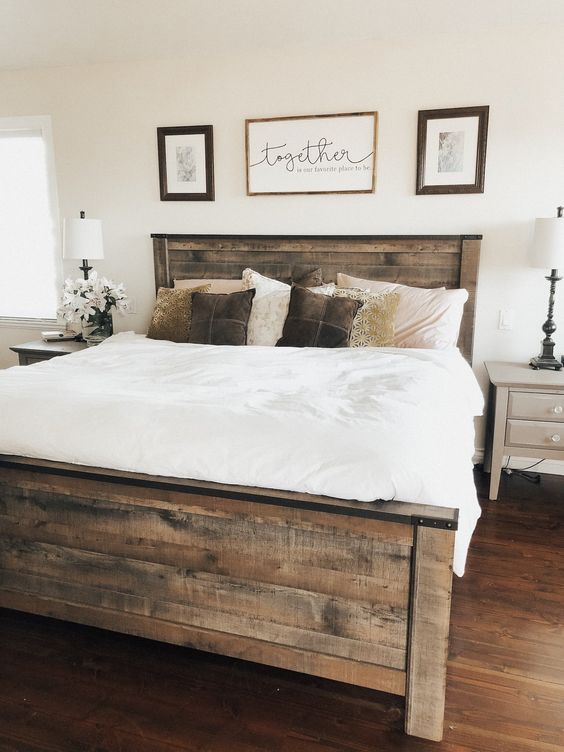
I am so excited to share our master bedroom inspiration for our new house! If you’re new here, welcome! My husband, Robbie, and I are building our very first home together. You can read about our experience so far and see more of our home inspiration here. To see where you can buy similar (or the same) products that are featured in all of my home inspiration posts as well as all credits on images, head to my inspiration shop here. View and purchase ALL of my Amazon home decor inspiration and ideas here!
When you think of your master bedroom what kind of feeling does it give you? To me, I want to think of our master bedroom as a clean, organized, and clutter free space to relax. We have decided (not just in this home but all of the homes we have lived in together), to not have TV in our bedroom. Check out our inspiration board below.
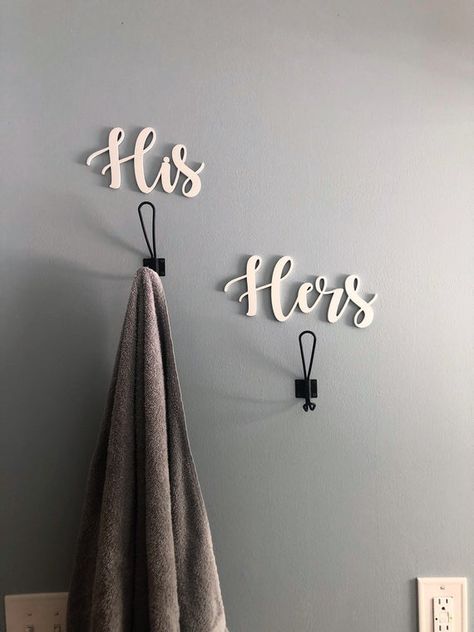
We want to create a relaxing place for us to enjoy in the evenings and sleep in on the weekends. We’re lucky because we get to have an ensuite and walk in closet! I am excited about adding in all of our own little touches like his and her towel hangers and of course a shower stool!
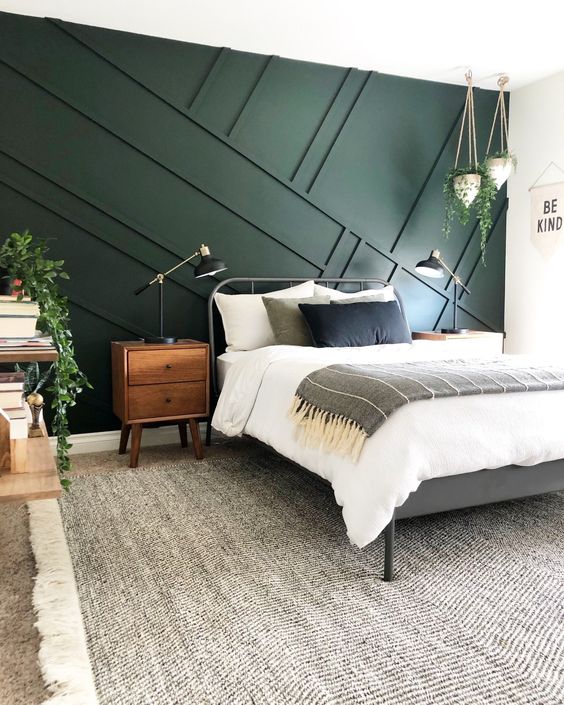
Some ideas we have for our room is painting the back wall a sage/spanish green color and maybe even adding a linear wood element to the wall. Do you think we should keep it white, paint it green, or paint it green and add the wood element pictured below?
We’re keeping our existing bedroom furniture which is large and wood. However, we are unsure if we will have the space to put the matching tall dresser! I have never had a walk in wardrobe so I need organization ideas! What have you done to save you time and space?!
Although the room is quite simple, we’re looking forward to having big, glass sliding doors that lead onto our large deck! Robbie mentioned adding a bench seat to the right hand side of the deck (at the end).
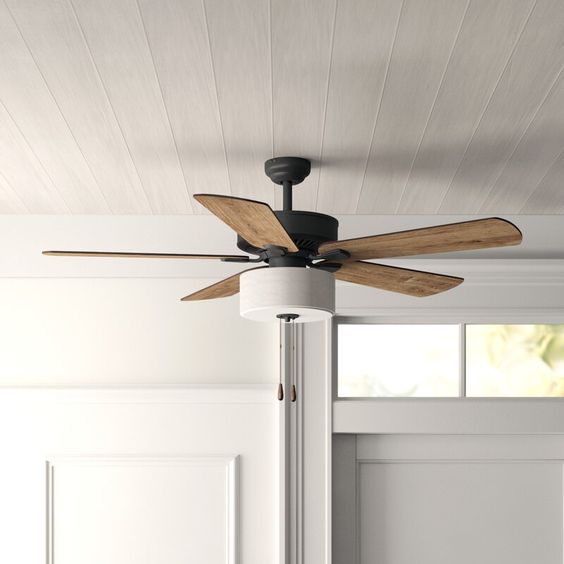
One thing that I miss about our old rental home, is that the master bedroom had a ceiling fan! It’s definitely on our to-buy list. I am thinking of getting a wood and black fan like pictured in our master bedroom inspiration board.
If you enjoyed reading this and would like more information on home, lifestyle, advice, tips, tricks, and more, follow me on Instagram @Its.Mary.Taylor and on Facebook at Mary Taylor! I can’t wait to see you there!
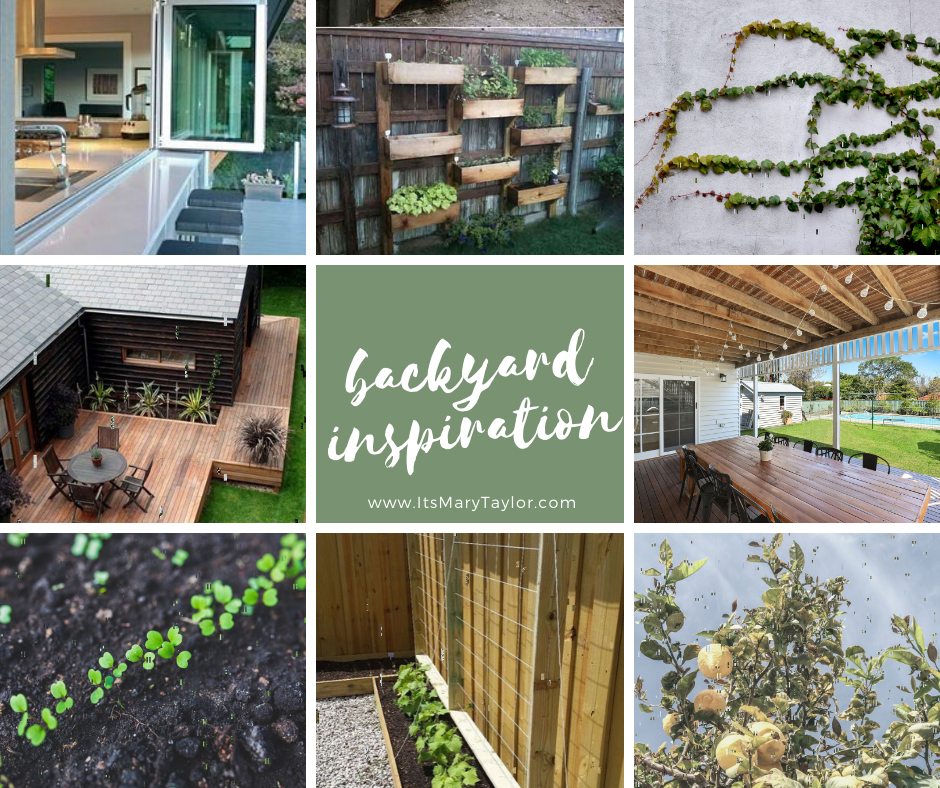
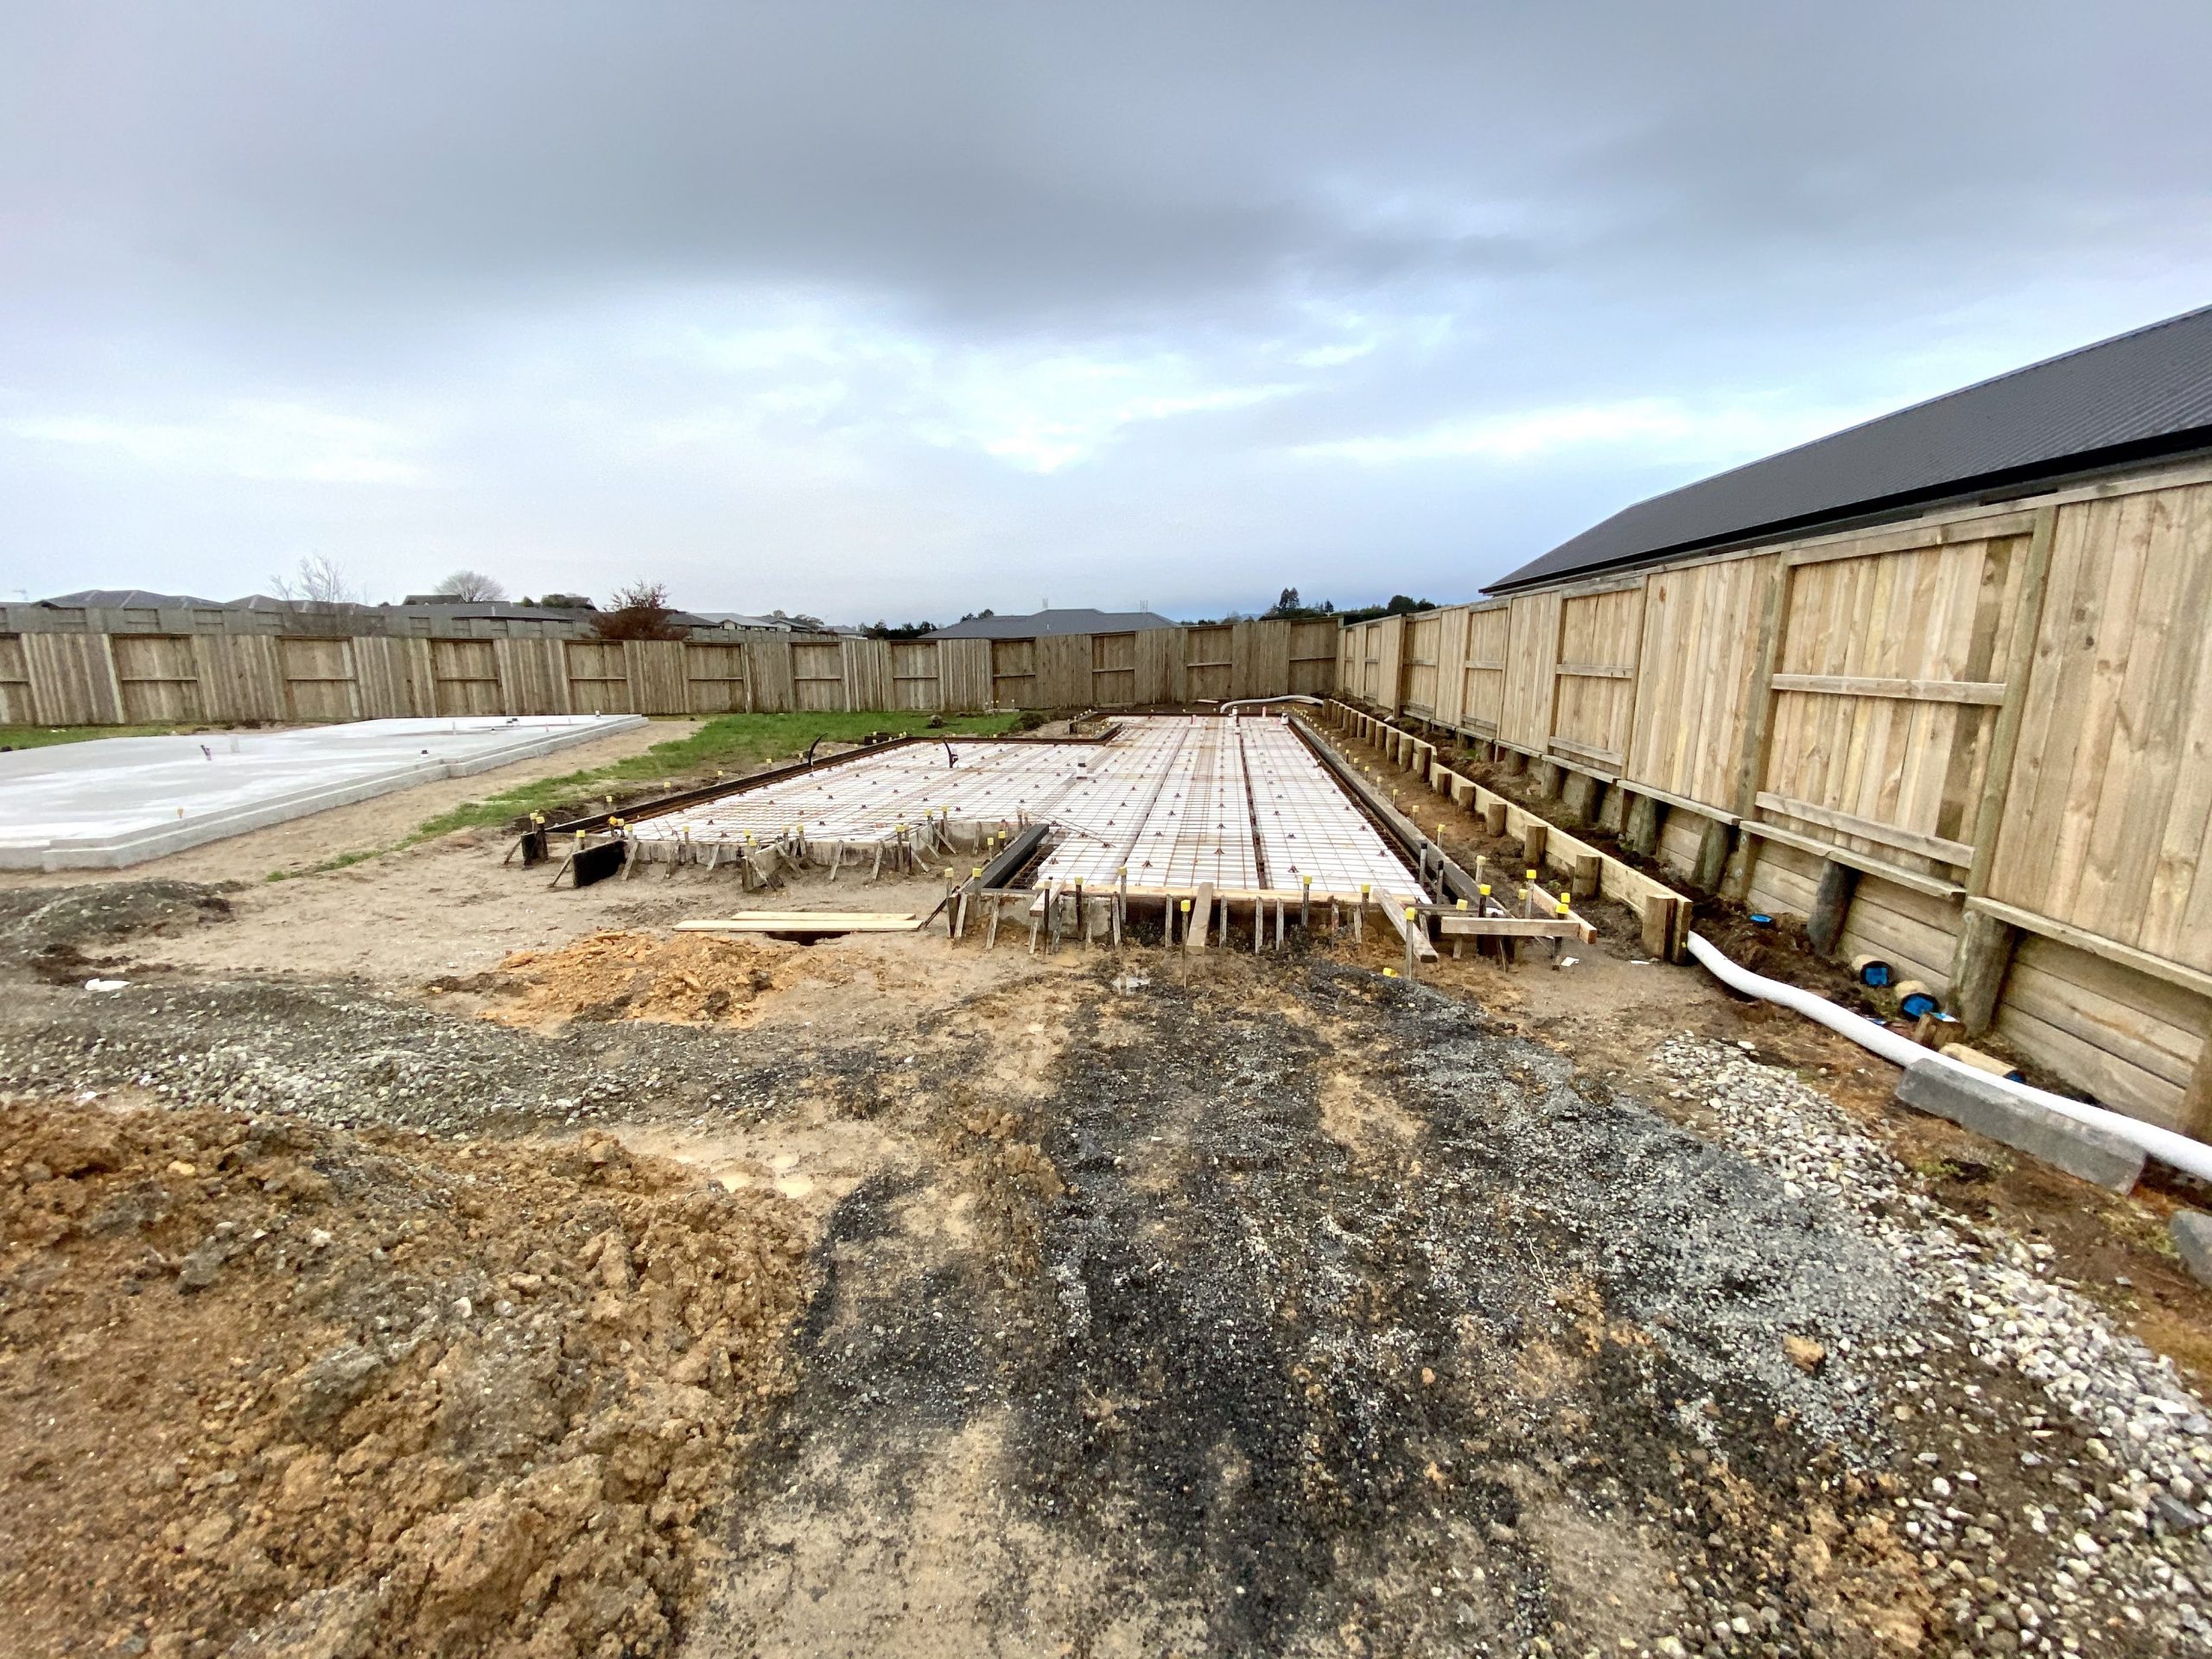
We’re about four and a half weeks into our new home build! If you’re new here: Hi, I’m Mary! My husband Robbie and I are building a new home in New Zealand. For each room in the house, I am posting my inspiration board. Once the home is complete, I will be sharing the inspiration vs. the real thing. I am posting more current updates directly on my Instagram so you can see progress pictures!
See that little patch of grass in the back left corner of the above image? That’s part of our backyard! It’s hard to tell how big it is when I’m so far away. Even the home looks tiny!
One thing that was a must-have for us when we were searching for our home, was a backyard! We wanted something that we could use to host BBQ’s, lounge in the sun, have a garden, and have a dog. We knew that building a home, we would get less land but we still didn’t want to settle on a yard. Luckily, because of the shape of our land, we get the best of both worlds – a three bedroom, two bathroom brand new home with a backyard.
For those that don’t know much (or anything) about purchasing a land and home package: you’re given a home design and a piece of land for one price. But, you’re welcome to make changes as long as it doesn’t affect the outer walls (basically, you can’t make the home larger or reposition the home). You can do things like: upgrade materials, change inner walls, choose your paint colors, change doors and windows, add in heating, raise your roof, eliminate things you don’t want, and more. I won’t spoil all of our changes just yet!
You can take a look at where I got my inspiration and how to create all of my home inspiration looks here! I have even included a few extra items that I love for backyards. You can also check out my full Amazon home decor list here.
One thing that we decided to get rid of was landscaping. Landscaping was a huge cost (I think it was $4k) that we felt wasn’t necessary. With my father-in-laws tools we could spread our own grass seed and with my love for gardening, I could pick out and plant my own plants. In fact, we already have a lemon and lime tree and plenty of other vegetables for a veggie garden. We want to grow as many veggies as possible!
We also got rid of the concrete surrounding the home (on the side of the home and in the backyard which was a concrete deck). Again, this saved us a few thousand dollars. Instead, I wanted stepping stones on the side of the house and we want composite decking for the backyard. Composite decking is wood fiber, plastic, and some type of binding agent. It’s extremely durable and long-lasting. It will give us that wood effect but won’t warp in the rain.
I love coming up with vision boards because it helps me picture everything and how it’ll all come together. You might notice that my vision board has an image of a folding window. That’s one addition that we made to our home to really make it ours. This will be perfect for our wrap around deck. It will create a sense of flow within the dining room towards the BBQ area.
Don’t forget to shop these looks and all of my home decor inspiration blogs here.
If you enjoyed reading this and would like more information on home, lifestyle, advice, tips, tricks, and more, follow me on Instagram @Its.Mary.Taylor and on Facebook at Mary Taylor! I can’t wait to see you there!
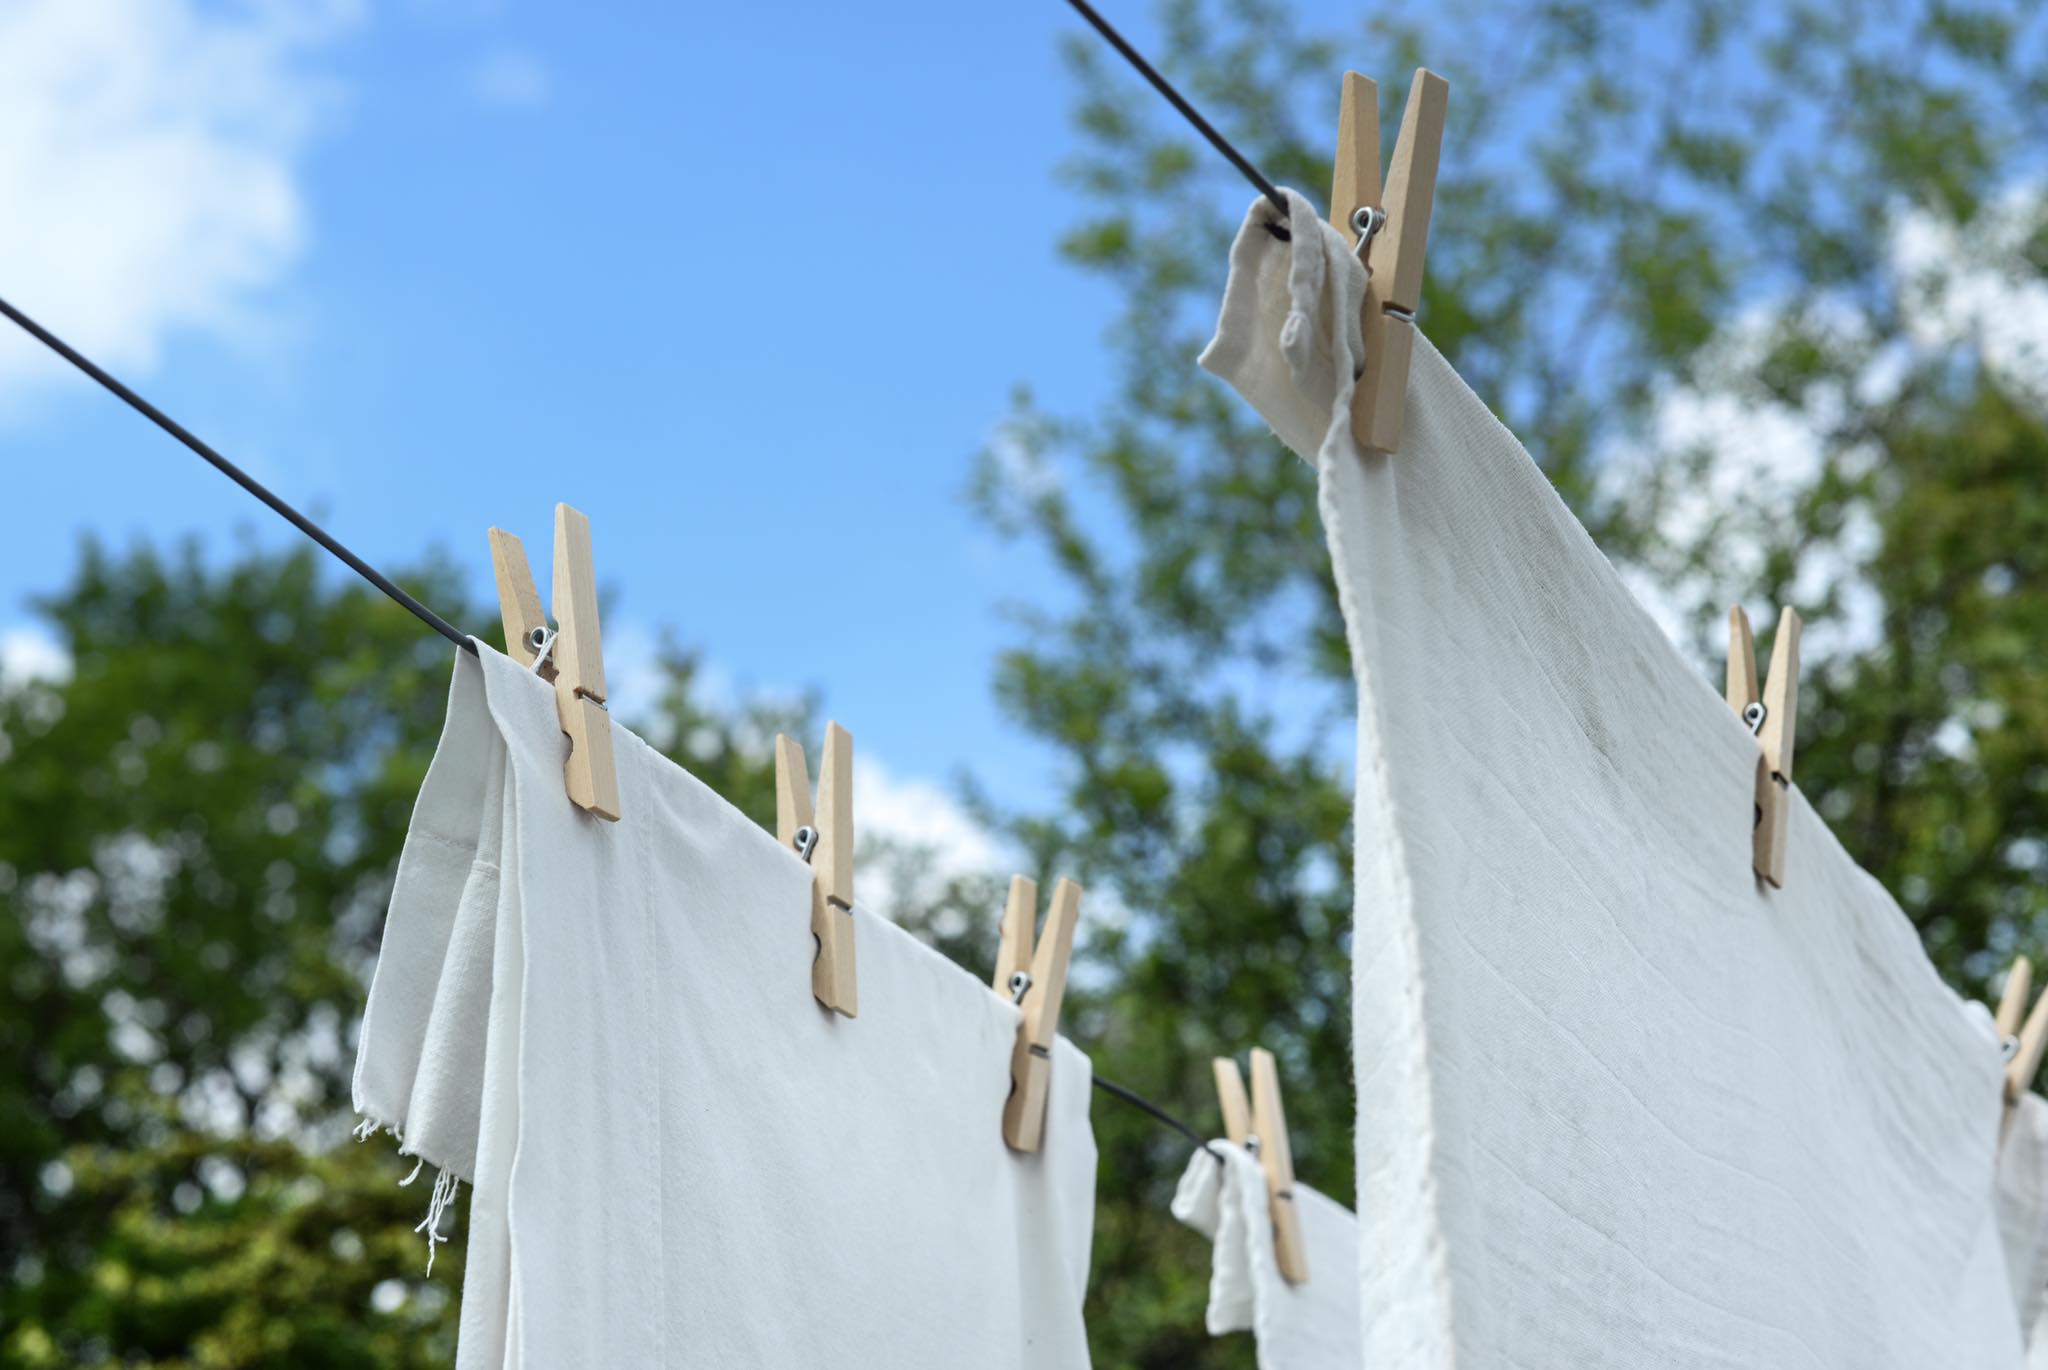
It’s winter here in New Zealand and if you know anything about New Zealand, besides that it’s beautiful, you might know that it gets very wet in the winter! Not to mention that most homes aren’t properly fitted for wet weather (leaky roofs, single glazed windows, and improper insulation).
One issue that we’ve been having lately is that our wash ends up smelling musty or moldy. This can even be due to leaving laundry in the washer for too long and forgetting about it or even forgetting about it in your dryer when it’s not completely dried (I can’t be the only one, right?).
I tried a few different ways of getting out the smell but nothing seemed to be working until….
I made a magic musty smell removing potion! Aka white vinegar, baking soda, laundry detergent and fabric softener (optional). Find a list of my favorite cleaning products and tools here.
To read more about my recipes and why I create them the way I do (without specific measurements, times, and temperatures) check outthis blog post.
Here’s the “recipe” for removing the musty smell out of your clothes:
Essential oils (lavender or lemon are good options)(optional)
Instructions
Add your musty clothes to the washer.
Sprinkle baking on top of laundry in the wash. Add a few drops of oils to your baking soda if you choose.
Turn your washer to warm or hot water and fill accordingly.
Add in your laundry detergent and softener as you normally would.
Once your wash is done, put in the dryer immediately.
EXTRA TIP: Use the highest heat setting possible as it helps to kill the mold spores. We used medium water heat but then dried our clothes as well.
Other things you can try (especially if you don’t have a dryer):
🧺 Leave your laundry hanging up outside even if it’s cold as long as there’s some sun and it’s not wet outside.
🧺 Place laundry in front of your heater/heat pump
🧺 Stop forgetting it in your washer (talking to myself here) – on a serious note, if you have this same “issue” try setting a reminder on your phone that you can easily switch on when you start your wash.
🧺 Place a jar with baking soda and your favorite essential oils in your closet. The baking soda will remove nasty odors and the essential oils make the room/closet smell good!
What do you do when your clothes get musty? If you try any of these tips or tricks or come up with your own, please tag me on Facebook and/or Instagram (@its.mary.taylor) so I can see too! I would love to stay connected.
If you enjoyed reading this and would like more information on home, lifestyle, advice, tips, tricks, and more, follow me on Instagram @Its.Mary.Taylor and on Facebook at Mary Taylor! I can’t wait to see you there! Don’t forget to follow me on Pinterest and save your favorite tips, tricks, and recipes.
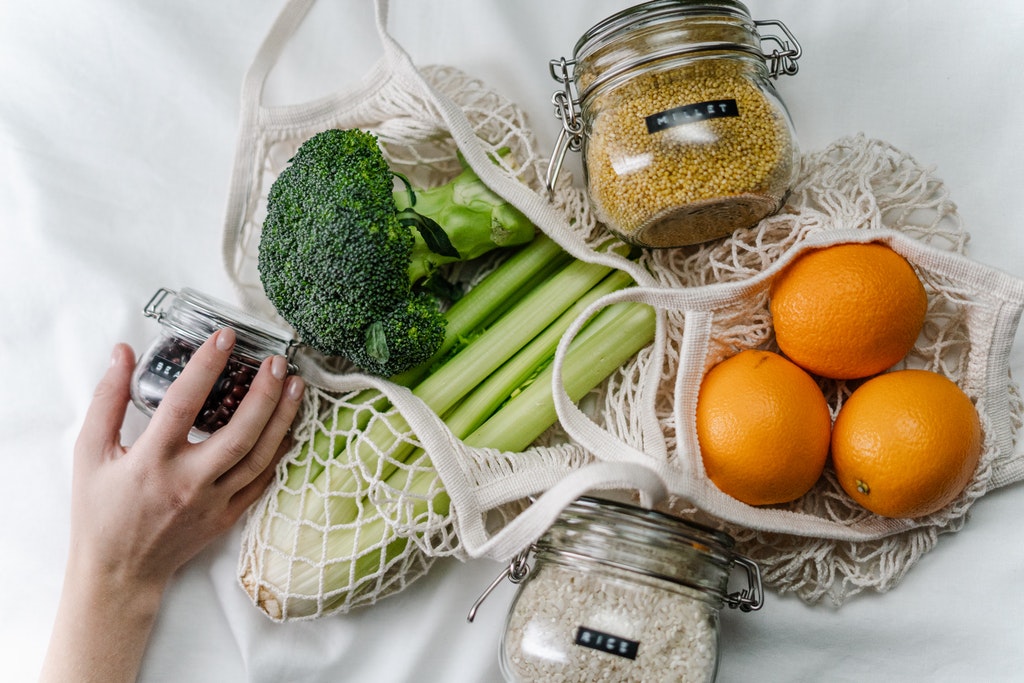
Did you know that having an eco-friendly home can actually be easy? You might think of eco-friendly as more expensive or even more difficult but it doesn’t have to be.
Here are some really easy and inexpensive eco-friendly swaps that you can do at home:
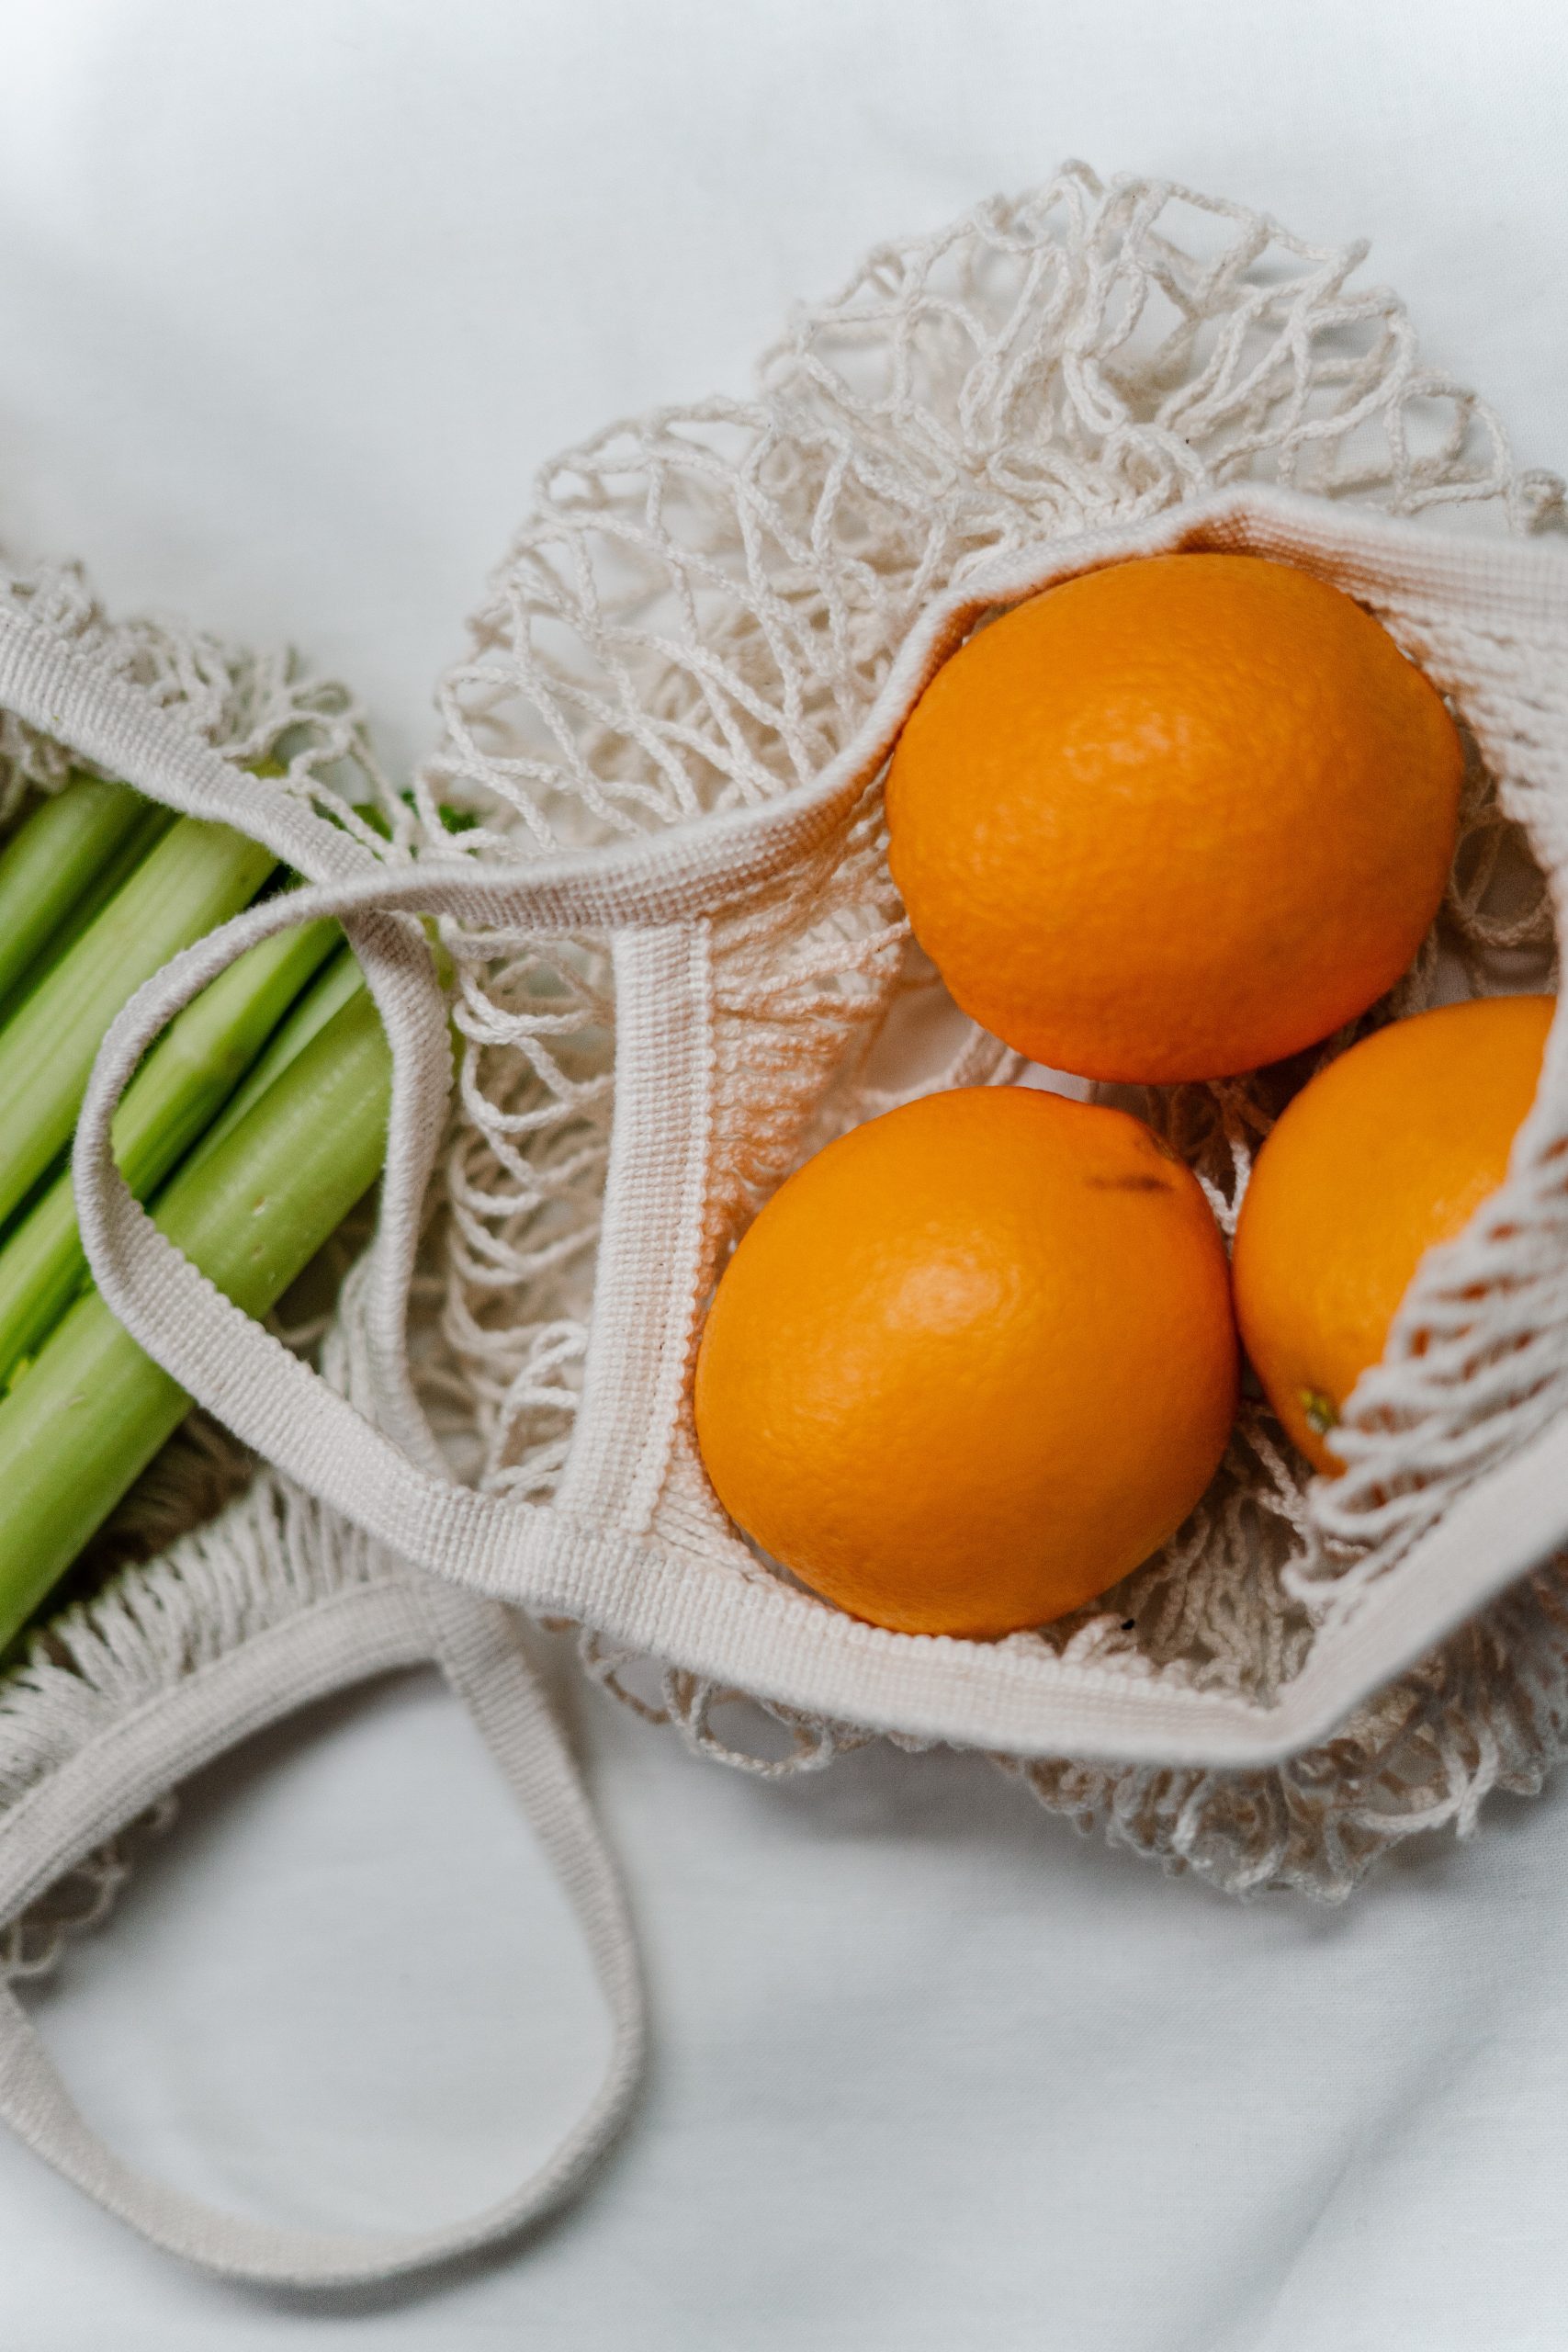
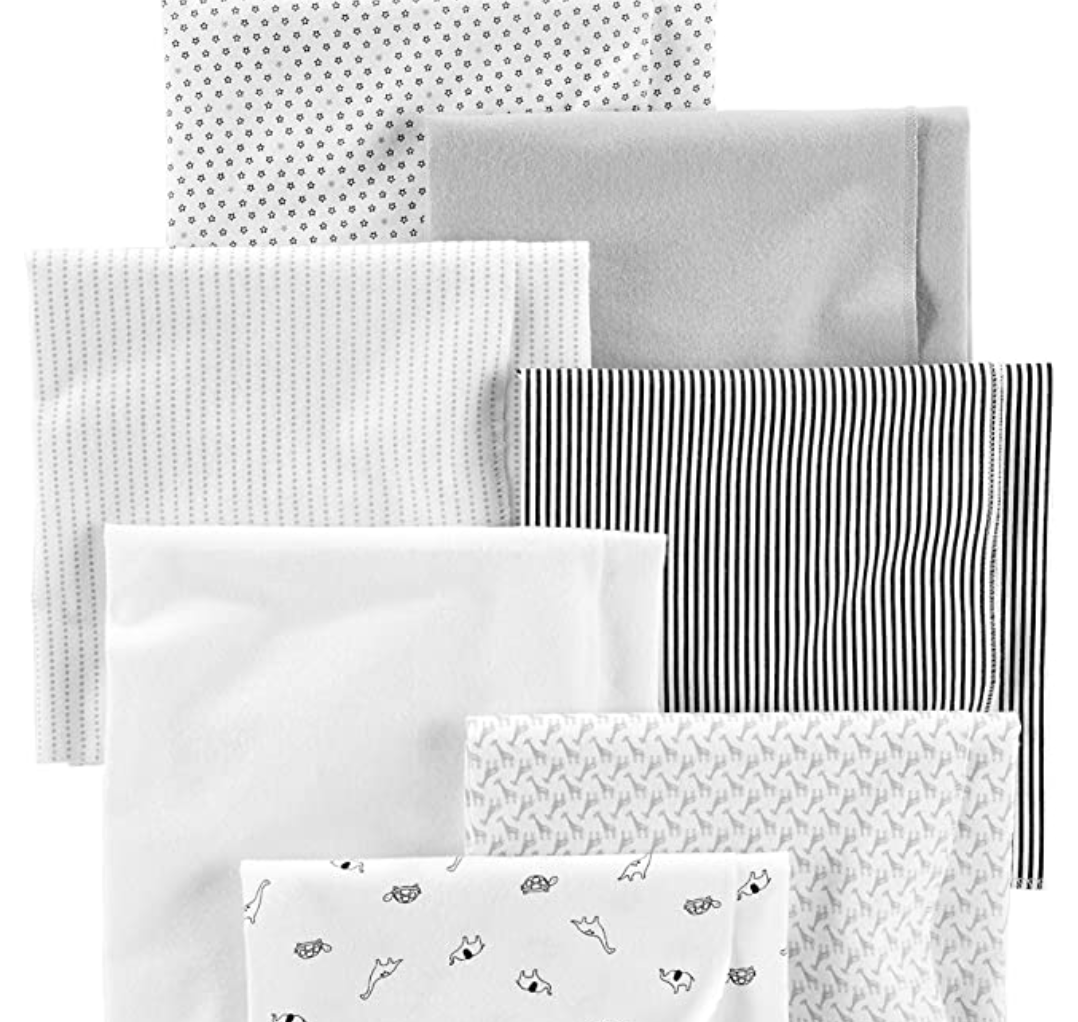
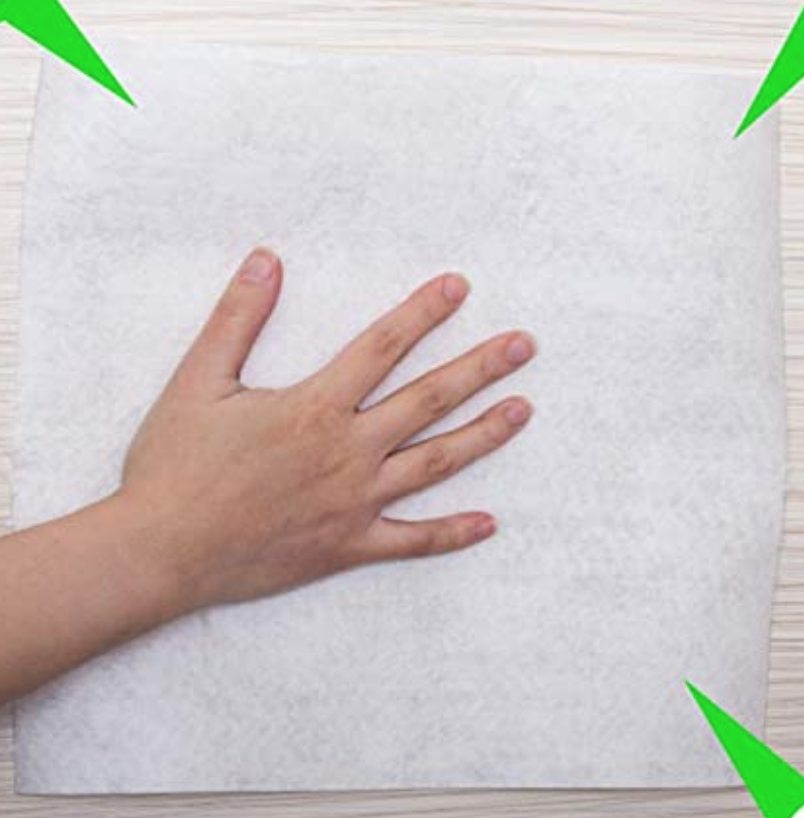
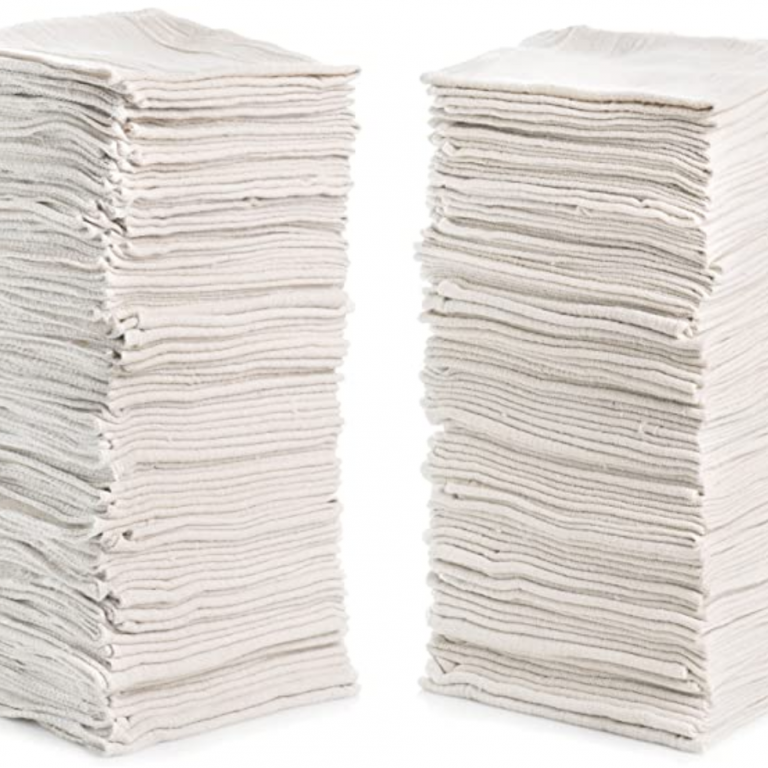
Swap out your paper towels for unpaper towels. Unpaper towels are just as they sound. There are so many ways to do this depending on your budget. The most favorite (but also most expensive) option would be to purpose pre-cut and pre-rolled unpaper towels (find here). But if you’re like me and can’t afford (or don’t want to spend) $x/paper towel, there are a few other options. These paper towels are actually recycled bamboo. They last a super long time and they’re easily rinsable with just soap and water in your sink. I love these because they look like real paper towels and they don’t need to go in the washing machine. My last suggestion if you want to use unpaper towels is to make your own. You can learn how to make your own here. Plus bonus tips on other things we use instead of paper products.
Flannelette blankets for DIY unpaper towels
Link to bamboo unpaper towels
Cheap reusable shop towels
Now that you’ve gotten rid of paper towels you should also replace napkins. You can find cheap and beautiful reusable napkins online. Then, just throw them in the wash with your other items.
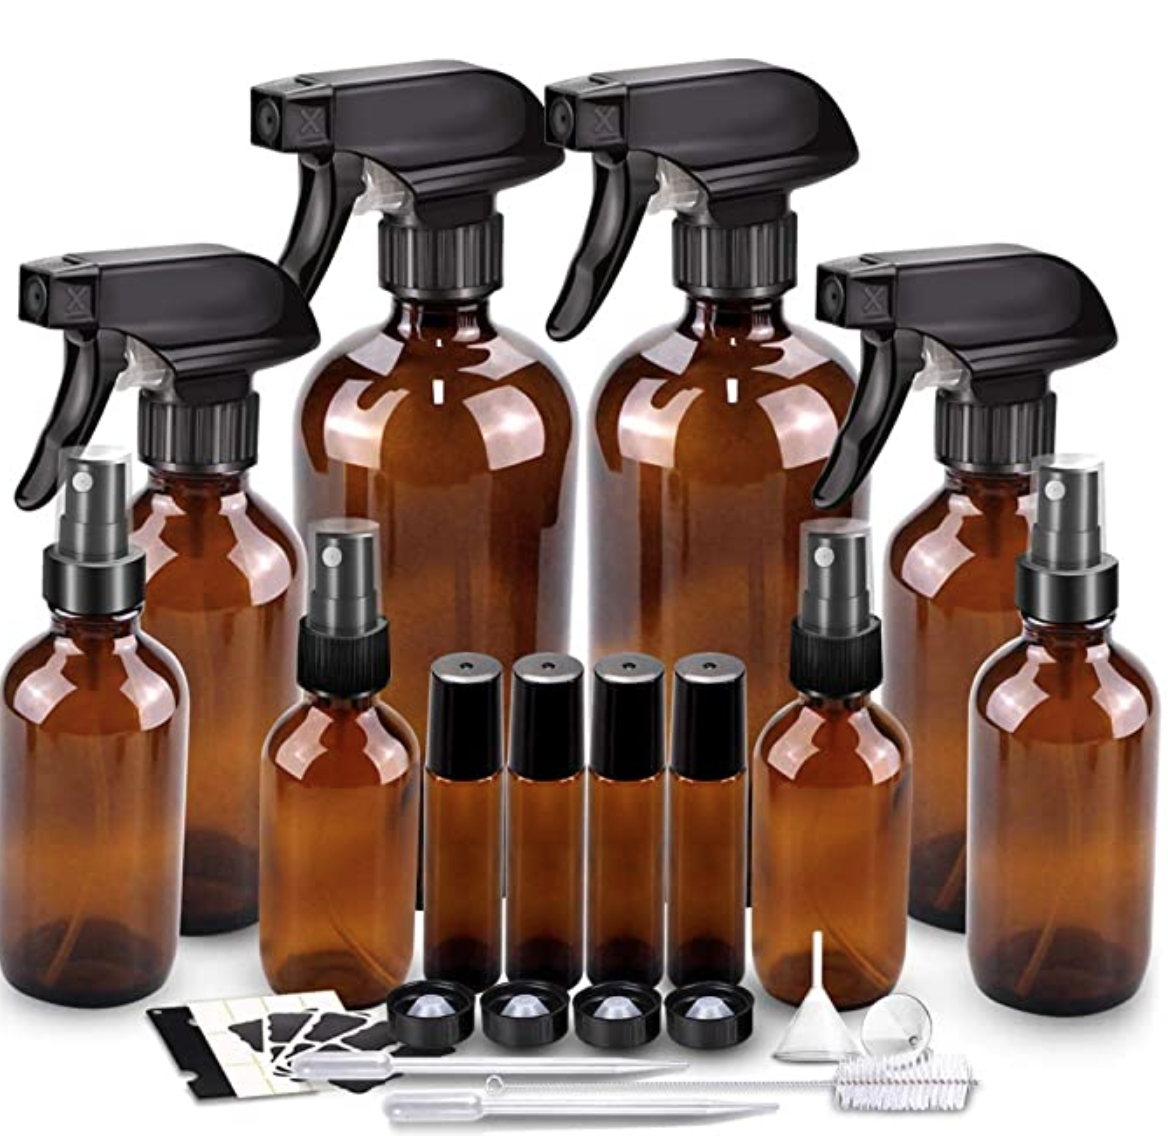
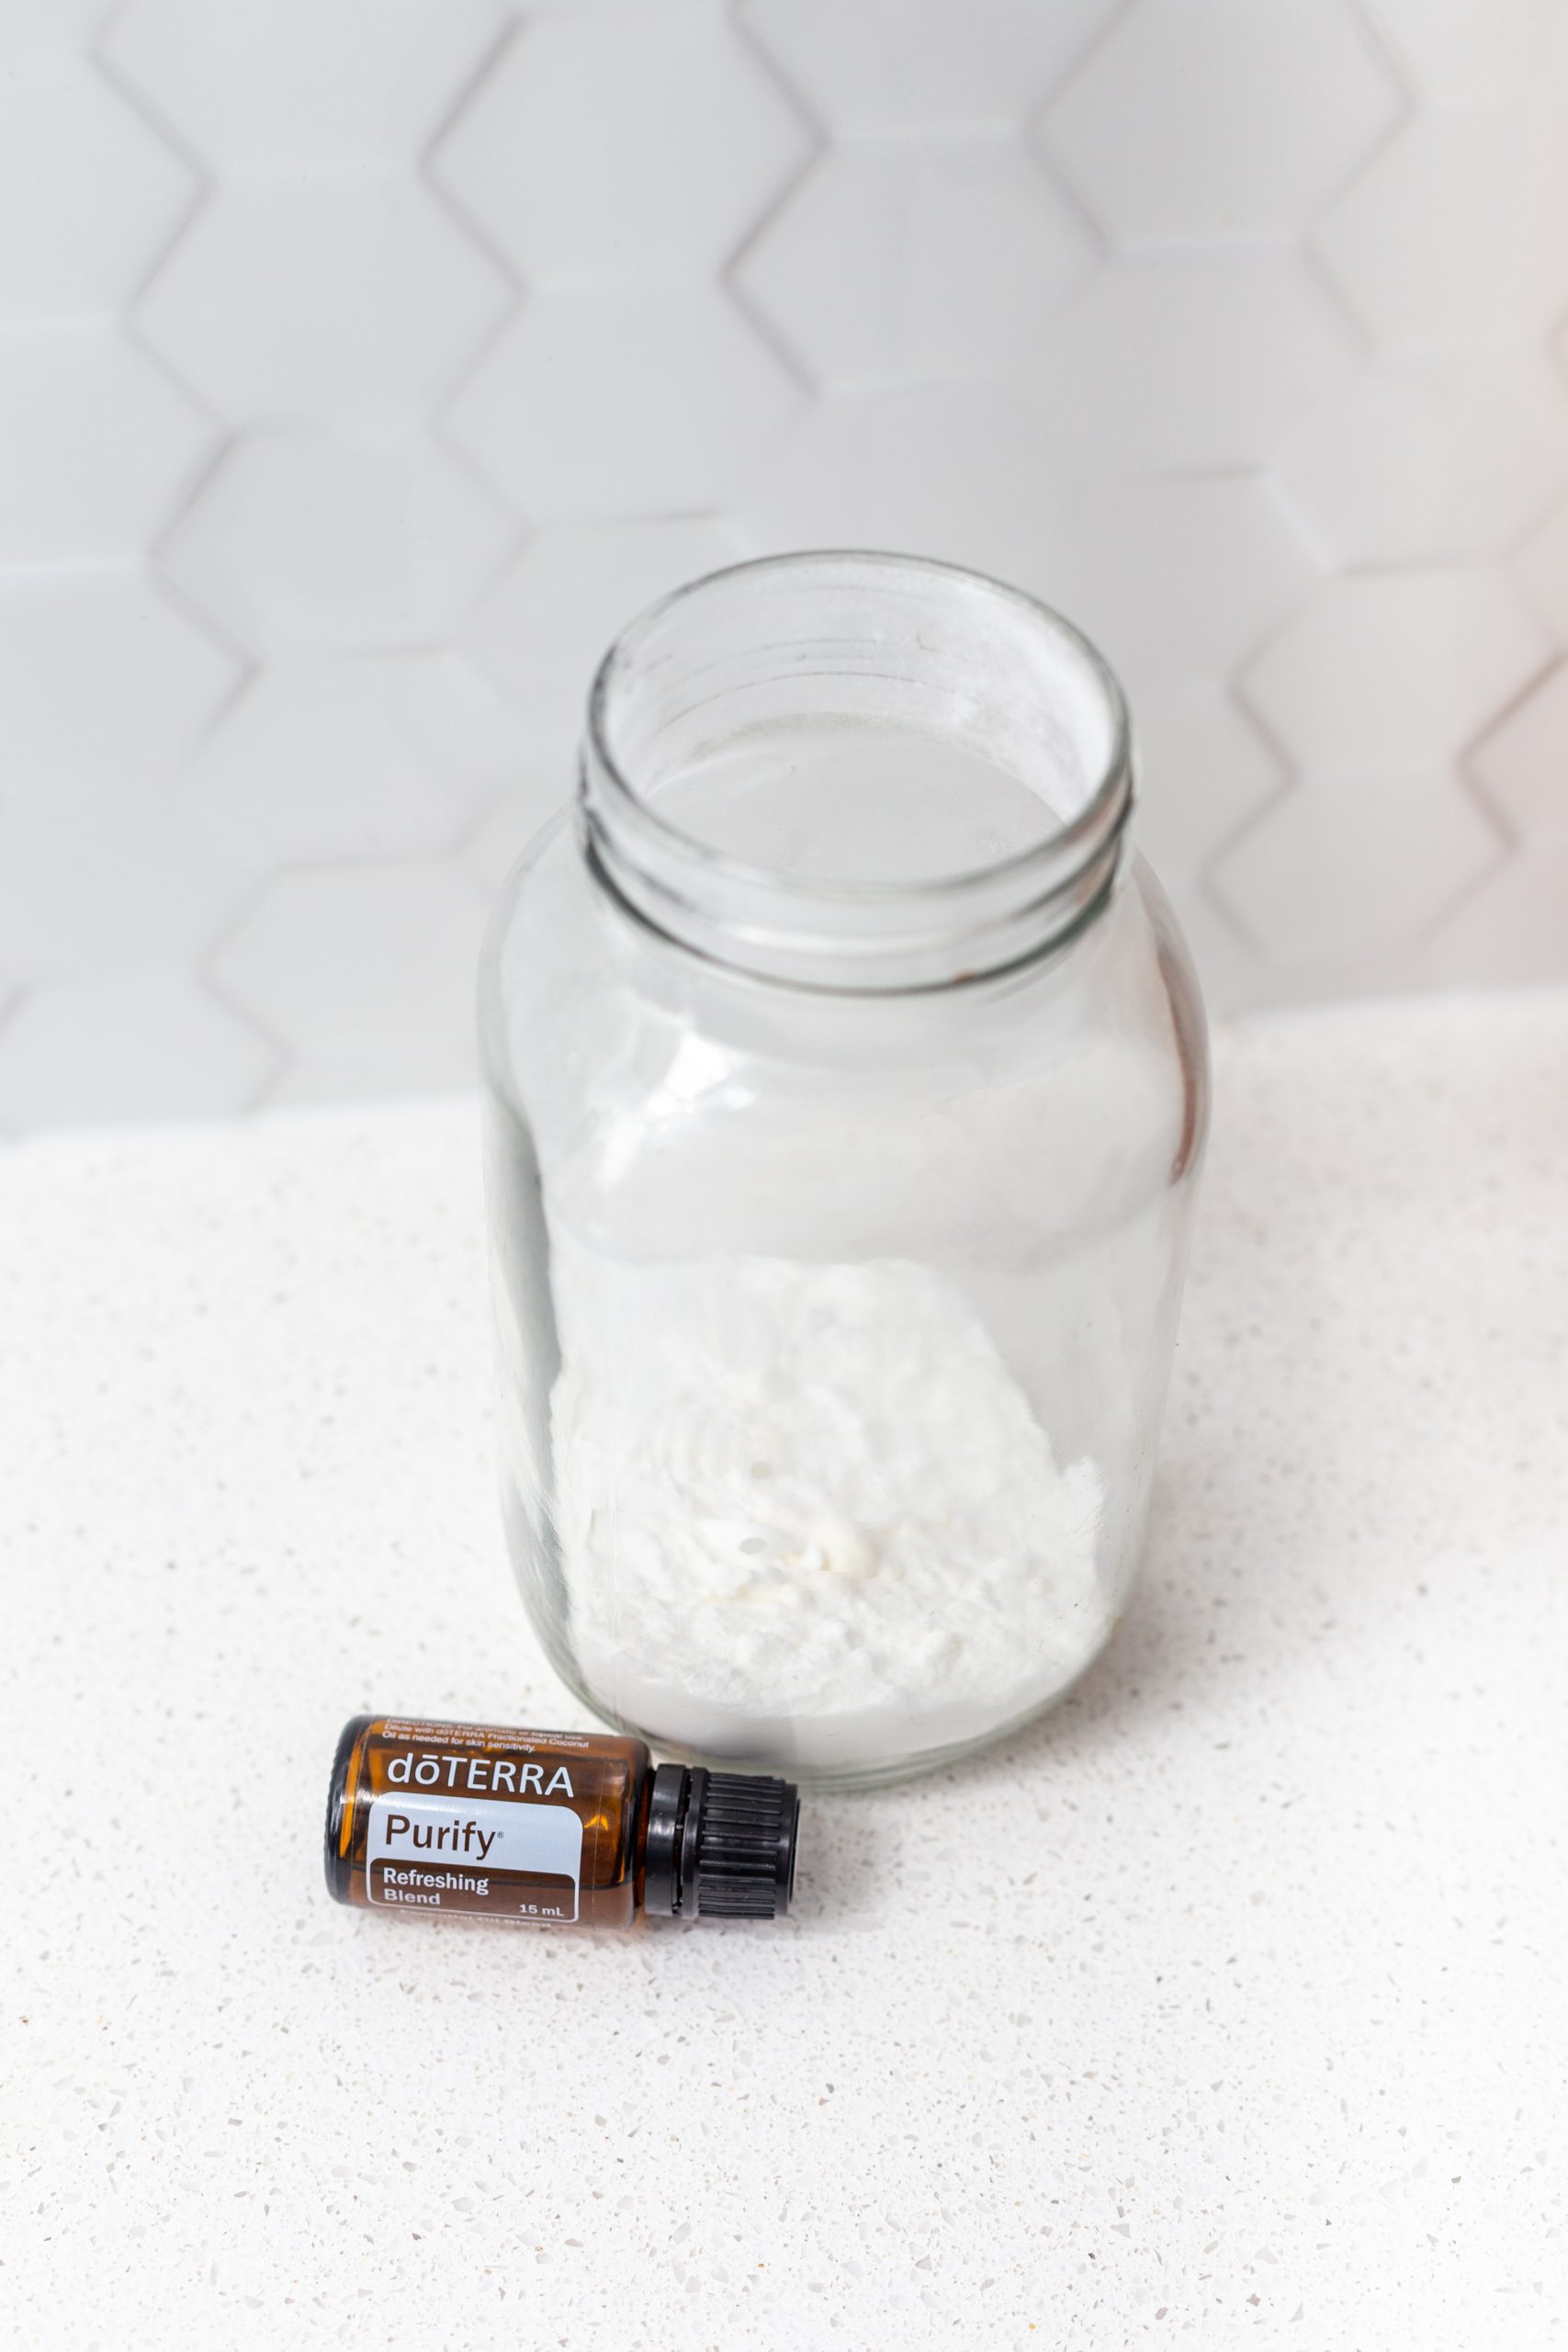
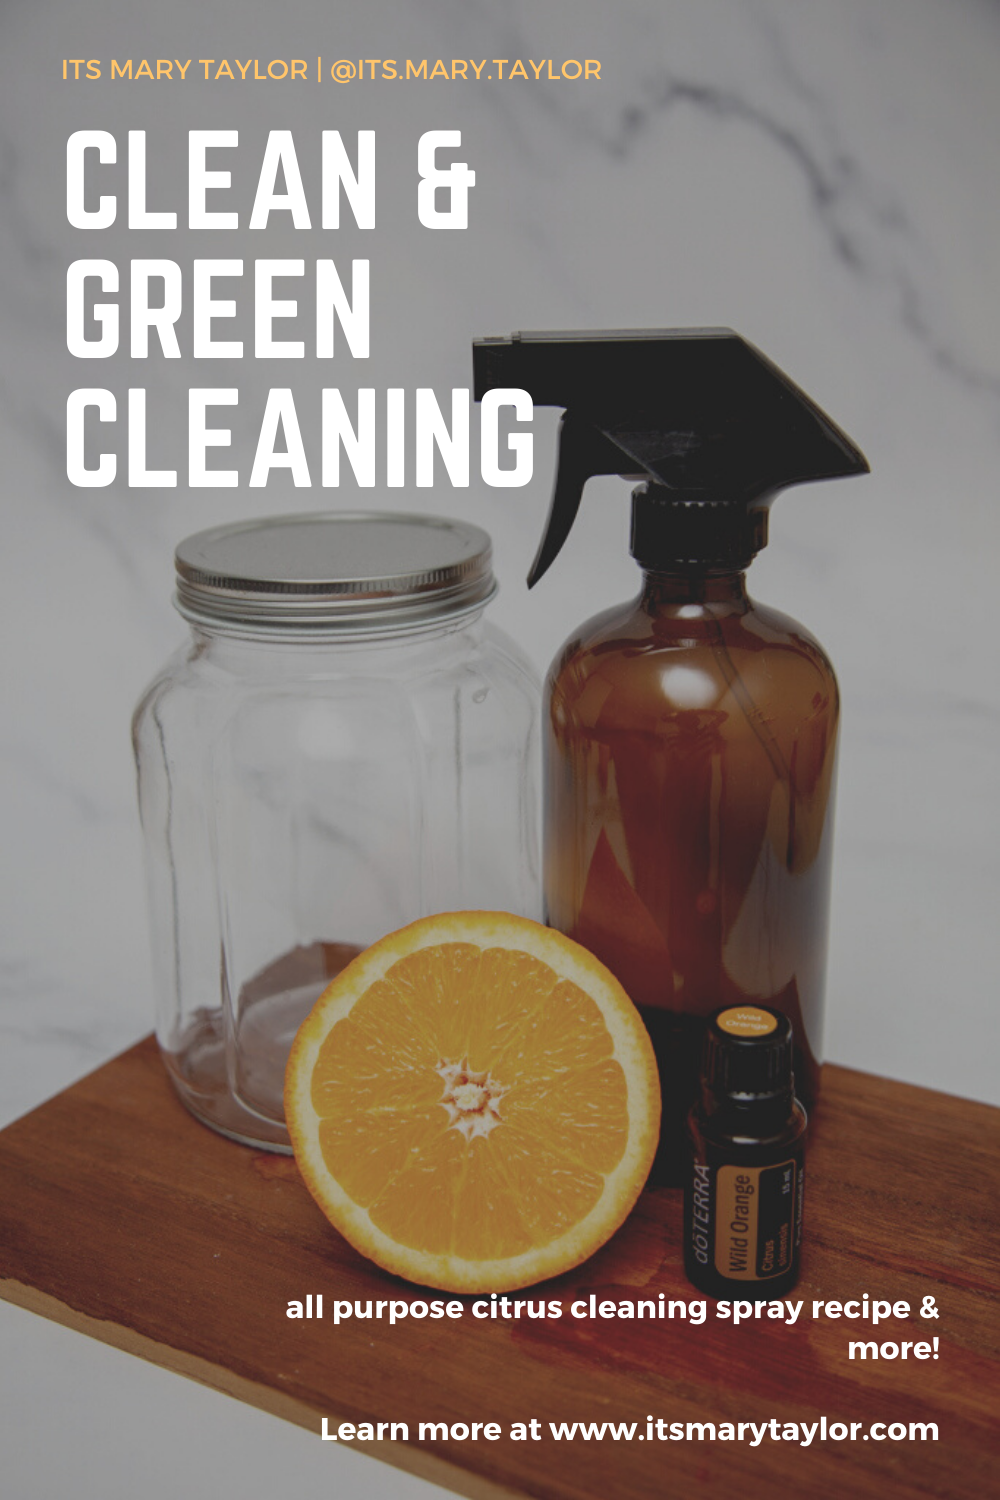
Cleaning products in plastic containers. Although you might be buying the eco-friendly cleaning sprays and cleaning products, they’re still usually in a plastic bottle. To save money and reduce waste (like throwing away the plastic bottles afterwards), you can make your own cleaning products and store them in glass containers. You’ll still need to purchase the ingredients to make the cleaning products but try to buy in bulk, refill your own containers at a bulk store, or buy powders in recycled cardboard boxes. Check out this blog for a DIY all-purpose citrus spray cleaner. See and click on the images below to check out a couple of great glass container options.
Link to glass containers
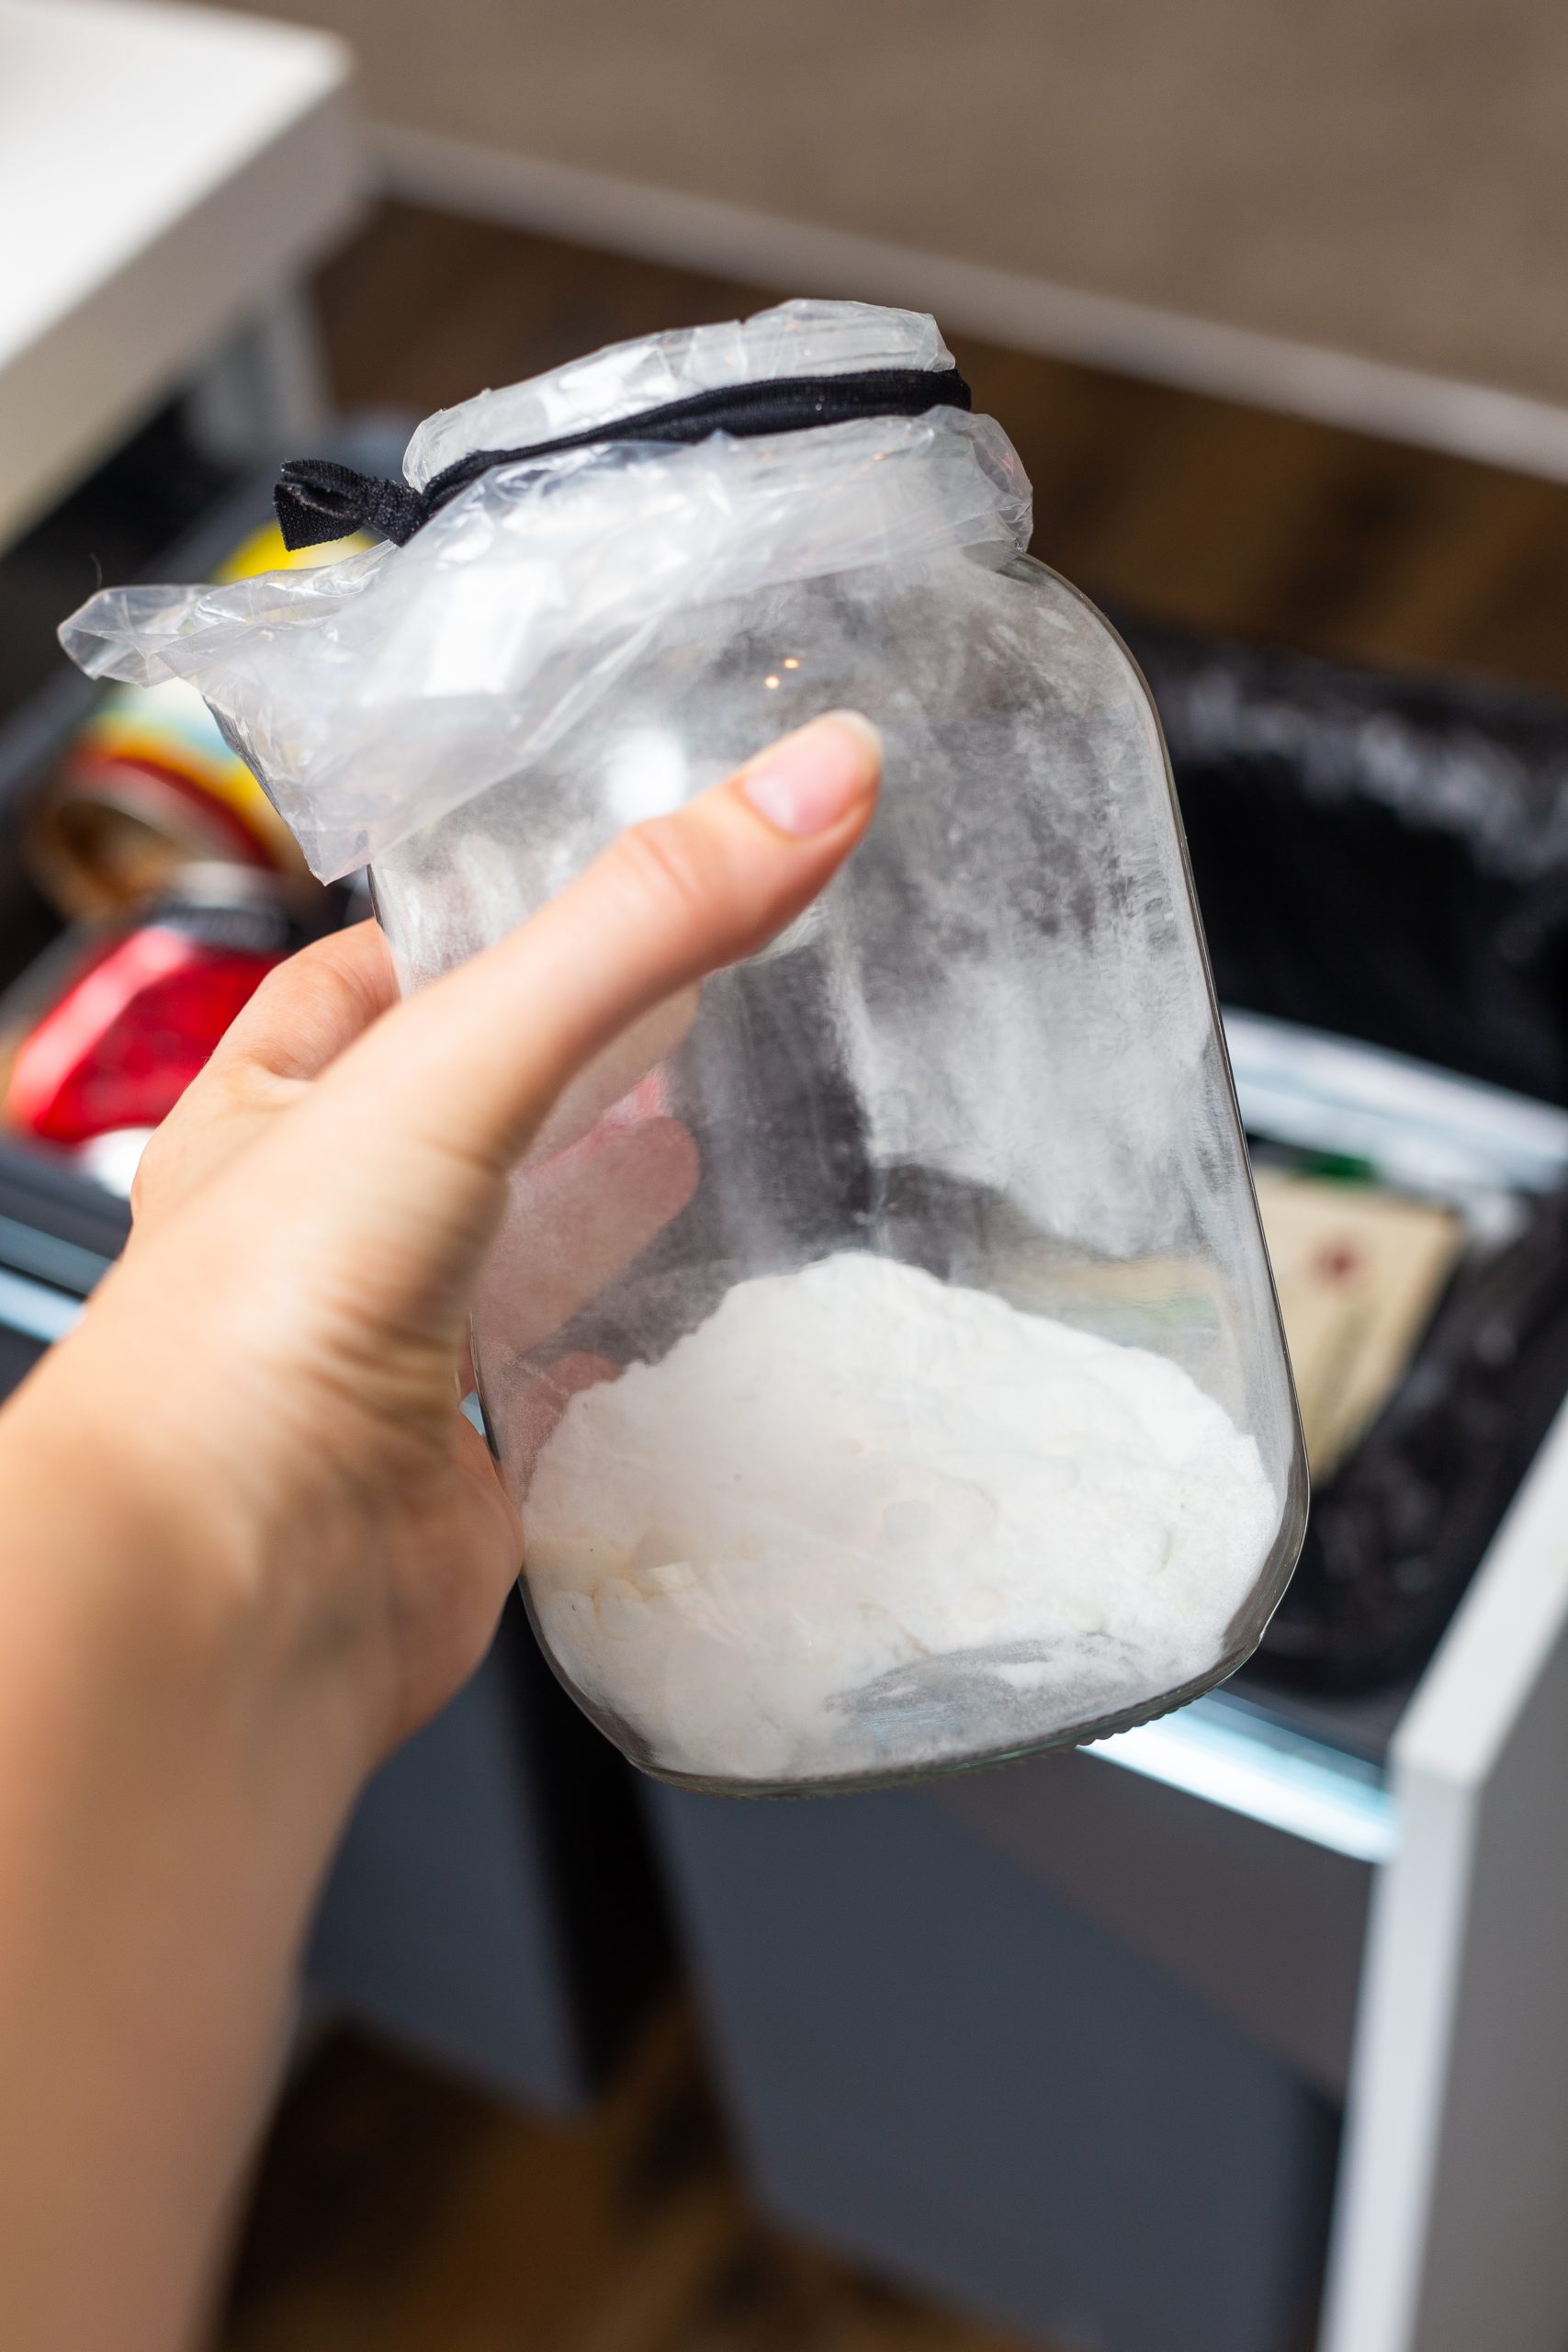
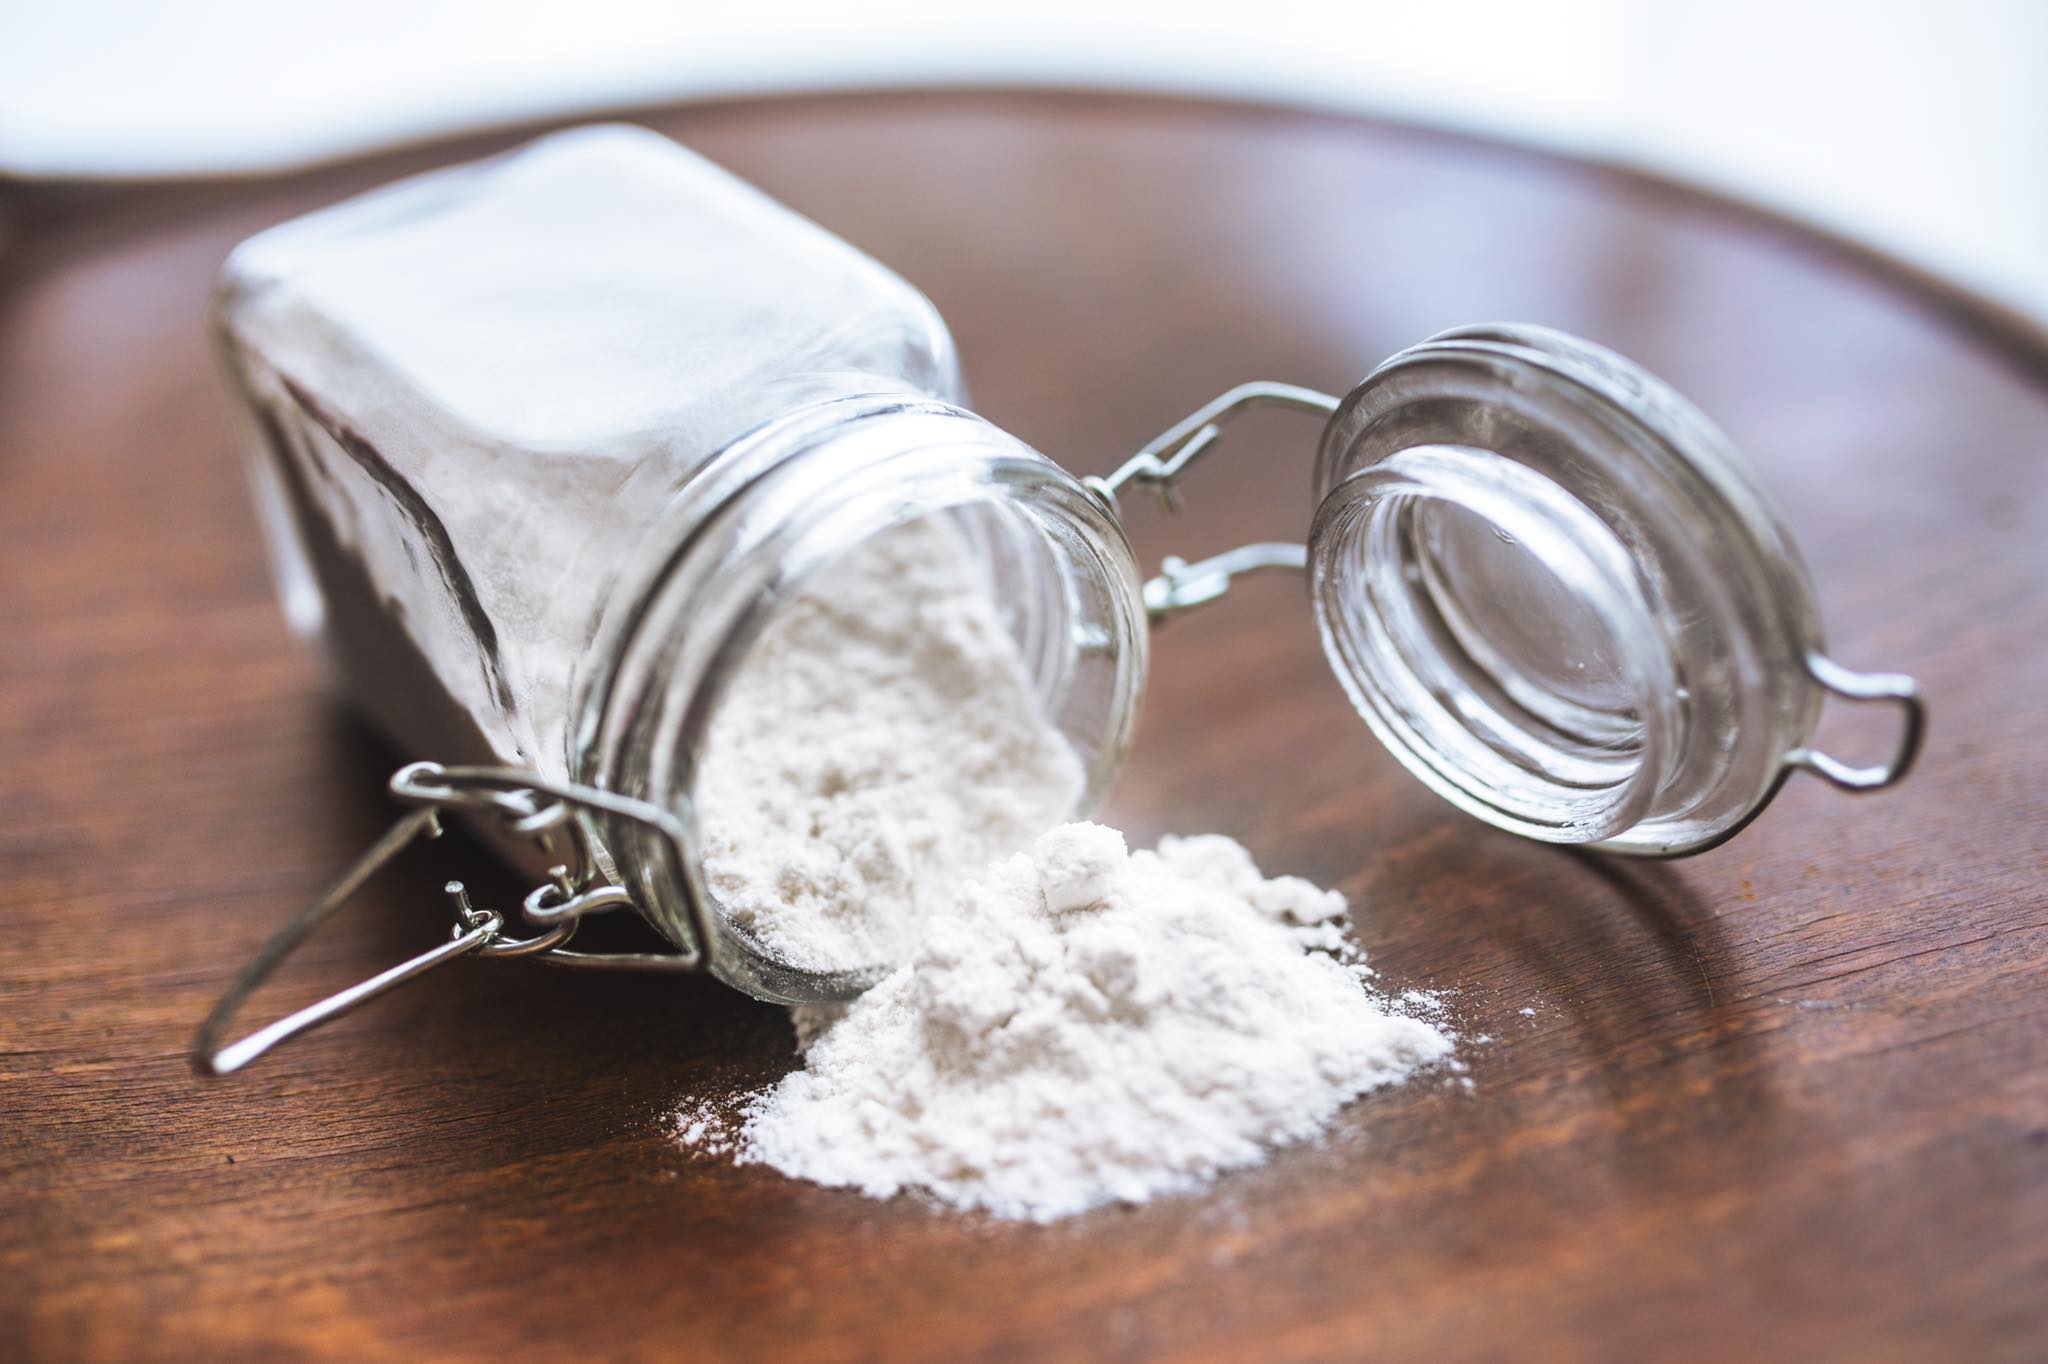
Link to container pictured (great for laundry powder)
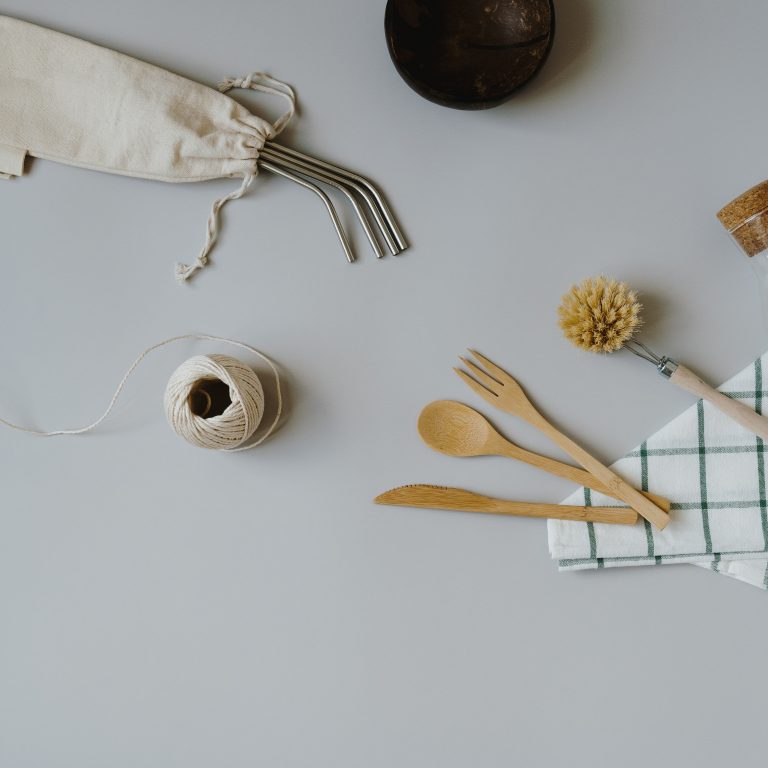
Straws! You definitely have seen this one before but I thought I would just throw it in anyways. Ditch the plastic and even paper straws and purchase reusable metal straws. You can find some here.
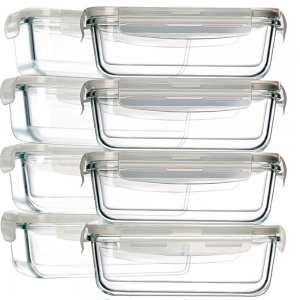
Going out to eat and usually bring home leftovers? Don’t forget to bring your glass watertight container to put your leftovers in. This way you don’t need to rely on the restaurant to provide a throwaway container that might not be recyclable.
Link to glass food containers
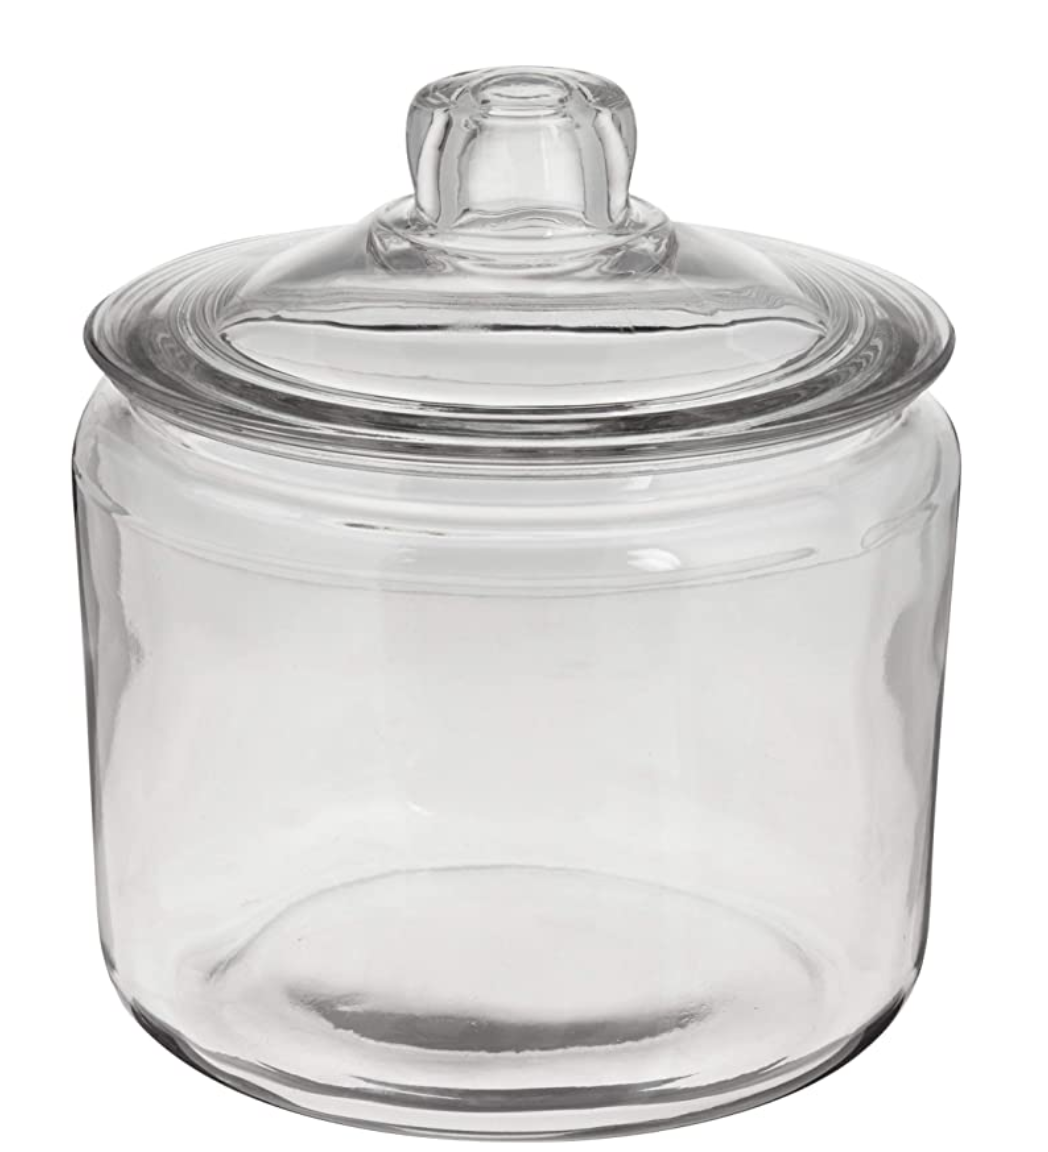
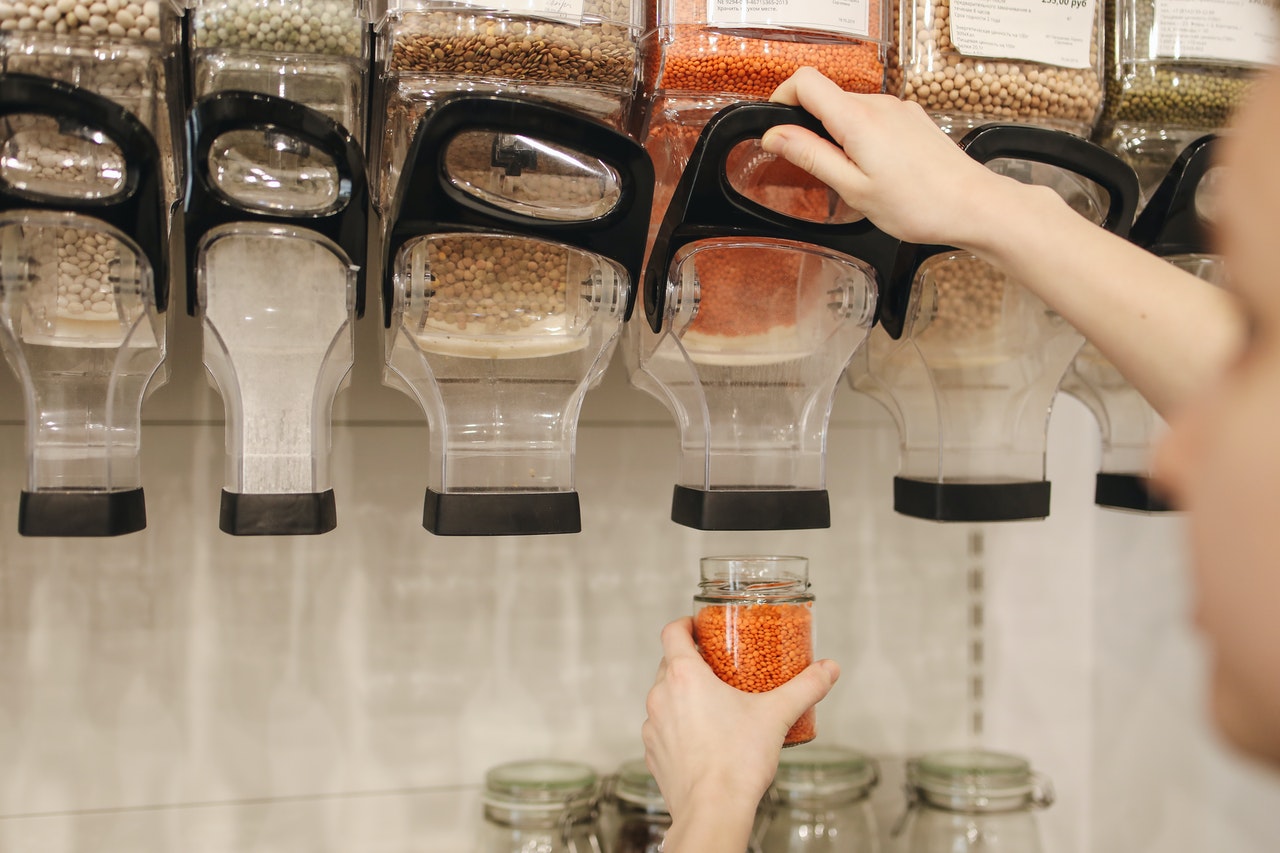
Buy in bulk & use your own containers! This doesn’t just go for cleaning products but also your food! Did you know that bulk stores often allow you to bring in your own containers such as jam jars? If you don’t have any reusable glass jars on hand or want an upgrace, check out a few of my favorite eco-friendly glass container options here.
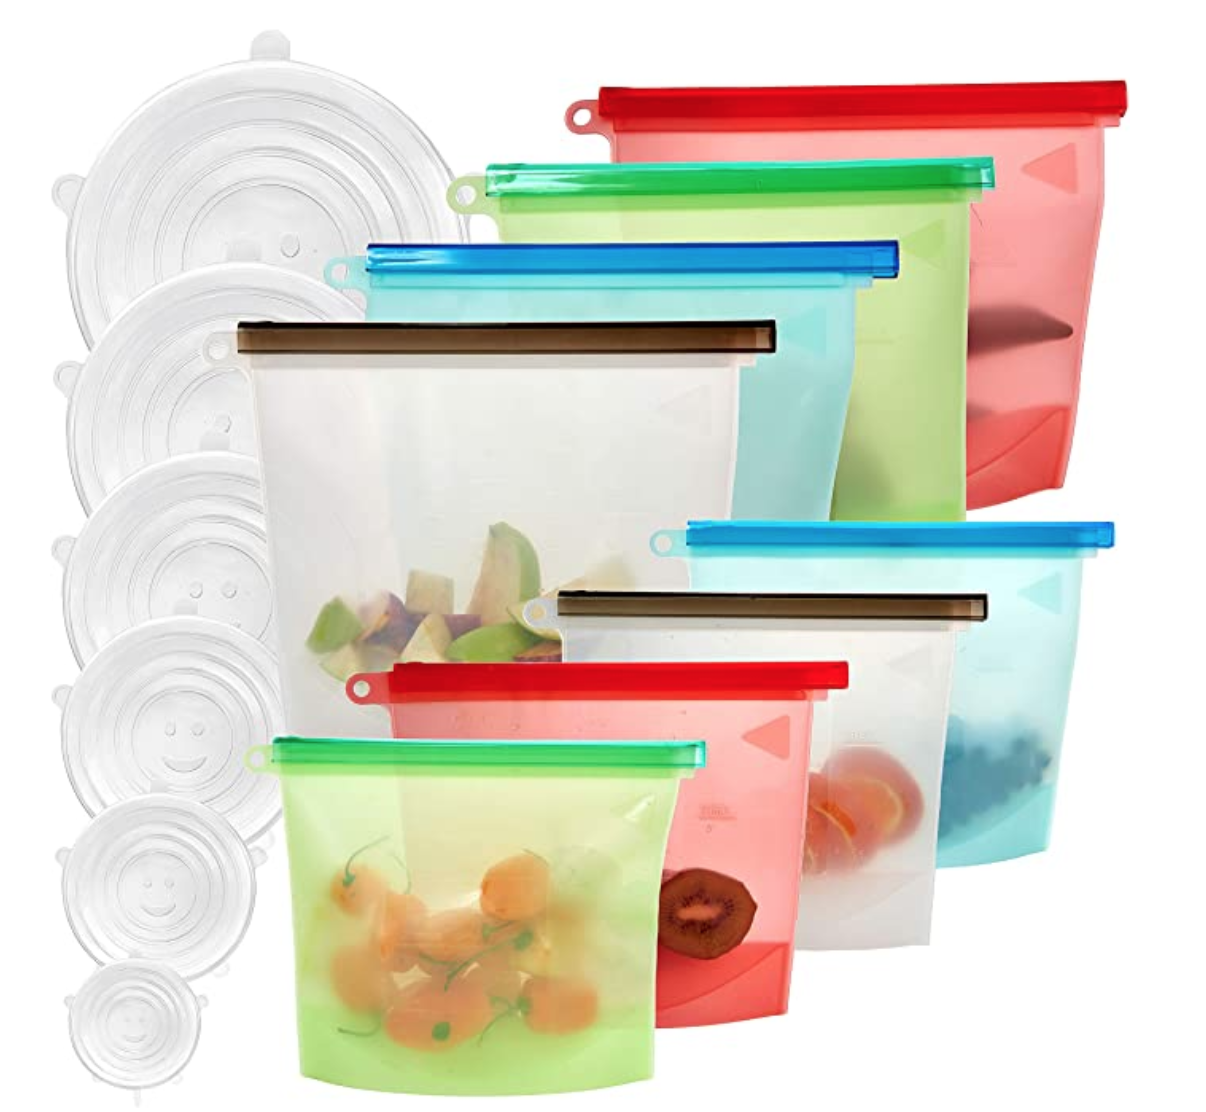
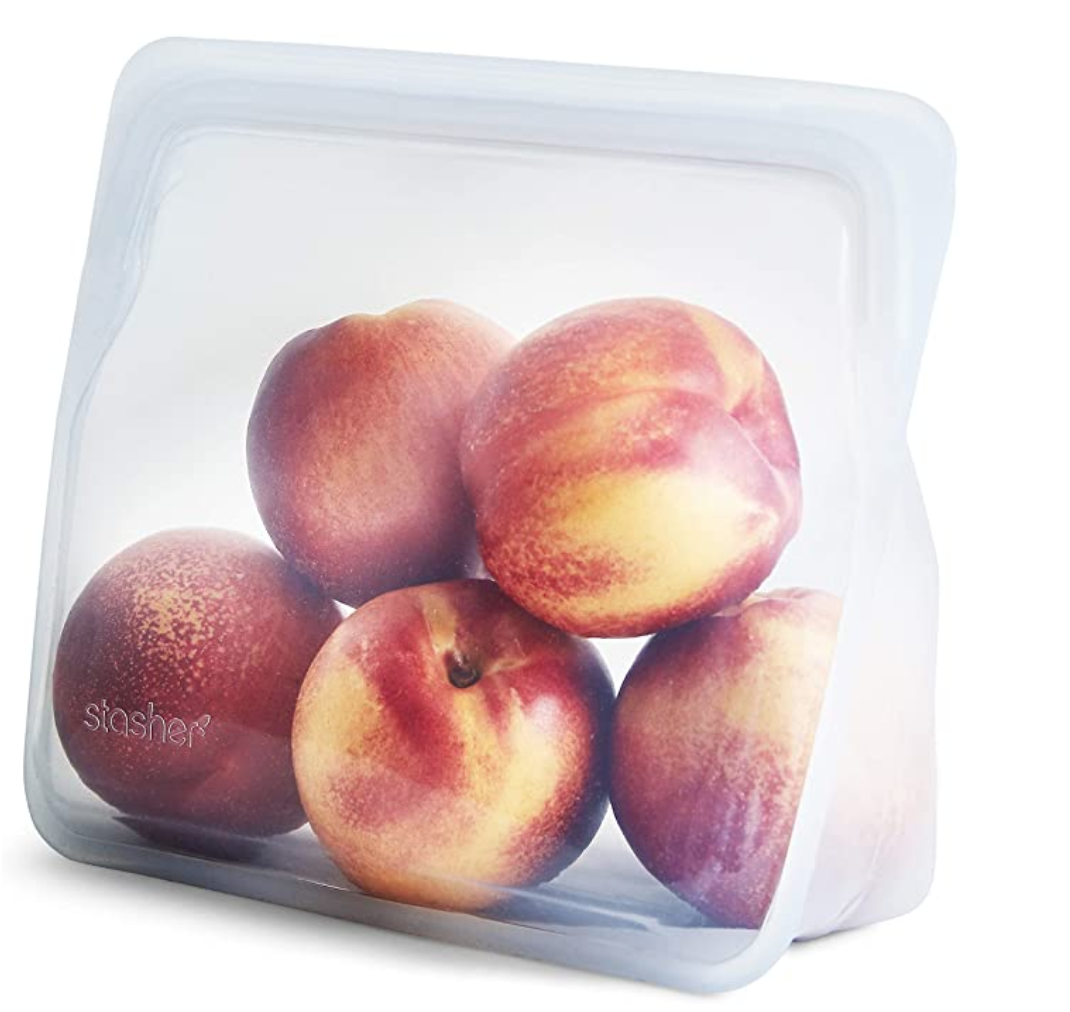
Say bye-bye to ziplock bags! These reusable ziplocks are my FAVORITE swap of all! I used to try to wash and reuse regular ziplocks (because I hated the thought of throwing them away after one use) but they never dried and were such a hassle. Plus, they never looked clean. Now I have several sets of different reusable ziplocks! For clear, regular looking ziplocks click here. For watertight, large, silicon ziplocks check these out.
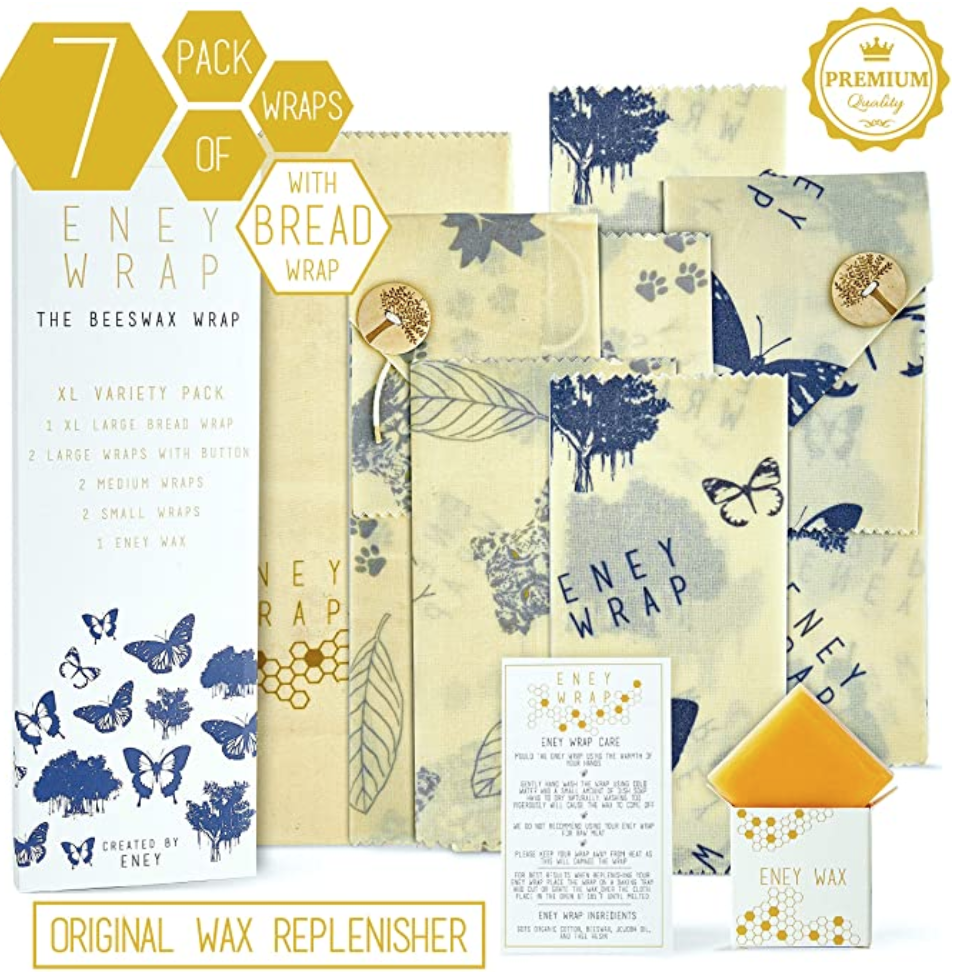
Glad wrap or sad wrap? Glad wrap, plastic wrap, or cling film. However you want to say it, it’s a huge waste of plastic and can easily be replaced with beeswax wraps. Once you’re done using them, just give them a rinse and use again. Check out these gorgeous designs.
Link to silicon ziplock bags
Link to beeswax wraps
Link to bag pictured
Baking paper ➡️ baking silicon! We use this tray liner that can be reused again and again. Nothing ever sticks to it so it’s a great replacement for baking paper or tinfoil.
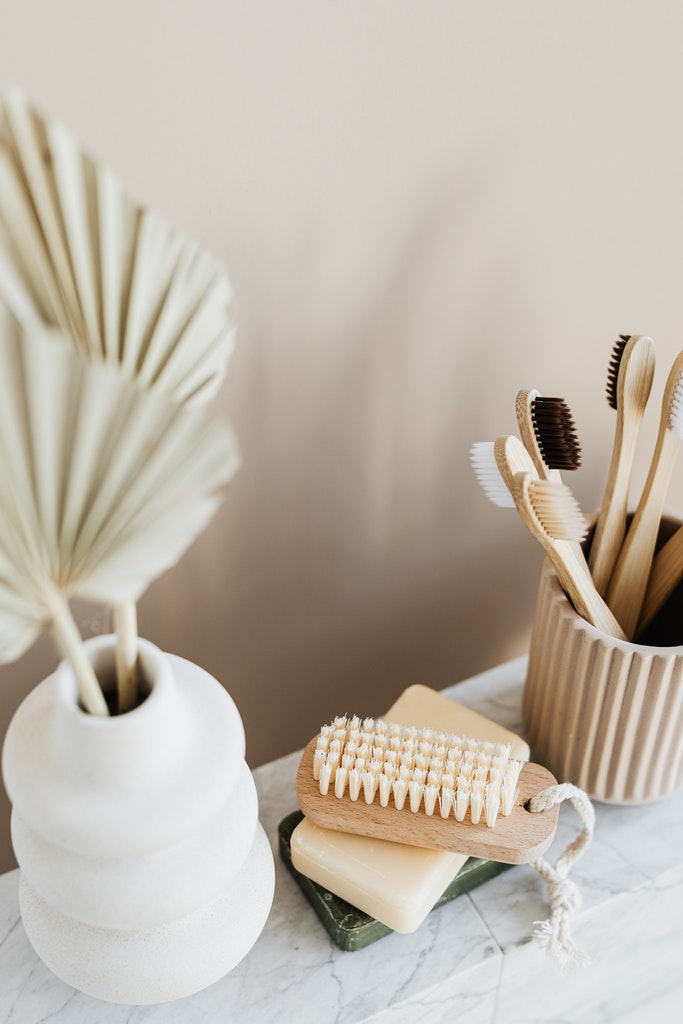
Skip the plastic toys, decor, and household items! Although most of these items aren’t one time use plastics (like takeaway containers and straws are), they’re still contributing to the pass amount of plastic production and waste in the world. Opt for wood items such as toys, toothbrushes, hooks, hangers,
Check out these inspirational home images below and click on any of them (or click here) to see my shopping list of eco-friendly home items.
Link to Eco-Home Purchases
Link to Eco-Home Purchases
Link to Eco-Home Purchases
Do you have any other eco-friendly swap ideas for us? Tag me in your eco-friendly home inspiration on Instagram @its.mary.taylor and on Facebook here. I can’t wait to see how you use these ideas and your own ideas to create your eco-friendly, green home!
If you enjoyed reading this and would like more information on home, lifestyle, advice, tips, tricks, and more, follow me on Instagram @Its.Mary.Taylor and on Facebook at Mary Taylor! I can’t wait to see you there!
While we lived with grandparents (and parents), I kept thinking about the day we would finally be in our own place so I could start living as eco-friendly as possible. One thing about being an adult is getting excited for weird things like organization and DIY cleaning products. Surely I am not alone! There’s just something special about an eco home. In our rental, we tried our best (only produced 7 bags of trash a year and used “eco-friendly” products) but I wanted to take it the next step. This meant no paper towels, no tissues, no makeup wipes, and no more purchasing cleaning products that I could make (which is pretty much all of them)!
As an Amazon associate, I may earn from your purchases through my links; however, it doesn’t affect how much you pay and I cannot see who makes a purchase.
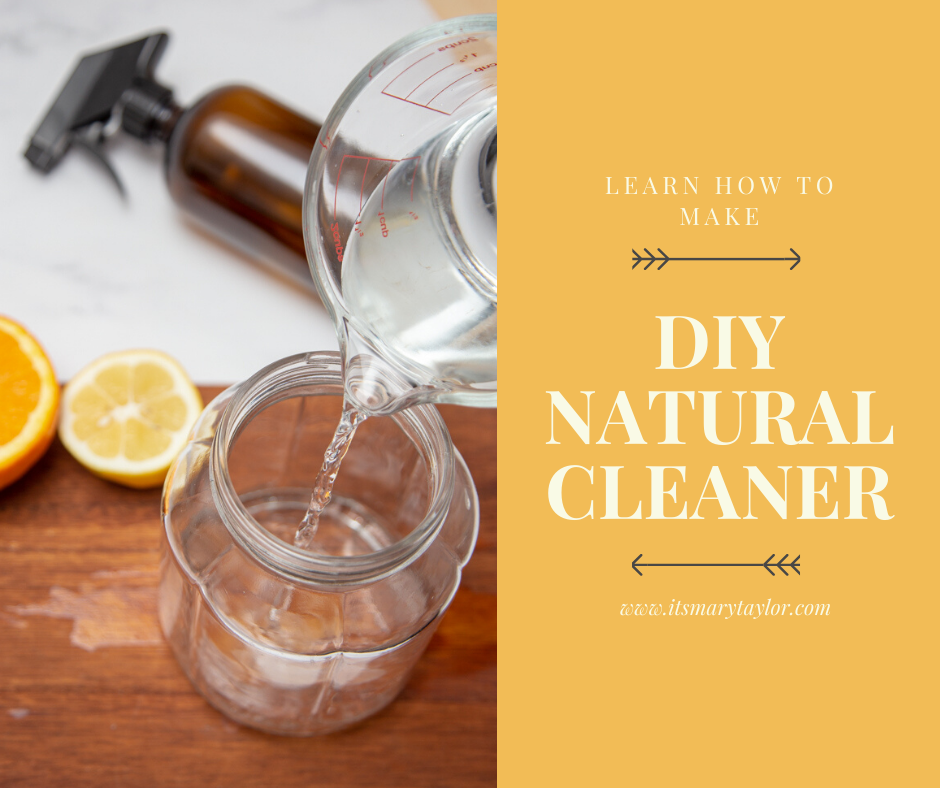
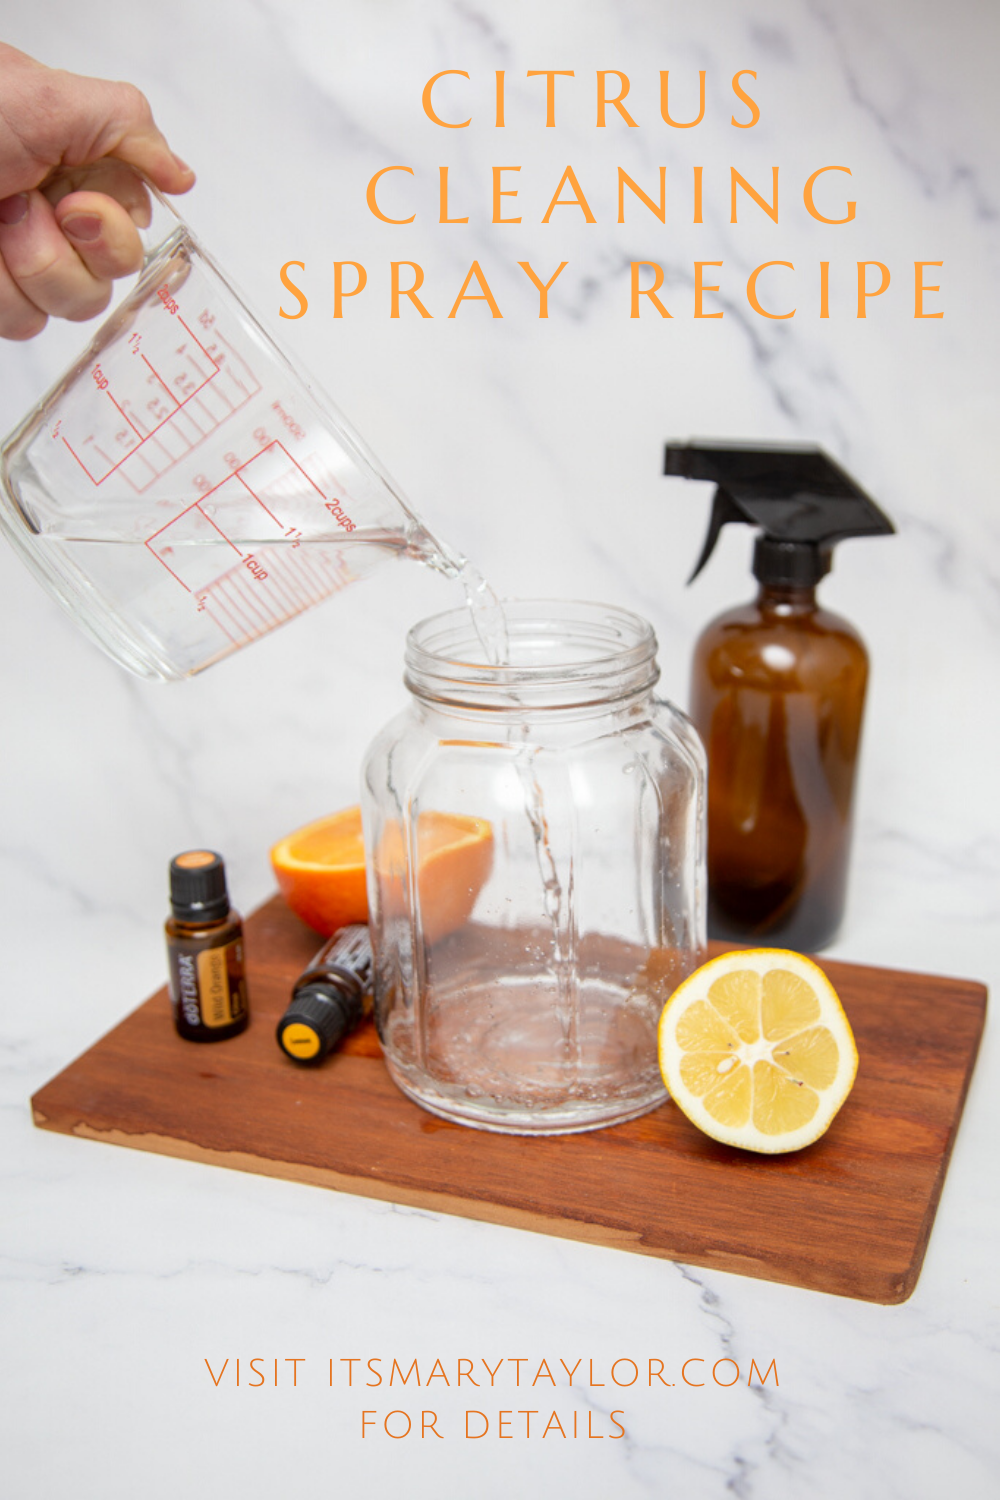
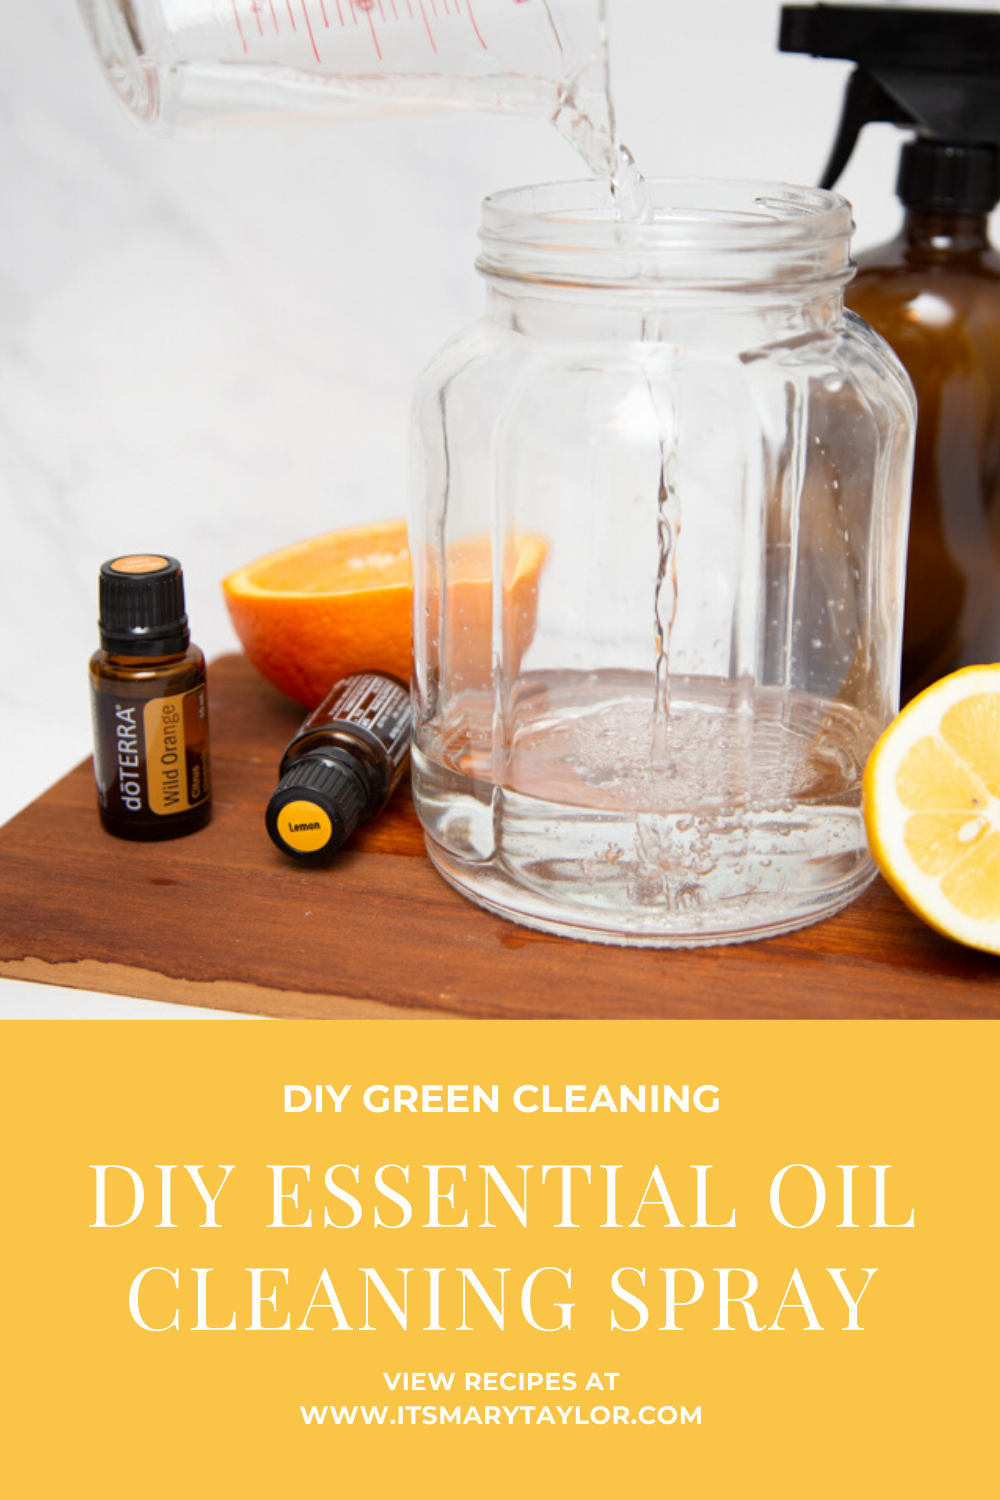
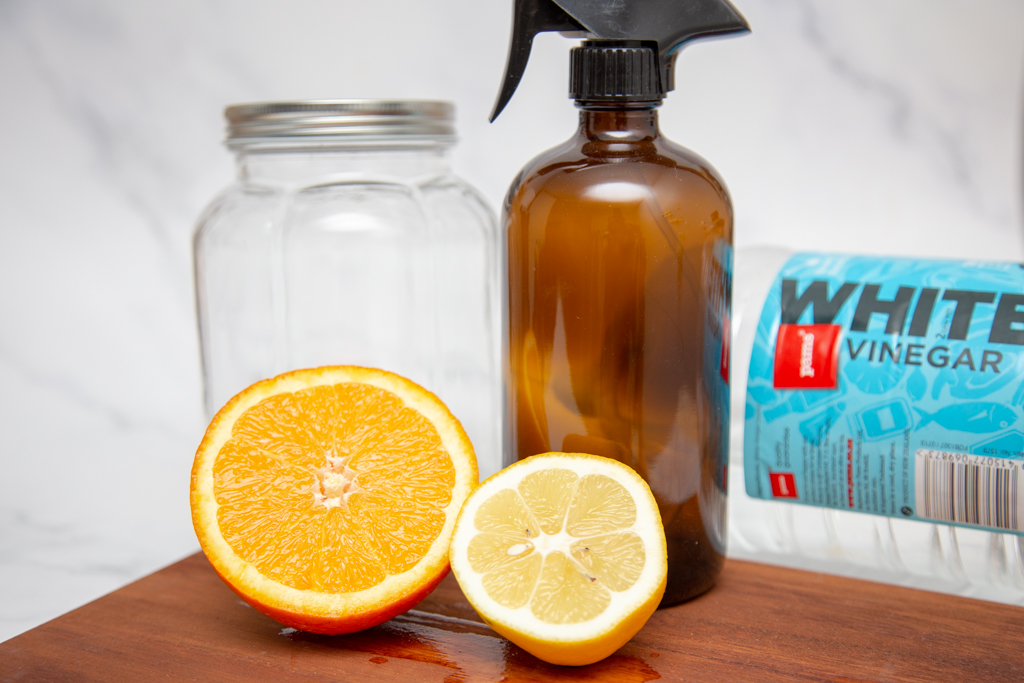
So the journey really began. I stocked up on glass bottles, which if you’re US based, you can purchase here. And I set out to make my own DIY natural all-purpose cleansing spray with what I had at home. You’re going to be shocked at how easy this recipe is.
Here’s what you need to make your own DIY citrus cleaning spray:
✧ Let sit for up to 7 days (minimum 3 days) in a cool, dark place – Shake the jar every day if you remember
✧ Strain the vinegar into your spray bottle
✧ Toss out the peels (or even better, put them in your insinkerator/garbage disposal to clean the inside of your sink & freshen it up)
✧ Optional: add in water to fill your spray bottle or if your vinegar is too strong you can add water
✧ Store in a cool, dark place and use on everywhere from your kitchen to your bathroom
** Extra tip… Enjoy the fruit first! To create even less waste, make this from orange and lemon peels you would have otherwise just thrown away.
If you learned something new and enjoyed this blog, don’t forget to like me on Facebook and follow me on Instagram. I would love to see your homemade DIY cleaning sprays you make so tag me so I can reshare!
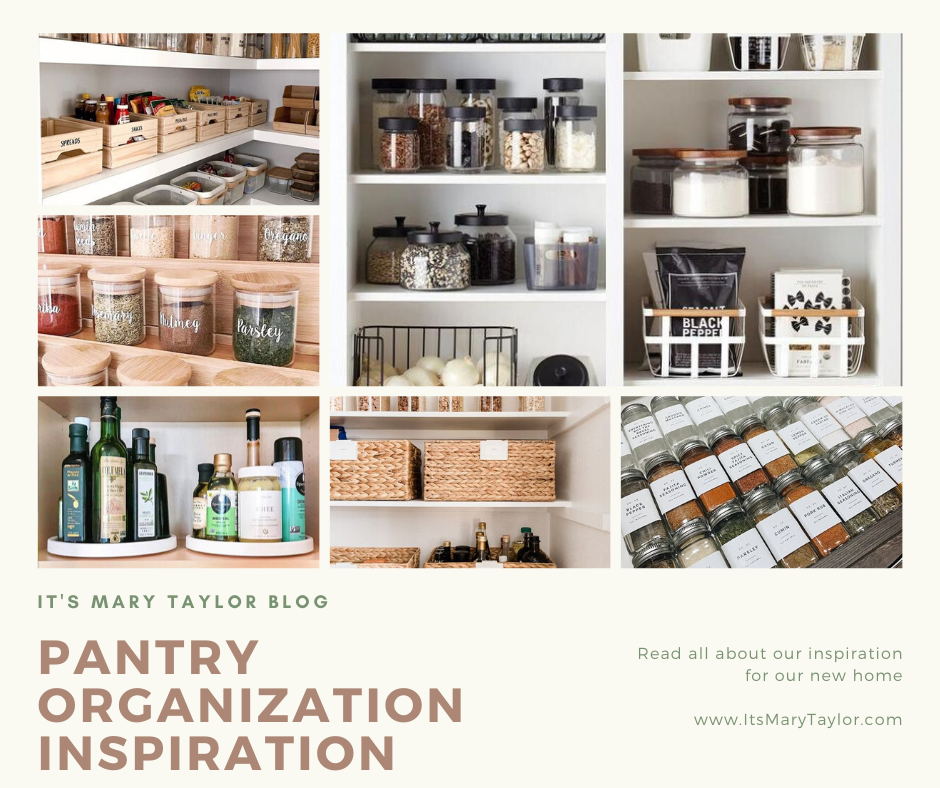
Being an adult can get weird sometimes right? To be honest, one of the things that I was (and am) most excited about for our new house is our pantry organization. Don’t worry, I totally know how weird it sounds.
I am going to dive right into my first home inspiration blog post since I released our home building process blog last week.
If you haven’t seen on Instagram, we actually recently moved into a temporary apartment until our home is built. So, we got to dive into pantry organization before our new house – granted, this apartment has NO storage so it doesn’t quite feel (or look) the same that I want it to. But, I know it will some day!
To see where you can buy similar (or the same) products that are featured in all of my home inspiration posts as well as all credits on images, head to my inspiration shop here.
What’s your favorite room in the house? Are you like me and the kitchen is your favorite spot? It’s probably because I love cooking, hence why I share recipes on the blog! When we finally decided we were going to build a house, I was super excited about all the things I could do in the kitchen. Given that our home won’t actually be THAT big and definitely lacks some storage space, I want to make sure we have amazing organization and a place for everything.
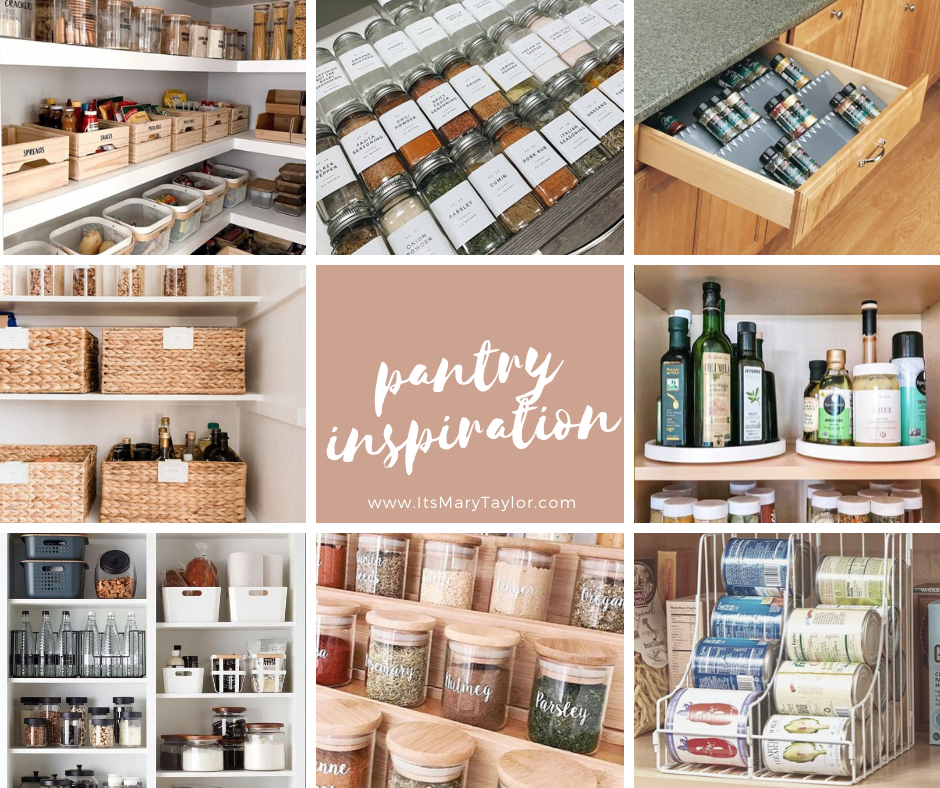
Check out my inspiration board and ideas and let me know what you think! What does your kitchen organization look like? I’d love to see your before and afters – especially if this blog helped you to find some tips, tricks, or a company that you now love! Check below for tips on making your kitchen pantry organized, beautiful, and maximized.
My number one tip for organizing your pantry is having designated, labeled baskets. This will help you sort items so they’re easy to find. It also reduces the look of clutter!
One thing we recently did was have a basket for opened “snacks” (chips, candy, nuts, etc) and one for unopened snacks. This not only helps us stay organized but also helps us reduce waste and buy less. If our opened snacks box is full, we should not be opening up more snacks!
My next suggestion is to have stackable containers so that you can maximize your space – especially if you have small cabinets or cupboards. If possible, purchase matching containers and stick to a theme (color, material, and style) to create consistency and elegance.
If you have deep corners or deep shelves, think about getting a lazy susan for inside your pantry. This not only helps with cleaning (because you can easily wipe, wash, or remove the lazy susan) but also helps you to be able to see everything without removing what’s in front. This is particularly handy for tall items such as sauces, oils, and vingers.
These few tips will help you take your current pantry from unorganized, sloppy, and difficult to utilize to clean, professional, and usable.
If you enjoyed reading this and would like more information on home, lifestyle, advice, tips, tricks, and more, follow me on Instagram @Its.Mary.Taylor and on Facebook at Mary Taylor! I can’t wait to see you there!