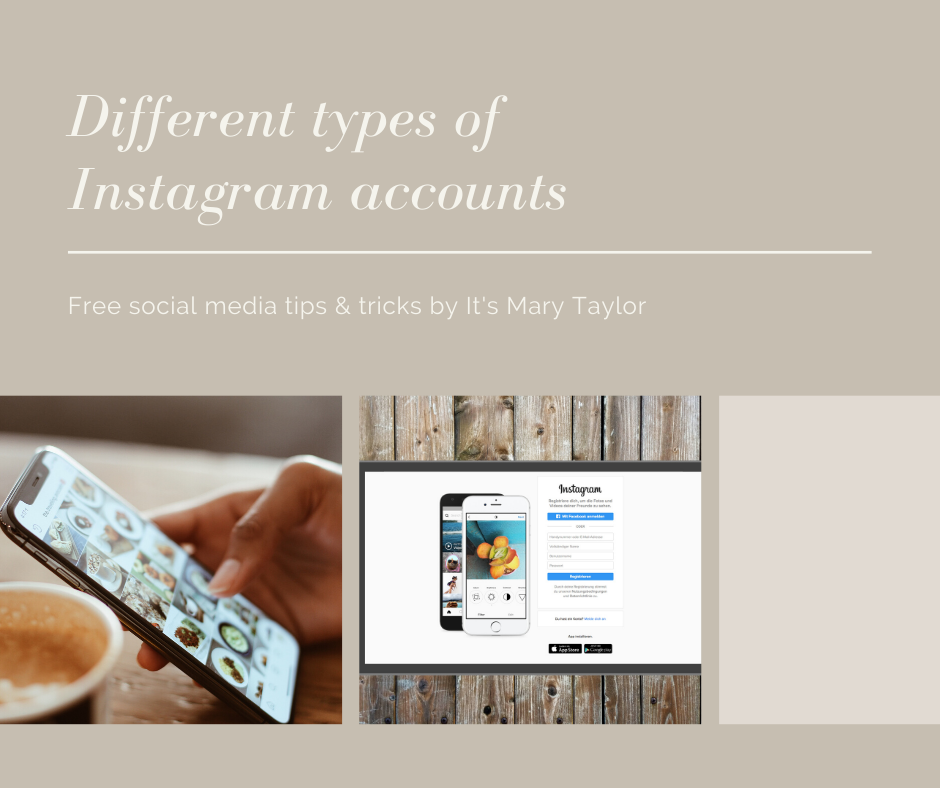
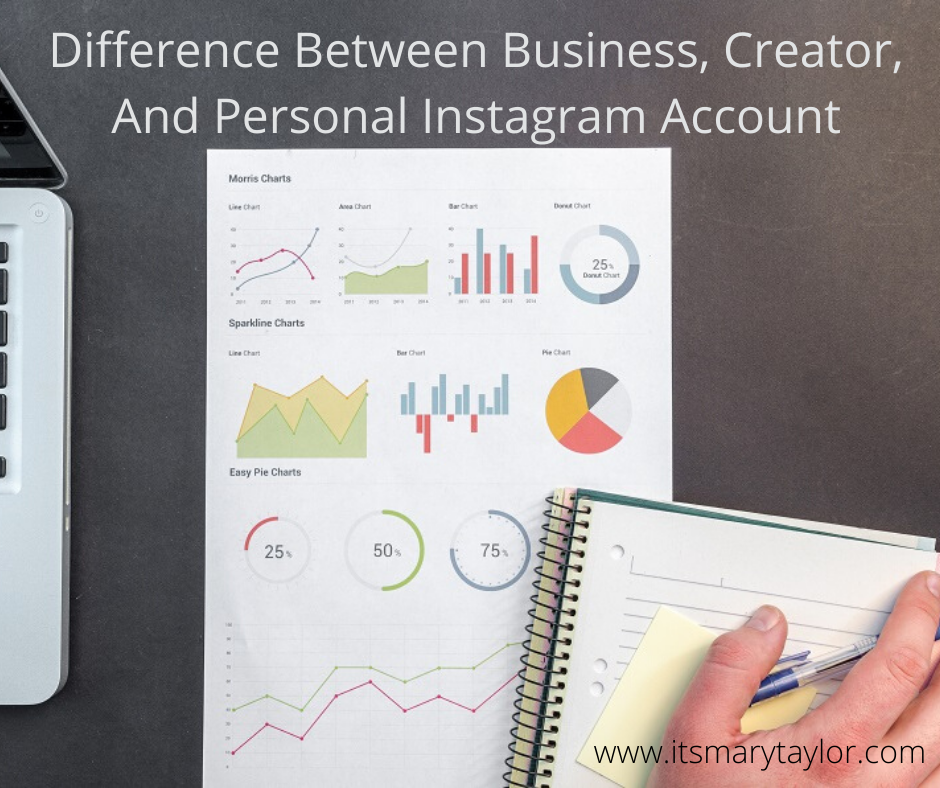
Why is an Instagram business account important and how do I make the switch? What’s the difference between a creator account and a business account?
First, let’s identify the differences between these three Instagram account types.
Instagram says, “With a business account, you’ll be able to access business features and Instagram Insights. These tools can help you understand who is engaging with your business on Instagram.” This means you have access to special analytics which gives you information about your followers such as their age range, gender, location, and when they’re online. All of this information is extremely helpful in identifying when to post and who your current audience is.
With a business account you also have the ability to change some profile settings such as displaying or hiding your business category and contact information on your profile. You can also add a specialized button for contacting, booking an appointment, or making a reservation.
Instagram says, “The Creator Account on Instagram gives you a set of tools that makes it easier to control your online presence, understand your growth and manage your messages.” Creator accounts are “best for public figures, content producers, artists, and influencers.” Nowadays, creators accounts are very similar to business accounts but business accounts have extra added features which is why I recommend switching to a business account.
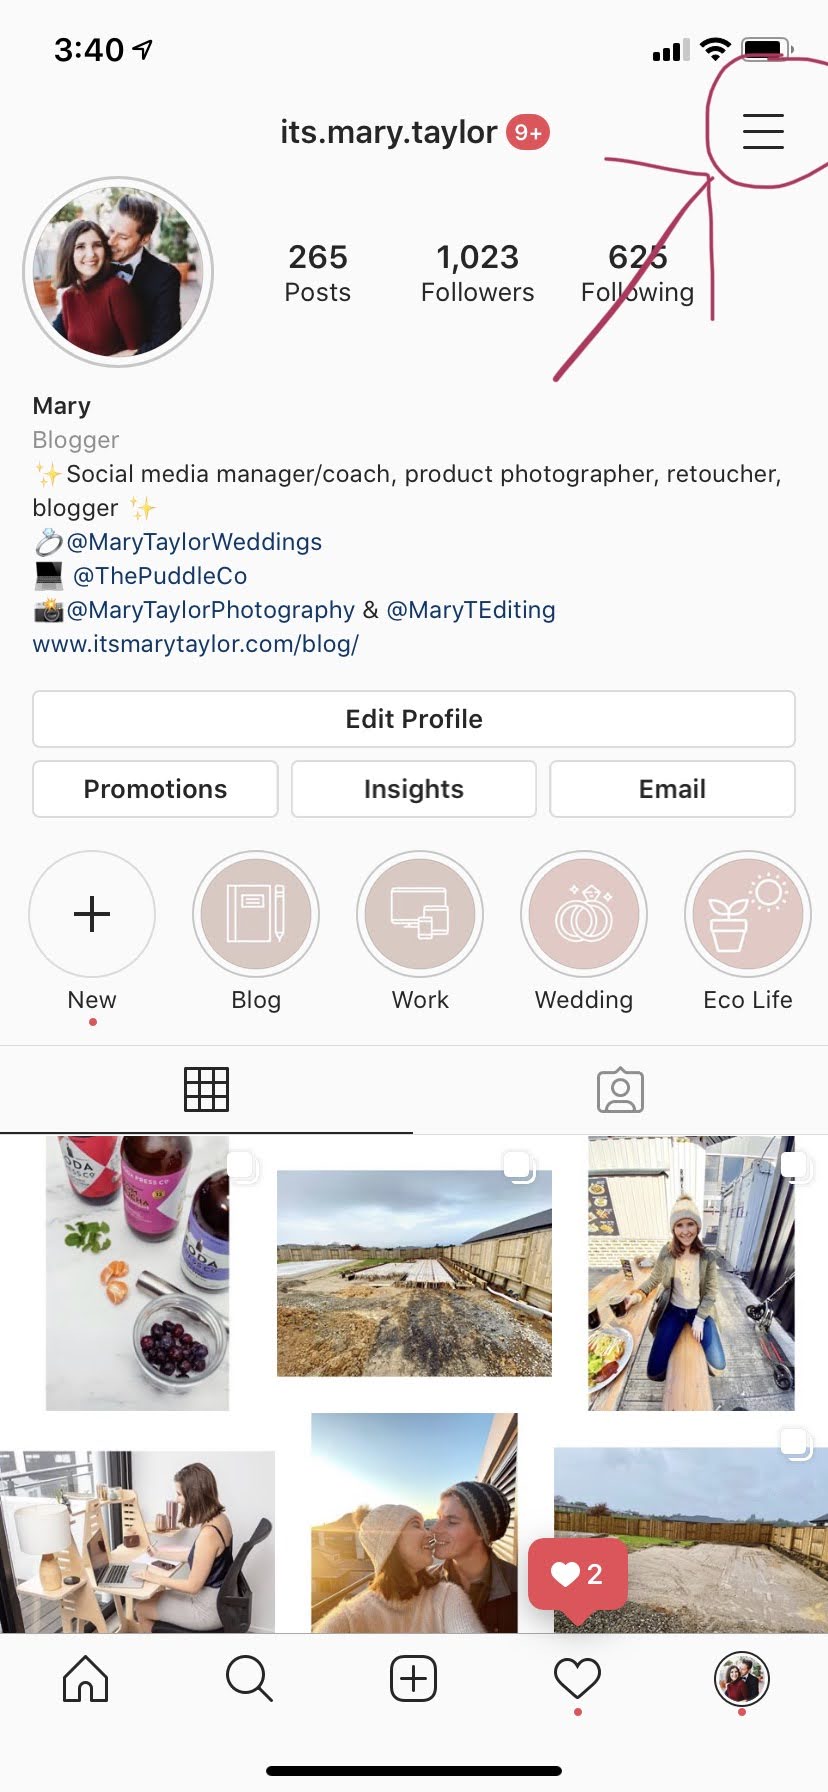
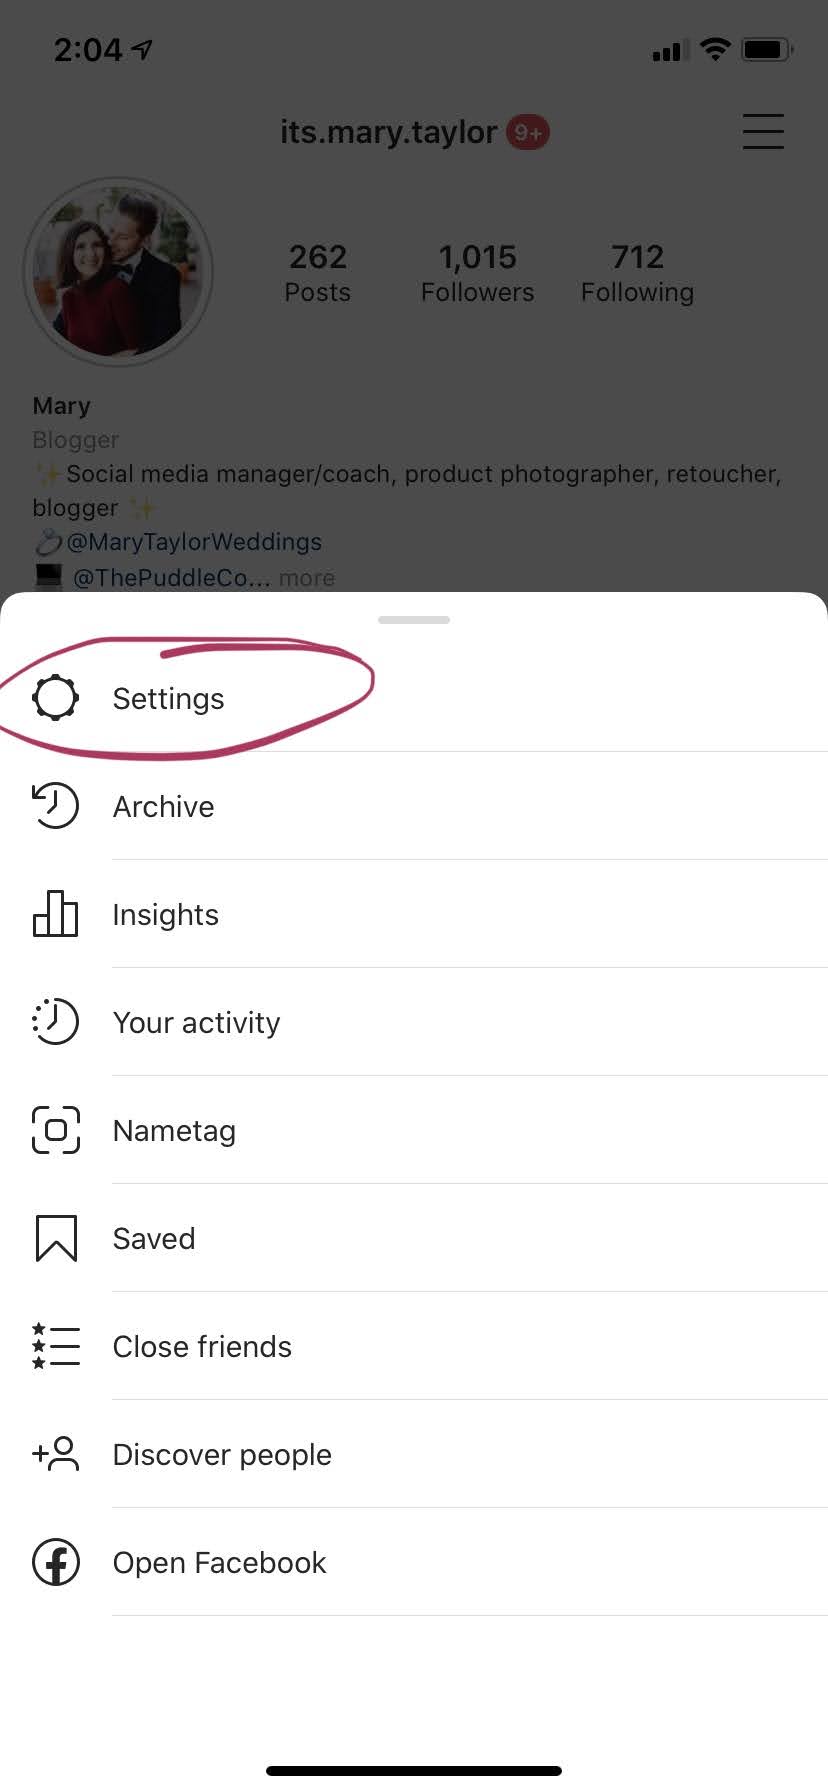
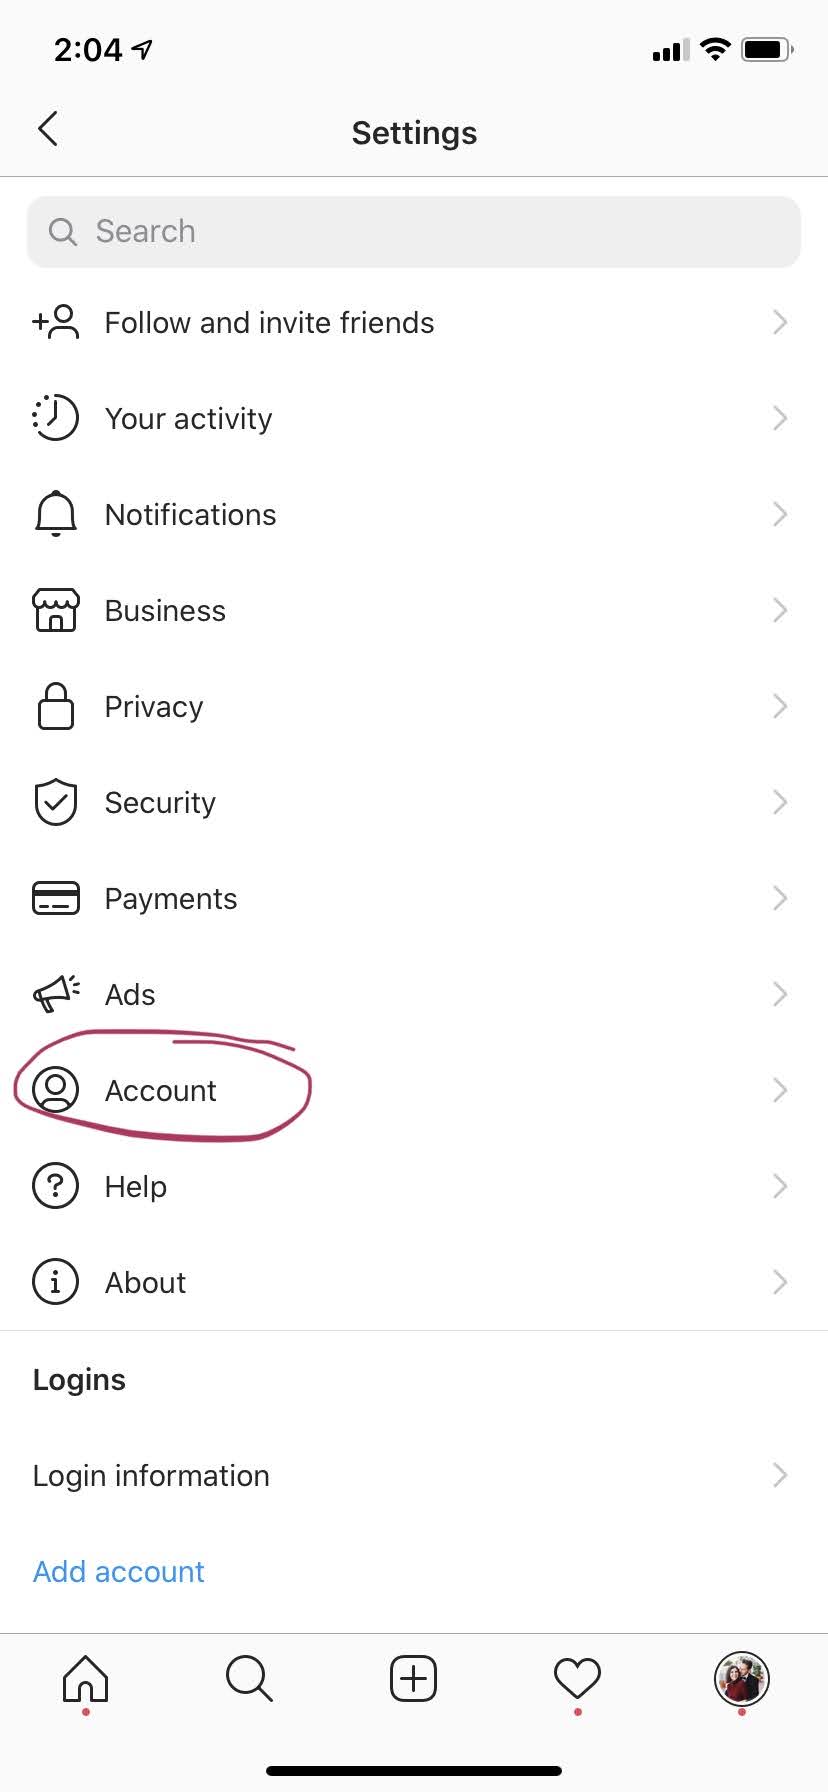
To change your personal Instagram account to a business account on Instagram, go to your profile, click the burger menu (the three lines in the top right-hand corner) if you’re on a mobile device. Then, click settings.
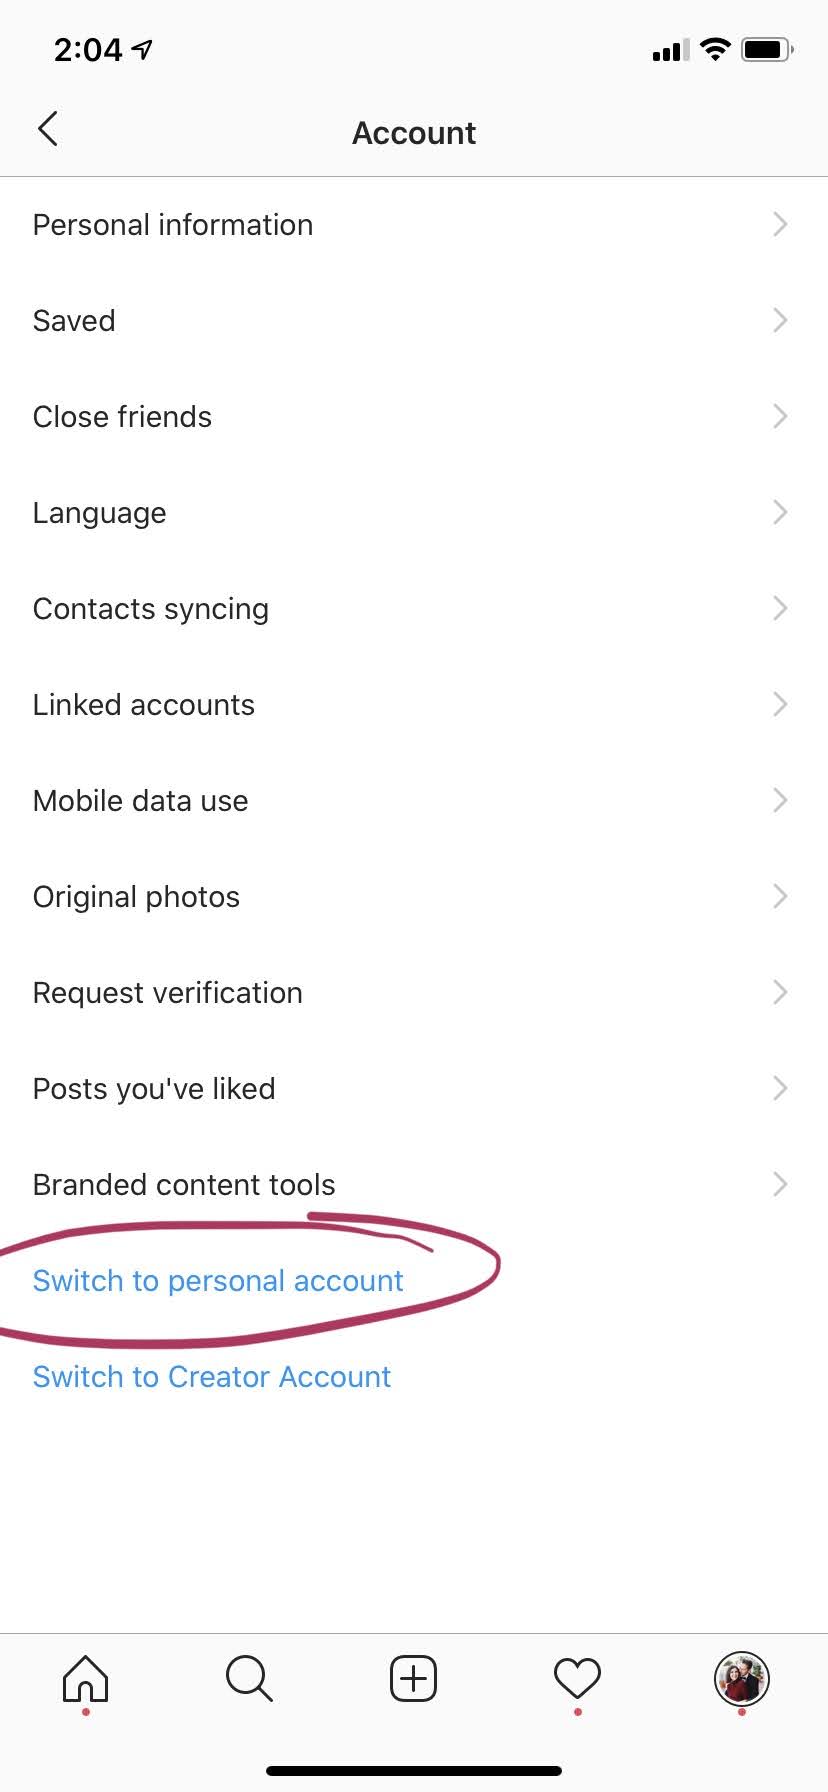
Next, click account, and then at the bottom you’ll see “switch to professional account,” then choose business. Since I already have a business account, it says “switch to personal account” but this will be replaced with “professional account” if you have a personal account.
Instagram says, “If you’d like, you can follow the steps to connect your business account to a Facebook Page associated with your business. This step is optional, and will make it easier to use all of the features available for businesses across the Facebook family of apps. At this time, only one Facebook Page can be connected to your business account.”
I hope this helped you learn more about the differences between a creator account and a business account on Instagram and how you can get your business account set up. If you’re not already subscribed to our mailing list, be sure to sign-up for more free social media tips and tricks delivered directly to your inbox each month. You can sign up using the form below.
If you enjoyed reading this and would like more information on home, lifestyle, advice, tips, tricks, and more, follow me on Instagram @Its.Mary.Taylor and on Facebook at Mary Taylor! I can’t wait to see you there!
In general, dry July means you go alcohol free for the entire month of July. In New Zealand, Dry July is a fundraiser that challenges you to go alcohol-free and raise funds for New Zealanders affected by cancer.
And, what’s a mocktail?
A mocktail is a “non-alcoholic mixed drink is a cocktail-style beverage made without alcoholic ingredients.”
As an Amazon associate, I may earn from qualifying purchases. However, I cannot see who purchases what.
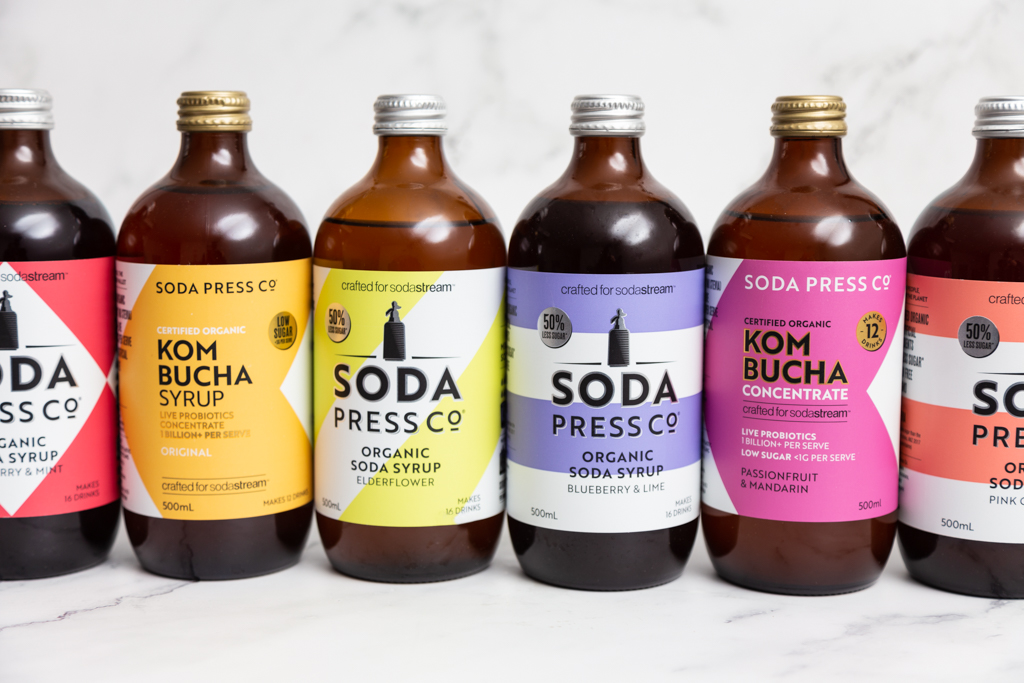
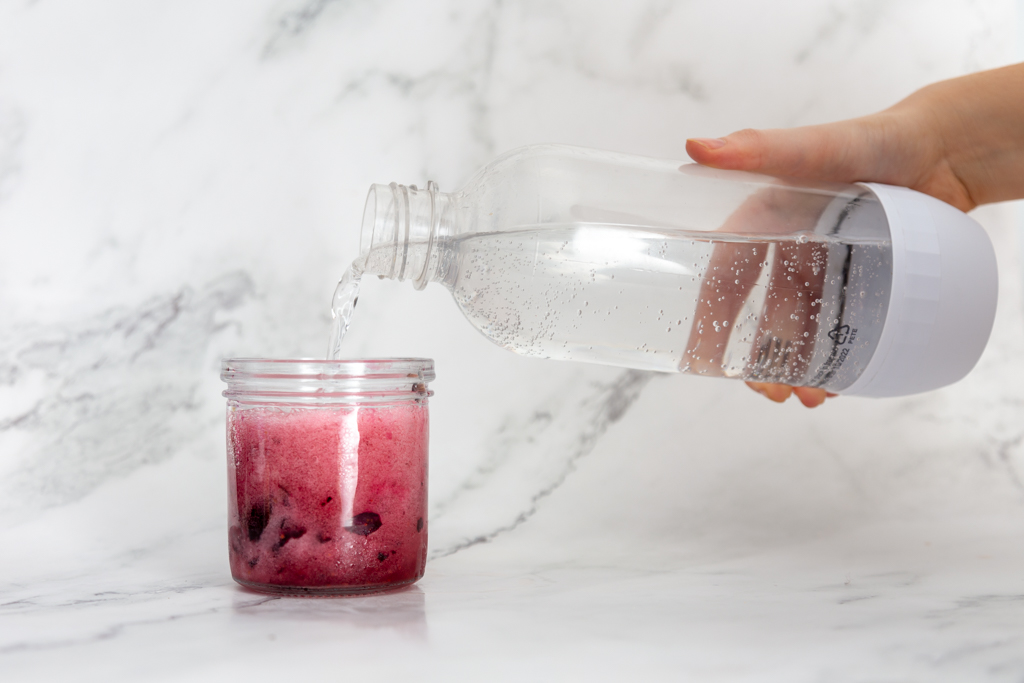
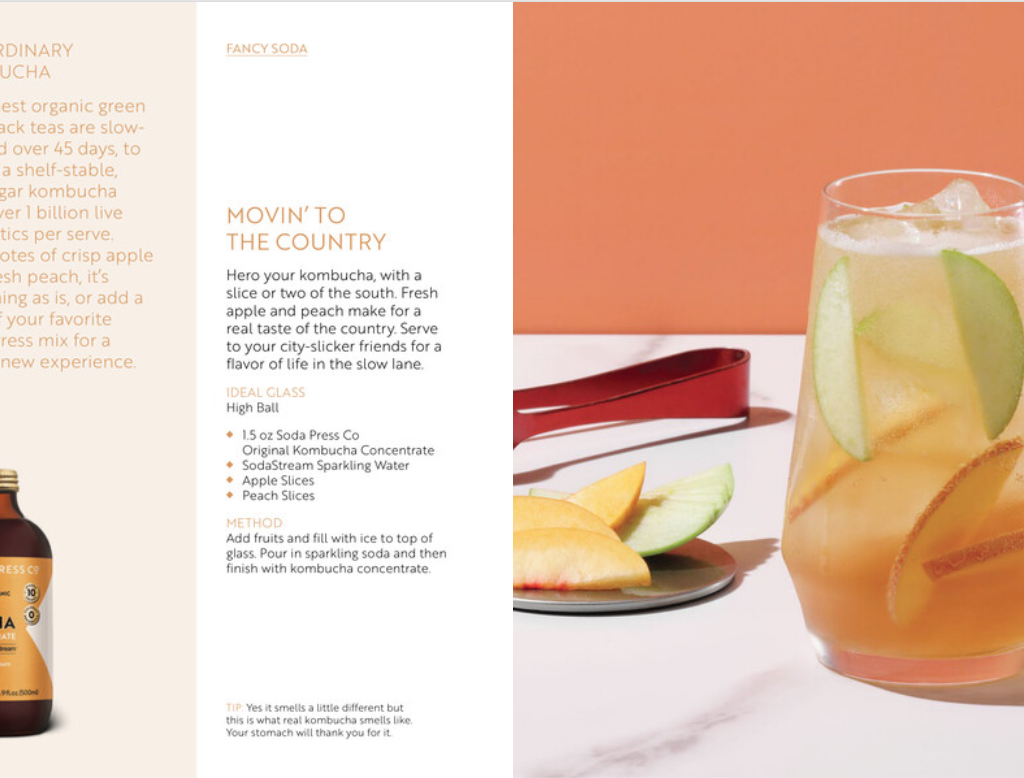
For this Dry July, I thought I would come up with some fun mocktail ideas (and hey, if you’re reading this and it’s not Dry July anymore, feel free to turn these into cocktails instead). I’ve partnered up with the Soda Press Co. to bring you the yummiest, healthiest, and freshest mocktail recipes! Throughout my recipes, I used a SodaStream for our sparkling water. You can purchase your own SodaStream here. If you’re US based and want to purchase Soda Press syrups and concentrates, you can do so here. Check out my full list of cooking and drinks favorites here.
I made three mocktails: a blueberry & lime mocktail (inspired by a blueberry margarita), a passionfruit & mandarin mocktail (inspired by a fruity sangria), and a raspberry & mint mocktail (inspired by a berry mojito). I’ve also included a few extra recipes from Soda Press Co. (you can grab their free recipe book directly on their website).
Blueberry & Lime Margarita Inspired Mocktail:
Ingredients
Fresh or frozen blueberries
Fresh lime or lime essential oil
Soda Press Co Blueberry & Lime Syrup
Sparkling water
Jalapeños* (optional)
Blueberry simple syrup* (optional)
Tequila* (for a cocktail not a mocktail)
Instructions
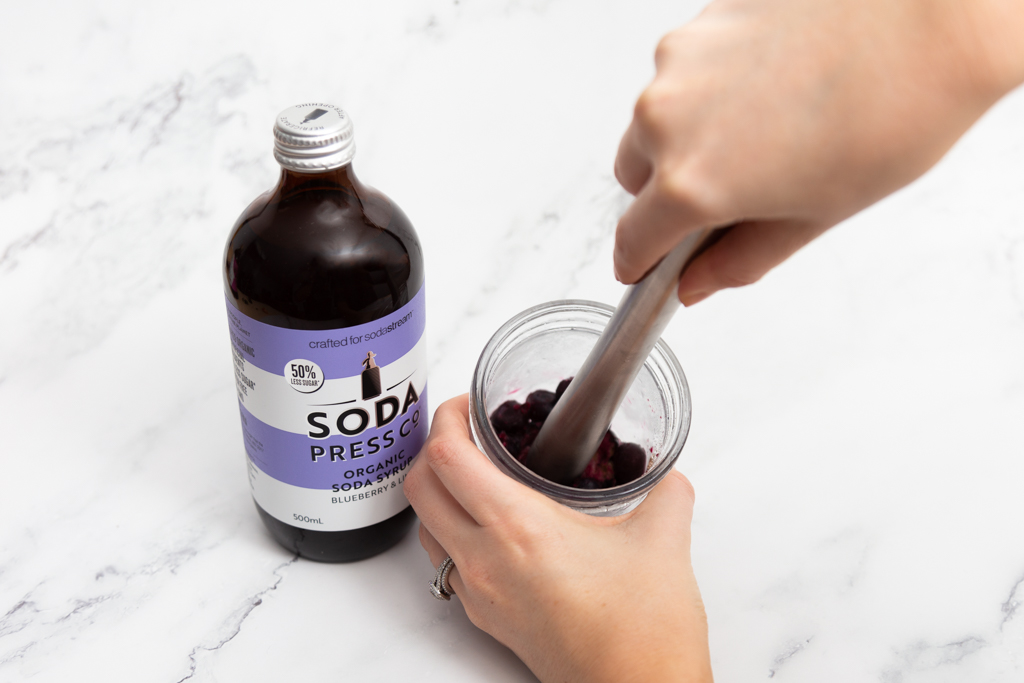
1. Muddle blueberries with lime juice (if you’re making a cocktail instead of a mocktail, now is when you should add in your tequila)
If you don’t have a cocktail shaker, you can even use a jar! These ones are perfect for single serving drinks.
If you want to sweeten it up or take things to the next level, add a homemade blueberry syrup with fresh or frozen blueberries and sugar. Add a little bit of water if needed. Reduce this on a stove until you have a thick syrup consistency.
2. Want to make it spicy? Add in a jalapeño (either whole, chopped, or muddled with the blueberries)! This mimics a blueberry jalapeño margarita.
3. Depending if you prefer the “pulp” and skins or not, you can strain out the liquid and throwaway the skins. Note that there may not be very much liquid if you’re not adding any tequila.
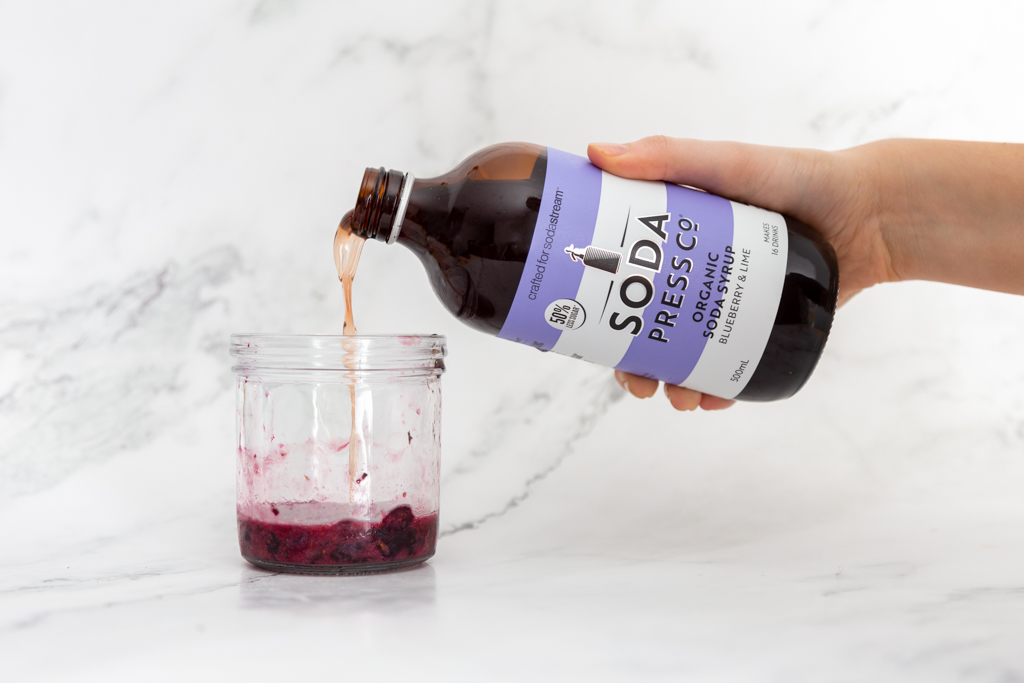
4. Fill your glass with ice and pour your muddled fruit, Soda Press Co syrup, and your sparkling water into the glass.
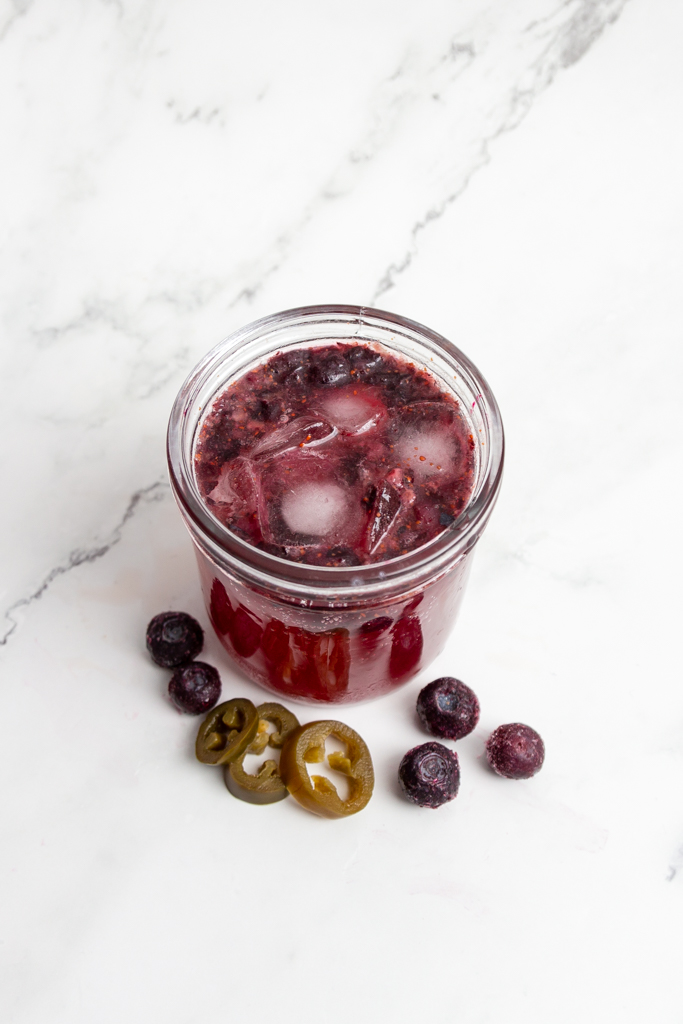
5. Top with blueberries if you choose and enjoy!
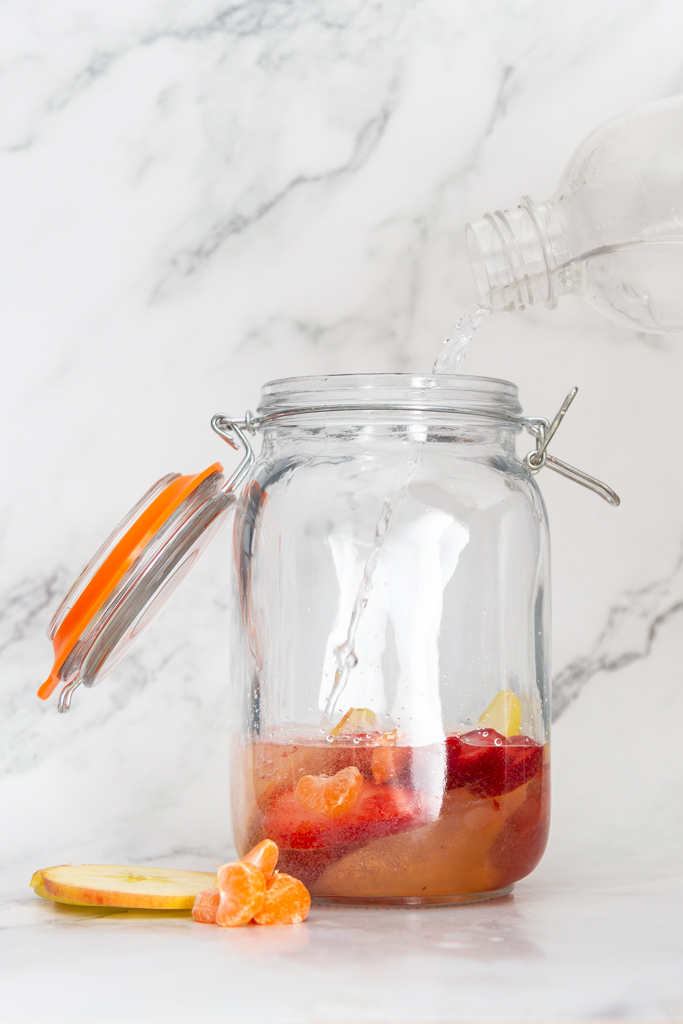
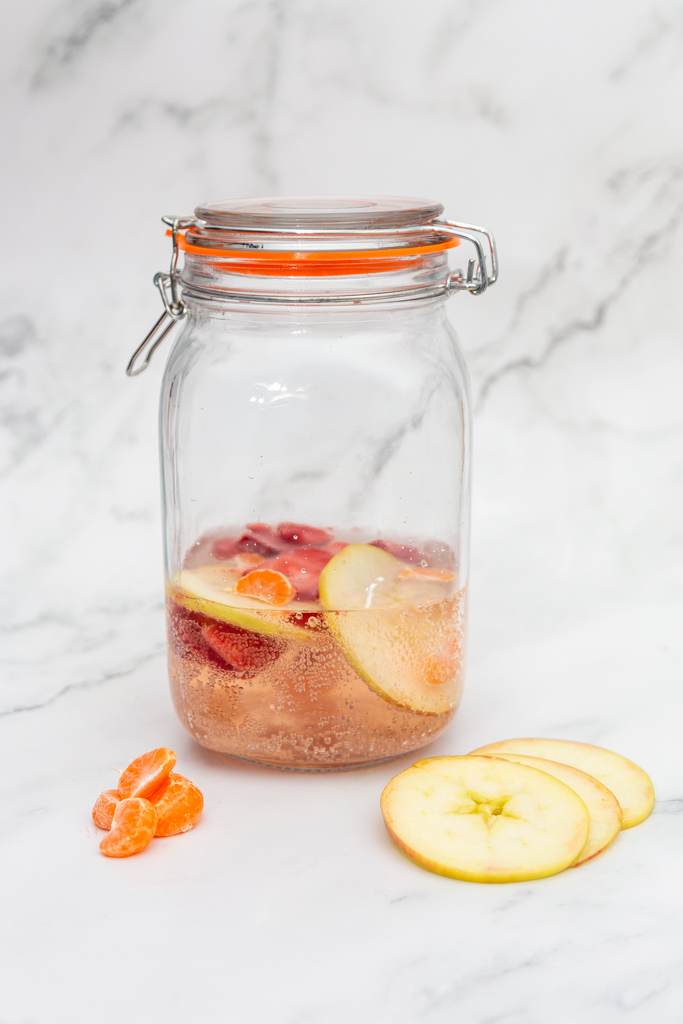
Alcohol-Free Passionfruit & Mandarin Sangria
Ingredients
Soda Press Co passionfruit & mandarin kombucha concentrate
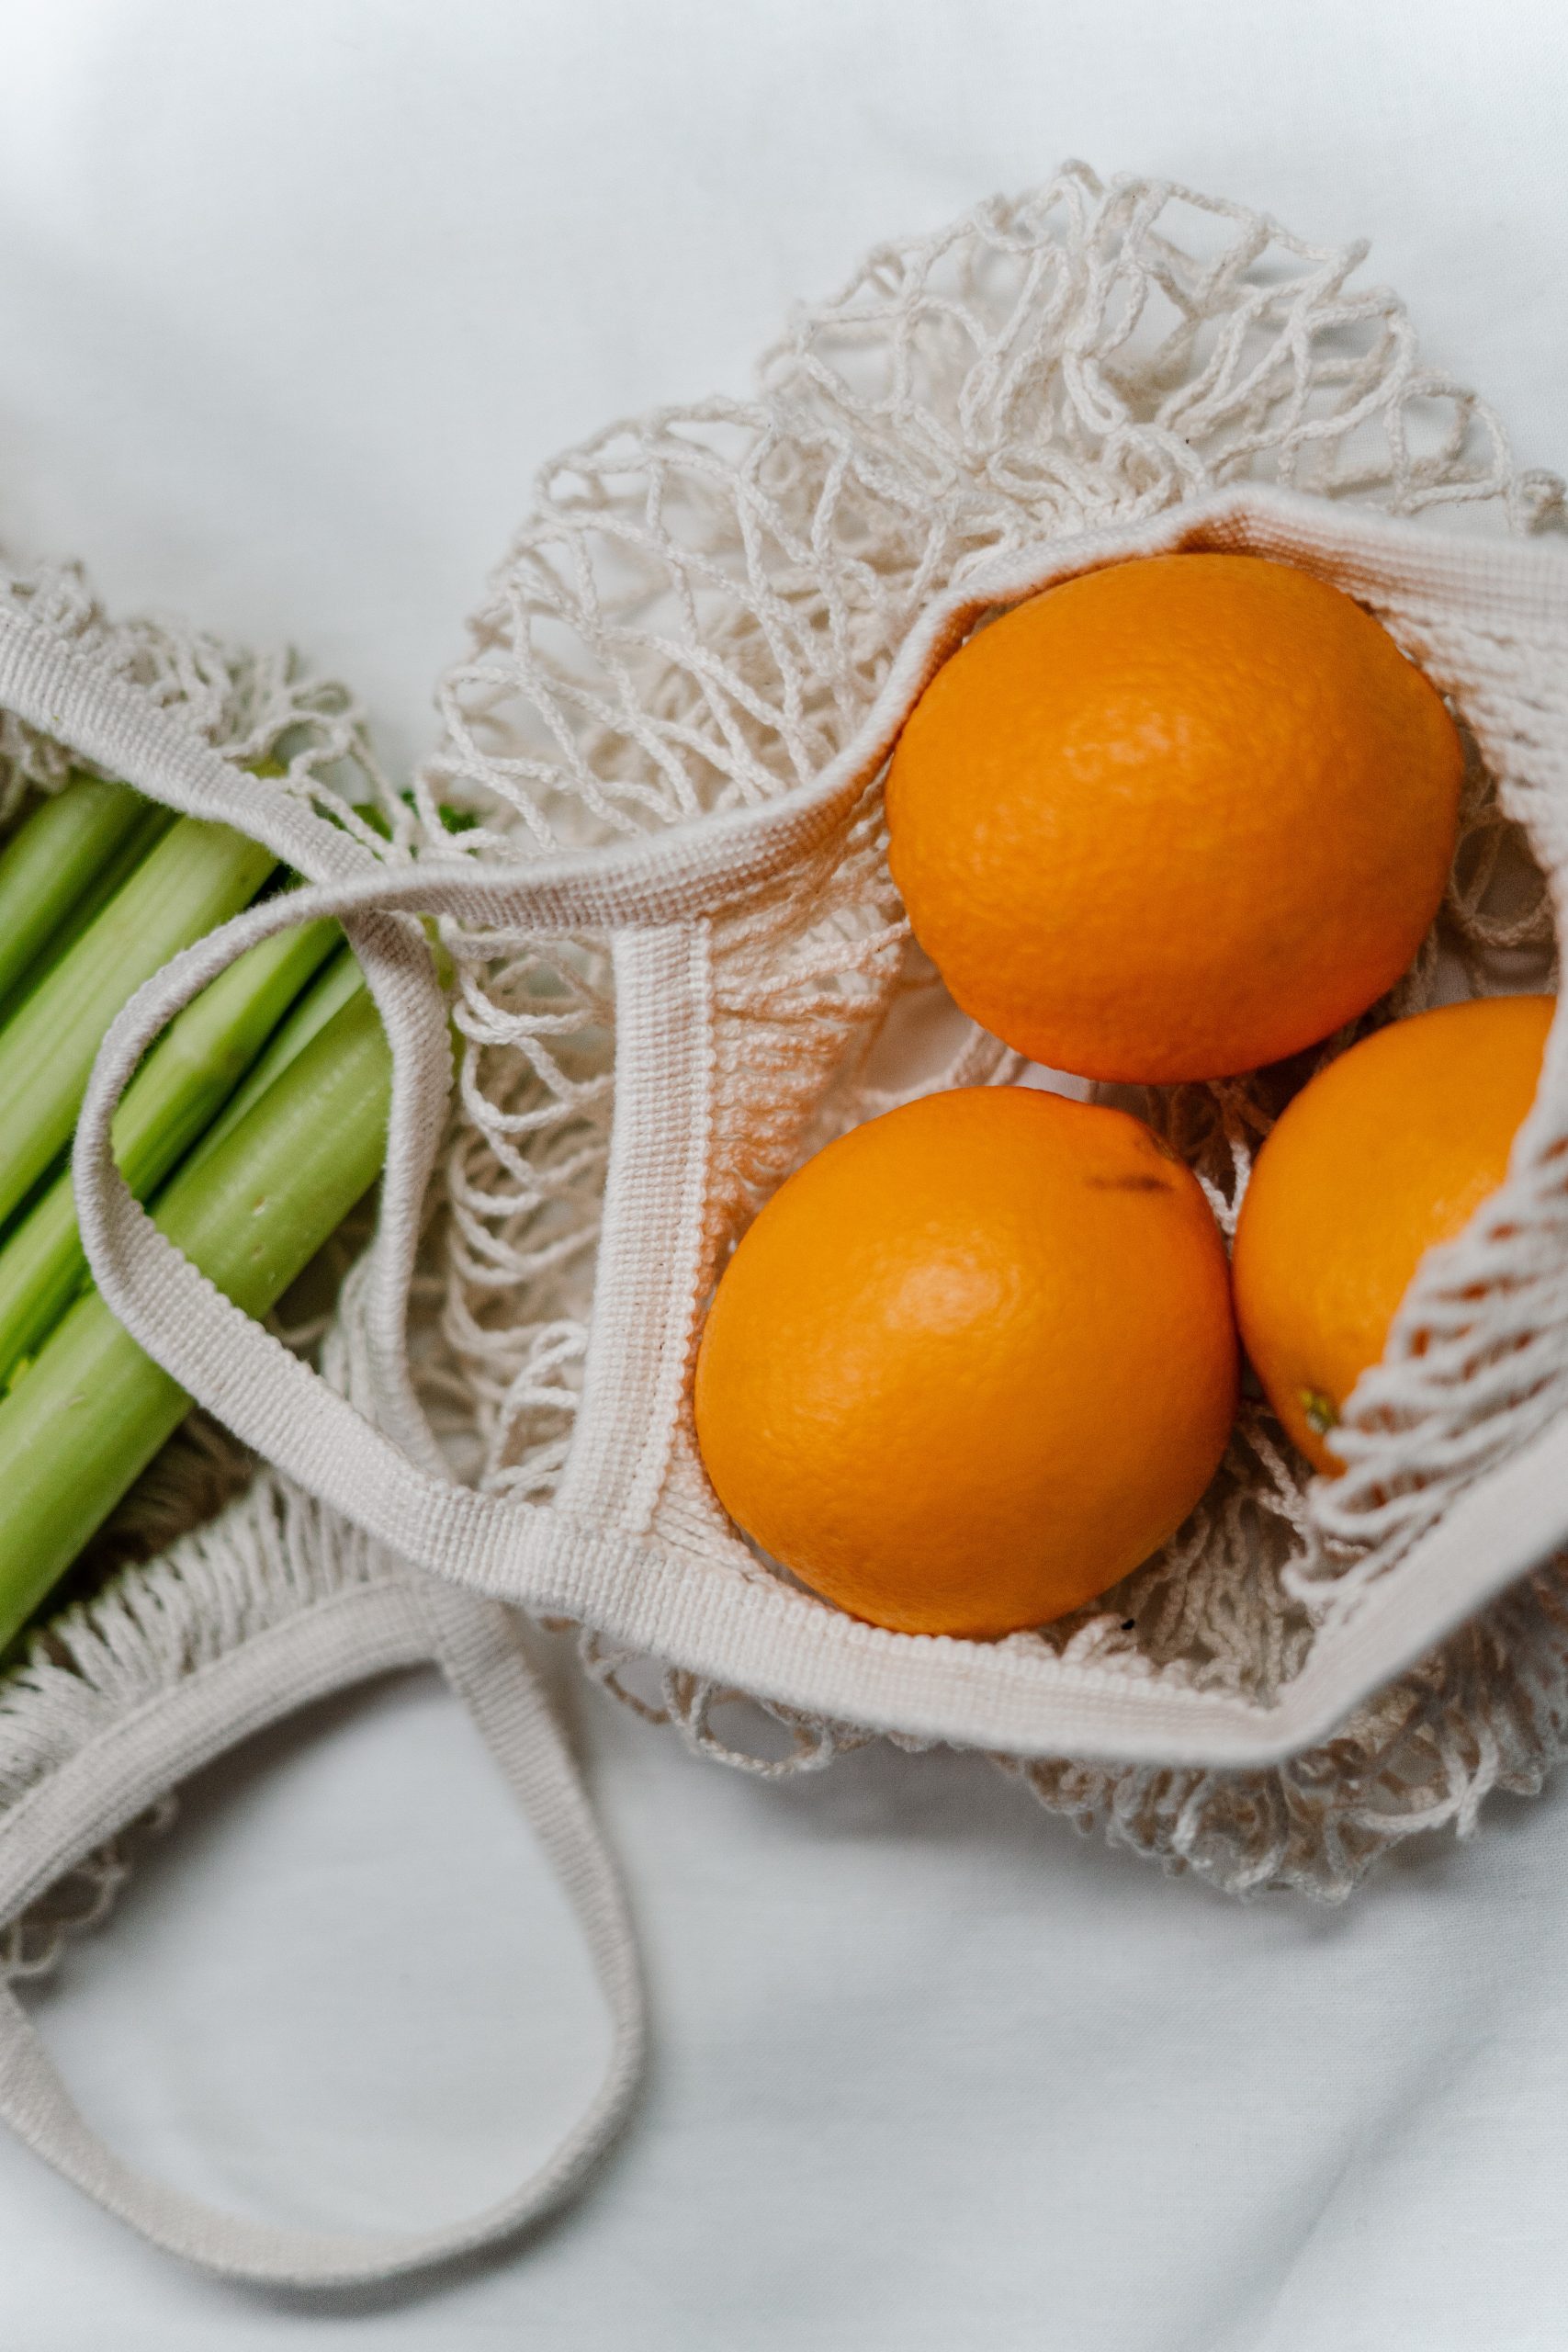
Fresh fruit (oranges, passionfruit, berries, cherries, pineapple, lemons, etc)
Sparkling water (only if making mocktail)
Mint* (optional)
Wine (white wine or rose recommended) or bubbly wine of choice* (to make a true sangria instead of an alcohol-free sangria)
Add in triple sec* (for cocktail not mocktail)
Instructions
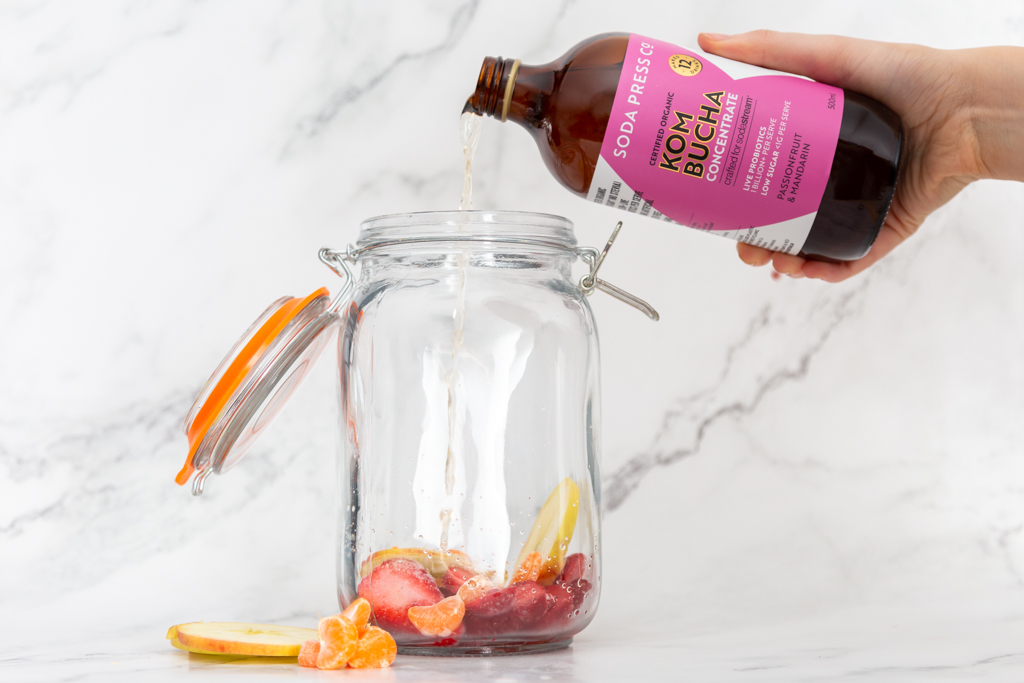
1. Cut your fresh fruit into small pieces (if applicable) and place in a jar.
2. Add desired amount of Soda Press Co passionfruit & mandarin kombucha concentrate.
3. Add in sparkling water or wine/bubbly wine and triple sec.
4. Add sugar or simple syrup if needed.
5. To meld the flavors together (specifically if using alcohol), let your creation sit in the fridge for a minimum of 30 mins.
6. Pour in glass, top with mint, and enjoy!
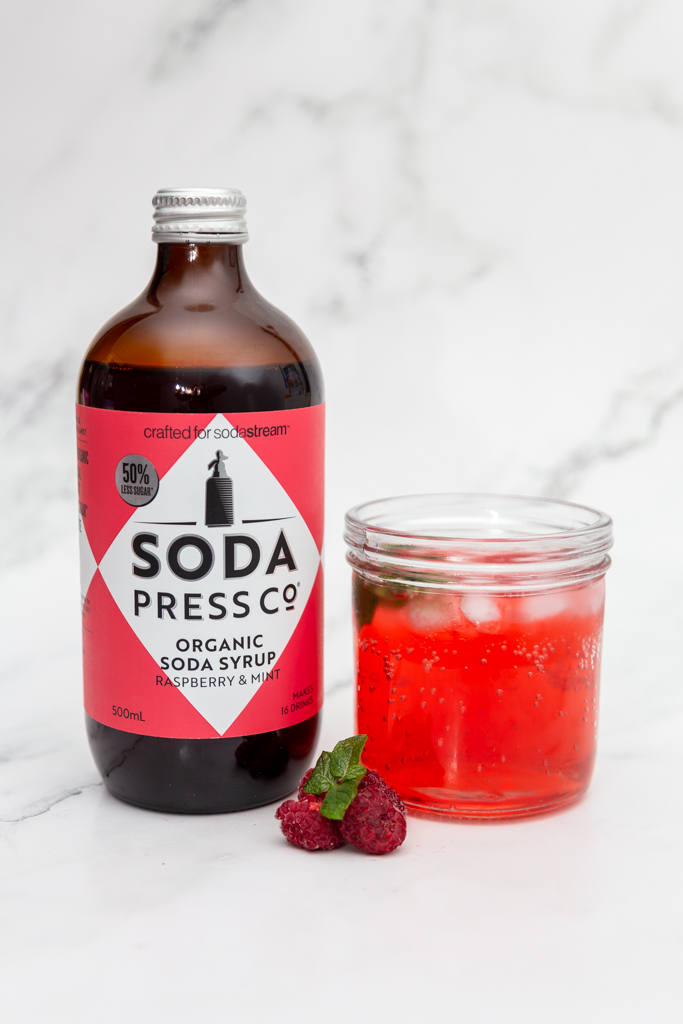
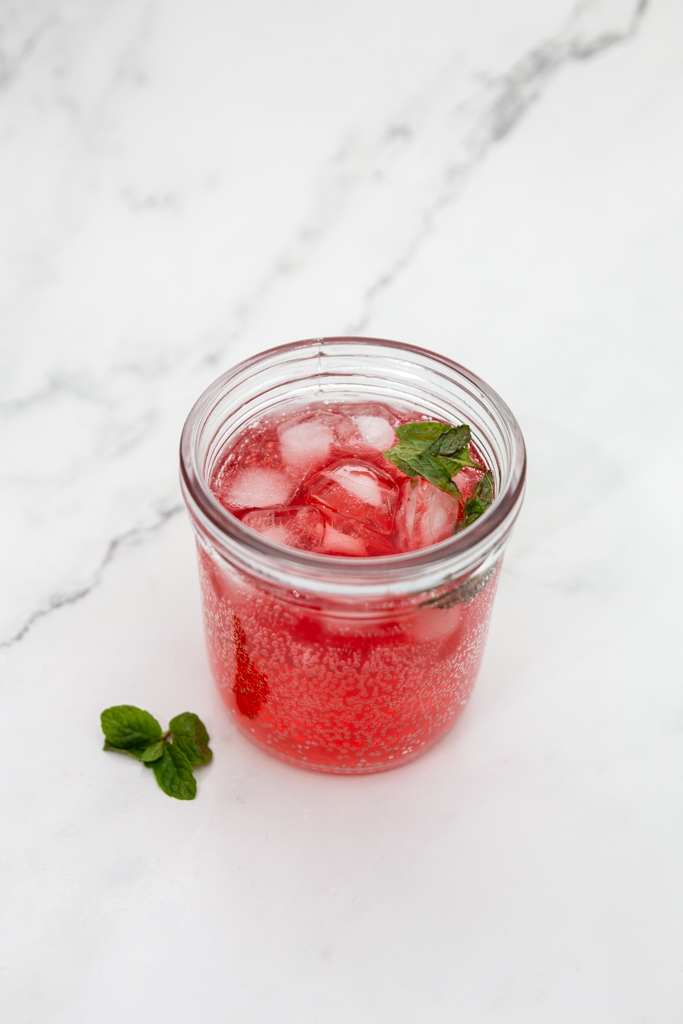
Raspberry & Mint Mojito Mocktail:
Ingredients
Soda Press Co raspberry & mint syrup
Fresh mint
Sparkling water
Fresh or frozen raspberries
Lime juice or lime essential oil
Simple syrup* (optional if you feel it needs a bit more sweetness)
White rum* (if making a cocktail not a mocktail)
Instructions
1. Muddle fresh mint and raspberries with a dash of water. If you’re making a cocktail instead of a mocktail, add white rum instead of water.
2. Strain your mint and raspberries (if you choose) into your glass.
3. Put a dash of Soda Press Co raspberry & mint syrup.
4. Mix well and shake well!
5. Fill the glass with ice and top with sparkling water.
6. Add fresh mint and raspberries if you choose.
A few extra recipes:
“WHERE MY ROSEMARY GOES” Pink Grapefruit & Rosemary Mocktail:
Soda Press Co Pink Grapefruit Soda Syrup
Sparkling Water
Pink Grapefruit Slices
Sprig of Rosemary
“Green Thumb” Elderflower & Cucumber Mocktail:
Soda Press Co Elderflower Soda Syrup
Sparkling Water
Lemon Juice
Cucumber Slither Garnish
“Gran’s Remedy” Kombucha & Apple Mocktail:
Soda Press Co Elderflower Soda Syrup
Soda Press Co original kombucha
Lemon Juice
Sparkling Water
Half a Granny Smith Apple (chopped)
Apple Fan Garnish
If you make any of these recipes, please tag me and Soda Press Co on Facebook or Instagram so we can see (and share) your creations! You can find Soda Press Co on Facebook here and Instagram here.
If you enjoyed reading this and would like more information on home, lifestyle, advice, tips, tricks, and more, follow me on Instagram @Its.Mary.Taylor and on Facebook at Mary Taylor! You can find all my recipes on Pinterest here. I can’t wait to see you there!
If you’re looking for your own blog post or professional images check out my services here. And don’t forget to sign up to my mailing list here to get monthly tips, tricks, and deals.
Hello fellow adventure seeker, inspired entrepreneur, and lover of life! I am so glad you found your way here. I’m Mary – a social media manager, blogger, and content creator (that means I get to do fun things like photography, retouching, graphic creations, and so much more). If it has to do with business, I want to talk about it! I love helping other entrepreneurs to learn more about networking and social media. I have this deep rooted belief that everyone should be doing what they love. I love helping other entrepreneurs experience that by eliminating the things they don’t enjoy doing (which I actually DO enjoy doing).
6. Sign up to our email list for FREE monthly social media tips and tricks AND a free monthly content calendar with post ideas & hashtags!
Receive FREE social media tips & content calendars each month!
If you enjoyed reading this and would like more information on home, lifestyle, advice, tips, tricks, and more, follow me on Instagram @Its.Mary.Taylor and on Facebook at Mary Taylor! I can’t wait to see you there!
An Instagram audit is when I review your Instagram account and give you suggestions. For those that don’t know me, I am Mary, a social media manager, blogger, and content creator (that means I get to do everything from photography and retouching to graphic creation, copywriting, and more). I even have a full Instagram course to get you started with Instagram. This matches perfectly with your audit.
But why should you get an Instagram audit?
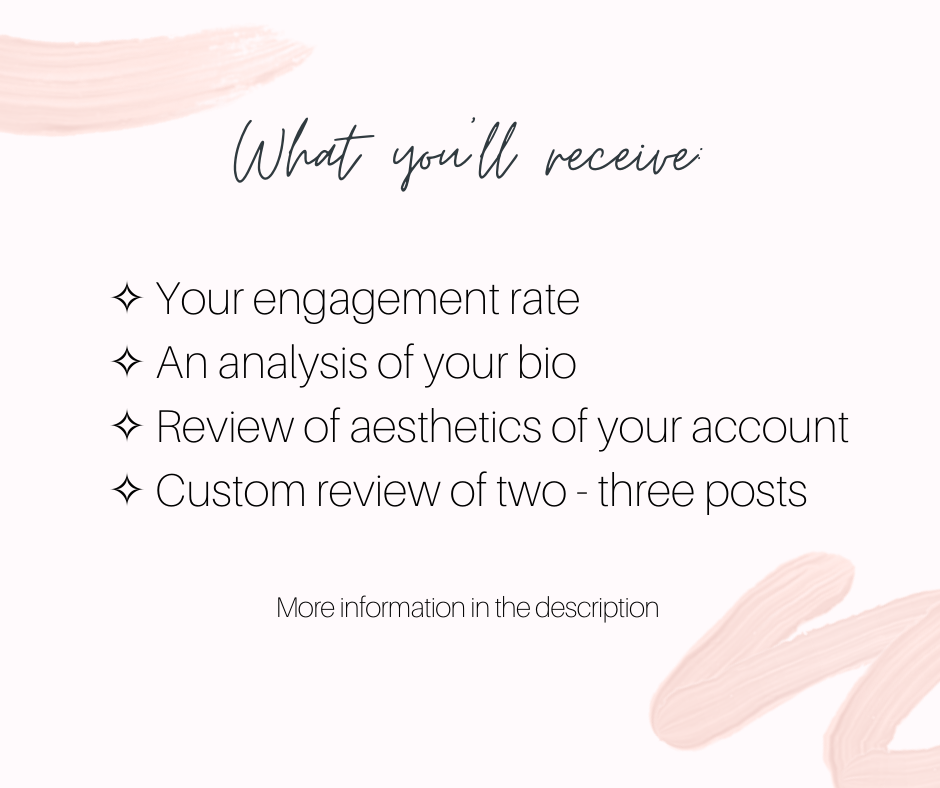
An Instagram audit can help you to improve your account without the need for a full social media manager. It gives you an inside, unbiased, and professional opinion of your Instagram account. Check below to see what’s included in an Instagram audit done performed by me.
✧ Your engagement rate for your account as well as what this is/more information ✧ An analysis of your bio (what you’re doing well and what needs to be improved upon as well as suggestions) ✧ Review of aesthetics of your account – what to improve/what looks good (profile picture, grid design, images, highlight covers, etc). ✧ Custom review of two to three Instagram posts (hashtag usage, caption, image, etc) – recommendations, improvements, what you’re doing well, etc.
Did you know I also offer social media management services as well as other business templates and worksheets on Etsy? Everything from identifying your ideal client to learning to how to grow your Instagram account organically.
If you enjoyed reading this and would like more information on home, lifestyle, advice, tips, tricks, and more, follow me on Instagram @Its.Mary.Taylor and on Facebook at Mary Taylor! I can’t wait to see you there!
If you’re having trouble reaching your ideal client it might be because you haven’t yet identified who they are. It’s important to dig deep into who they are so you can analyze where they are and where you can reach them through advertising. They say potential customers need to see your product or service as many as 7+ times in order to actually click purchase.
Why should you identify your ideal client? Our goal in identifying your ideal customer is to spend less time advertising in places they wouldn’t be. We want to spend more time focusing on how they WILL see your advertisement, post, or product. The more clarity you have surrounding your potential clients, customers, and followers, the more effective your marketing can be.
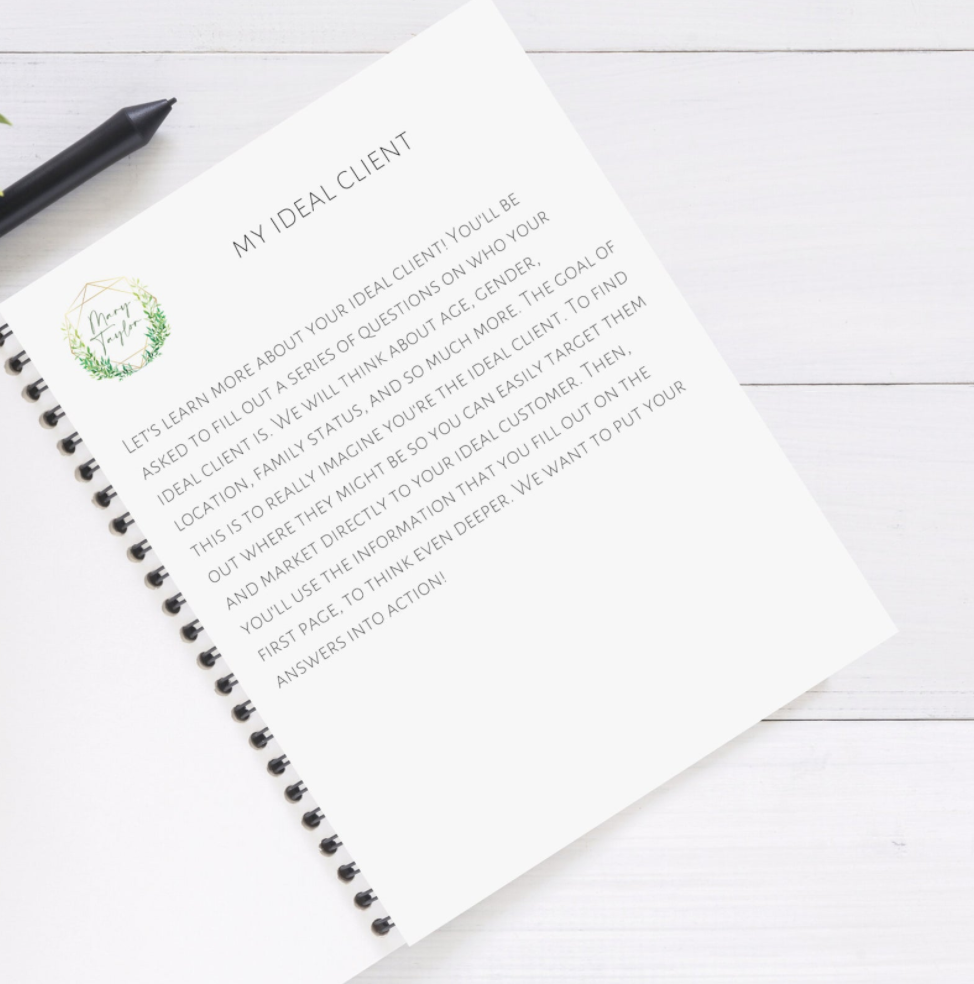
Click on this image for the link to the worksheet
This is why I created my ideal client worksheet. You’ll learn more about your ideal client by filling out a series of questions on who your ideal client is. We will think about age, gender, location, family status, and so much more. The goal of this is to really imagine you’re the ideal client. To find out where they might be so you can easily target them and market directly to your ideal customer. Then, you’ll use the information that you fill out on the first page, to think even deeper. We want to put your answers into action!
What else have you used to identify your ideal client? Do you have more questions? You can find me on Instagram and on Facebook!
If you enjoyed reading this and would like more information on home, lifestyle, advice, tips, tricks, and more, follow me on Instagram @Its.Mary.Taylor and on Facebook at Mary Taylor! I can’t wait to see you there!
Did you know that having an eco-friendly home can actually be easy? You might think of eco-friendly as more expensive or even more difficult but it doesn’t have to be.
Here are some really easy and inexpensive eco-friendly swaps that you can do at home:
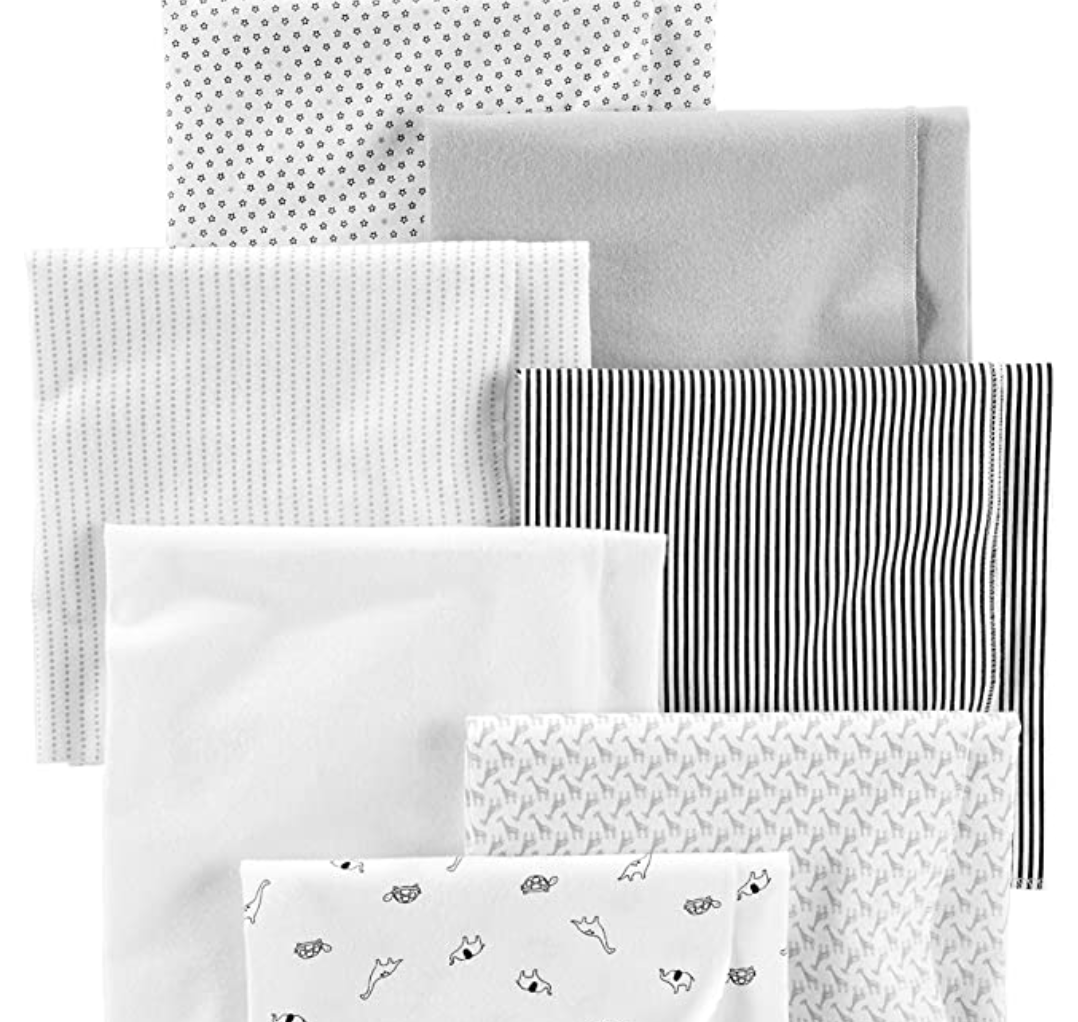
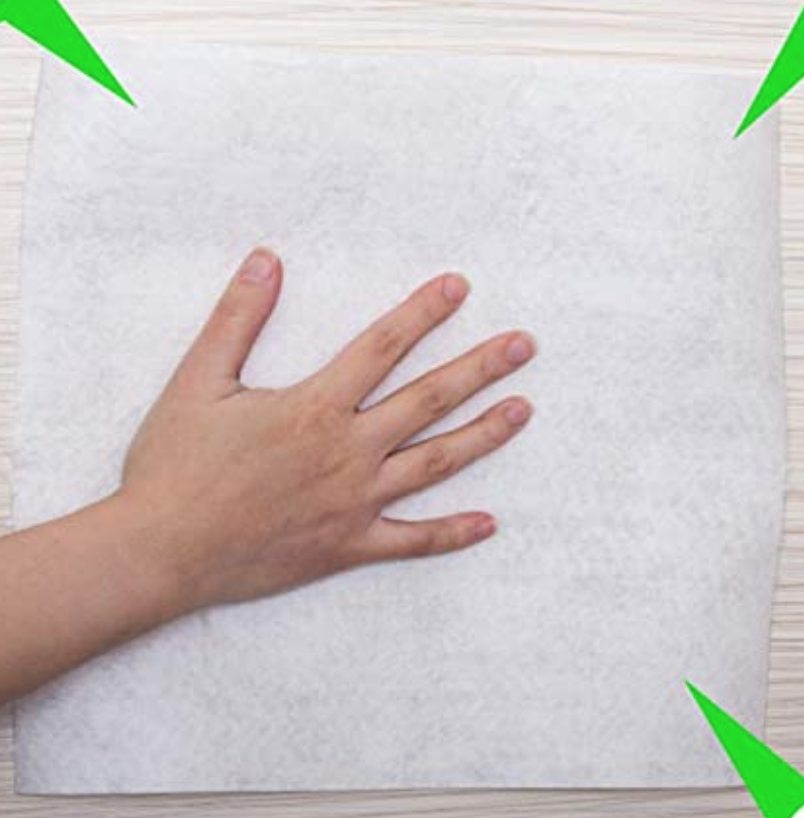
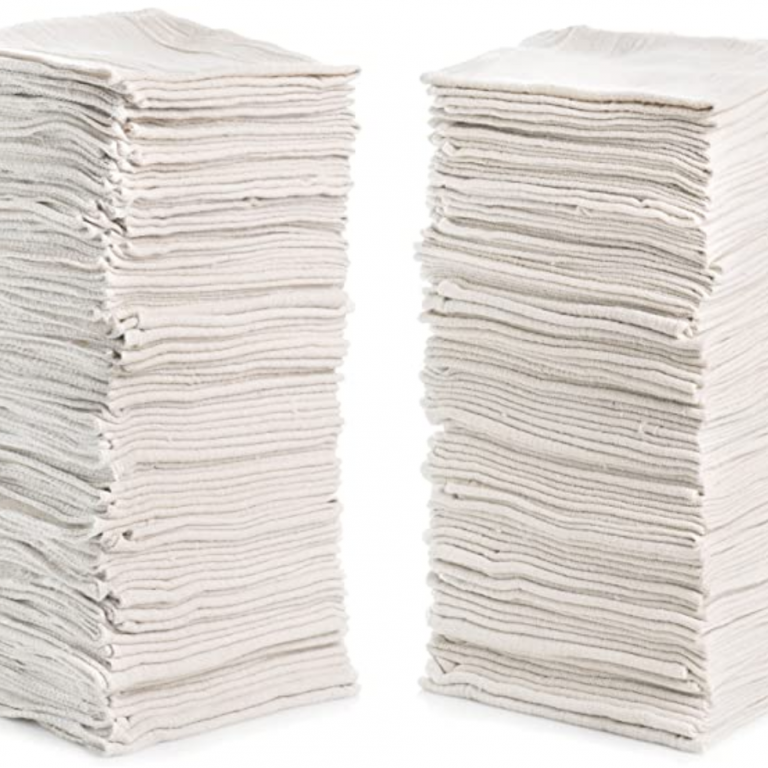
Swap out your paper towels for unpaper towels. Unpaper towels are just as they sound. There are so many ways to do this depending on your budget. The most favorite (but also most expensive) option would be to purpose pre-cut and pre-rolled unpaper towels (find here). But if you’re like me and can’t afford (or don’t want to spend) $x/paper towel, there are a few other options. These paper towels are actually recycled bamboo. They last a super long time and they’re easily rinsable with just soap and water in your sink. I love these because they look like real paper towels and they don’t need to go in the washing machine. My last suggestion if you want to use unpaper towels is to make your own. You can learn how to make your own here. Plus bonus tips on other things we use instead of paper products.
Flannelette blankets for DIY unpaper towels
Link to bamboo unpaper towels
Cheap reusable shop towels
Now that you’ve gotten rid of paper towels you should also replace napkins. You can find cheap and beautiful reusable napkins online. Then, just throw them in the wash with your other items.
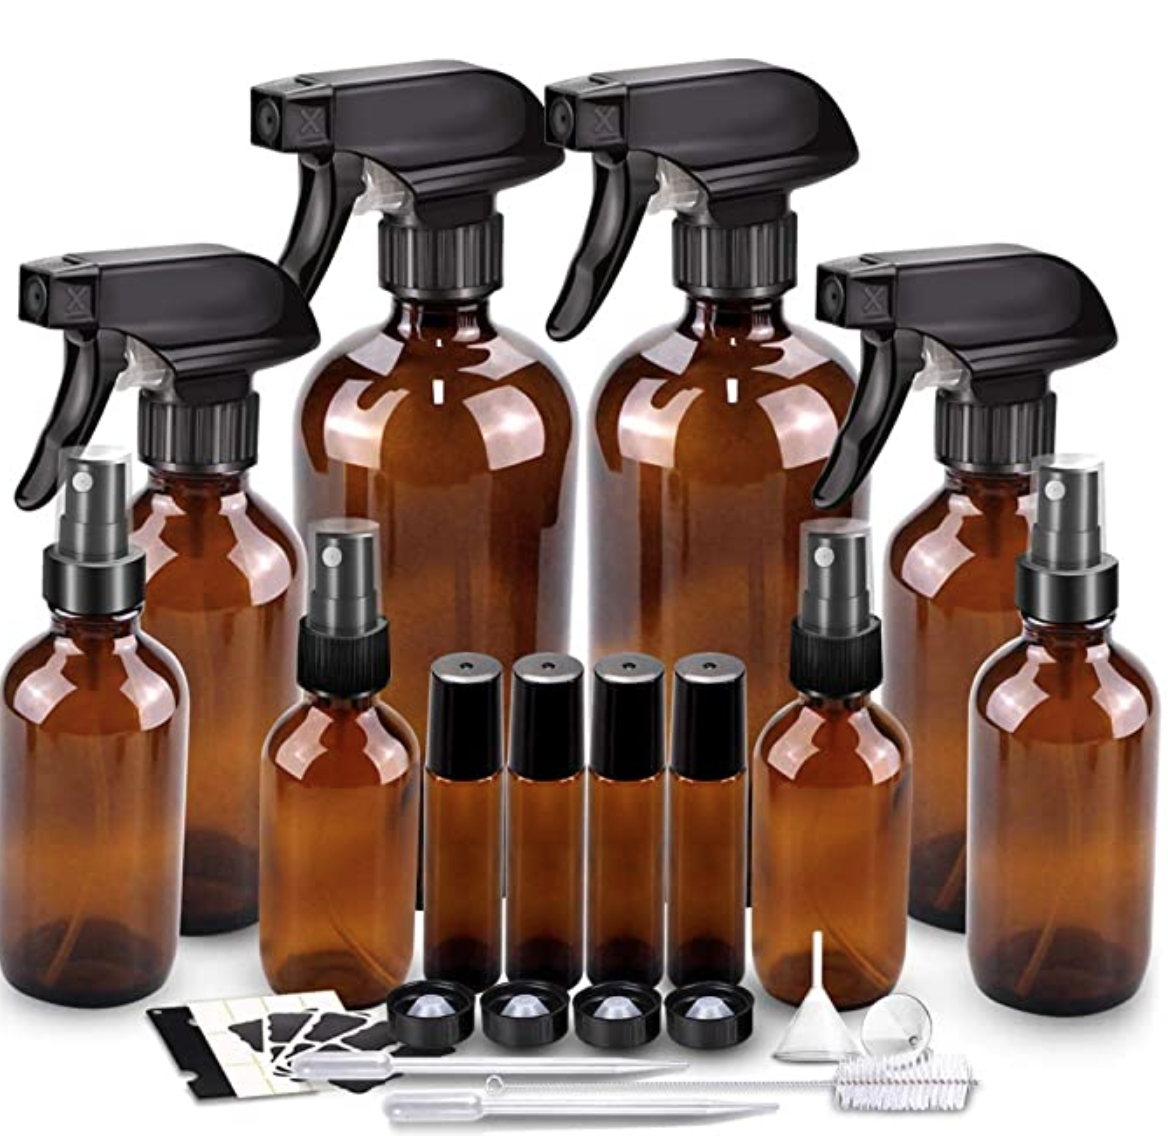
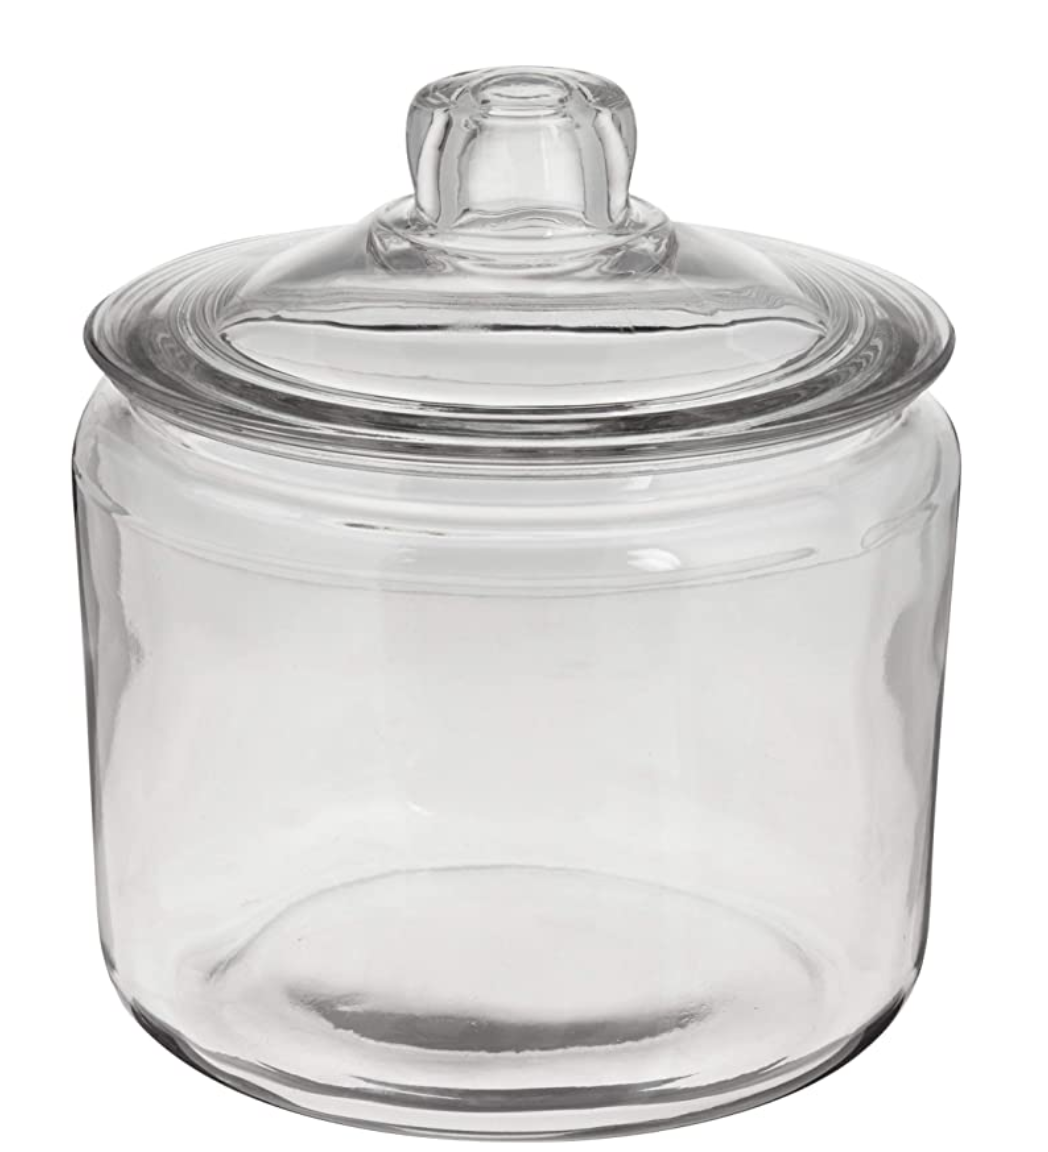
Cleaning products in plastic containers. Although you might be buying the eco-friendly cleaning sprays and cleaning products, they’re still usually in a plastic bottle. To save money and reduce waste (like throwing away the plastic bottles afterwards), you can make your own cleaning products and store them in glass containers. You’ll still need to purchase the ingredients to make the cleaning products but try to buy in bulk, refill your own containers at a bulk store, or buy powders in recycled cardboard boxes. Check out this blog for a DIY all-purpose citrus spray cleaner. See and click on the images below to check out a couple of great glass container options.
Link to glass containers
Link to container pictured (great for laundry powder)
Straws! You definitely have seen this one before but I thought I would just throw it in anyways. Ditch the plastic and even paper straws and purchase reusable metal straws. You can find some here.
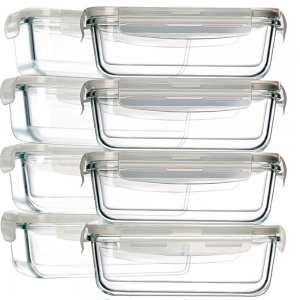
Going out to eat and usually bring home leftovers? Don’t forget to bring your glass watertight container to put your leftovers in. This way you don’t need to rely on the restaurant to provide a throwaway container that might not be recyclable.
Link to glass food containers
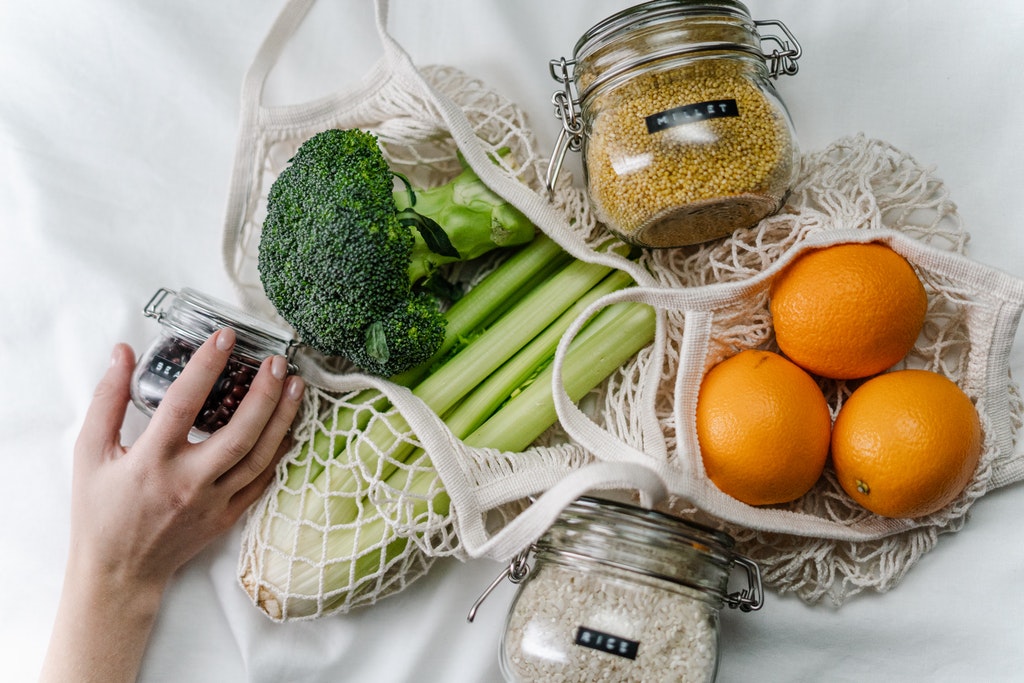
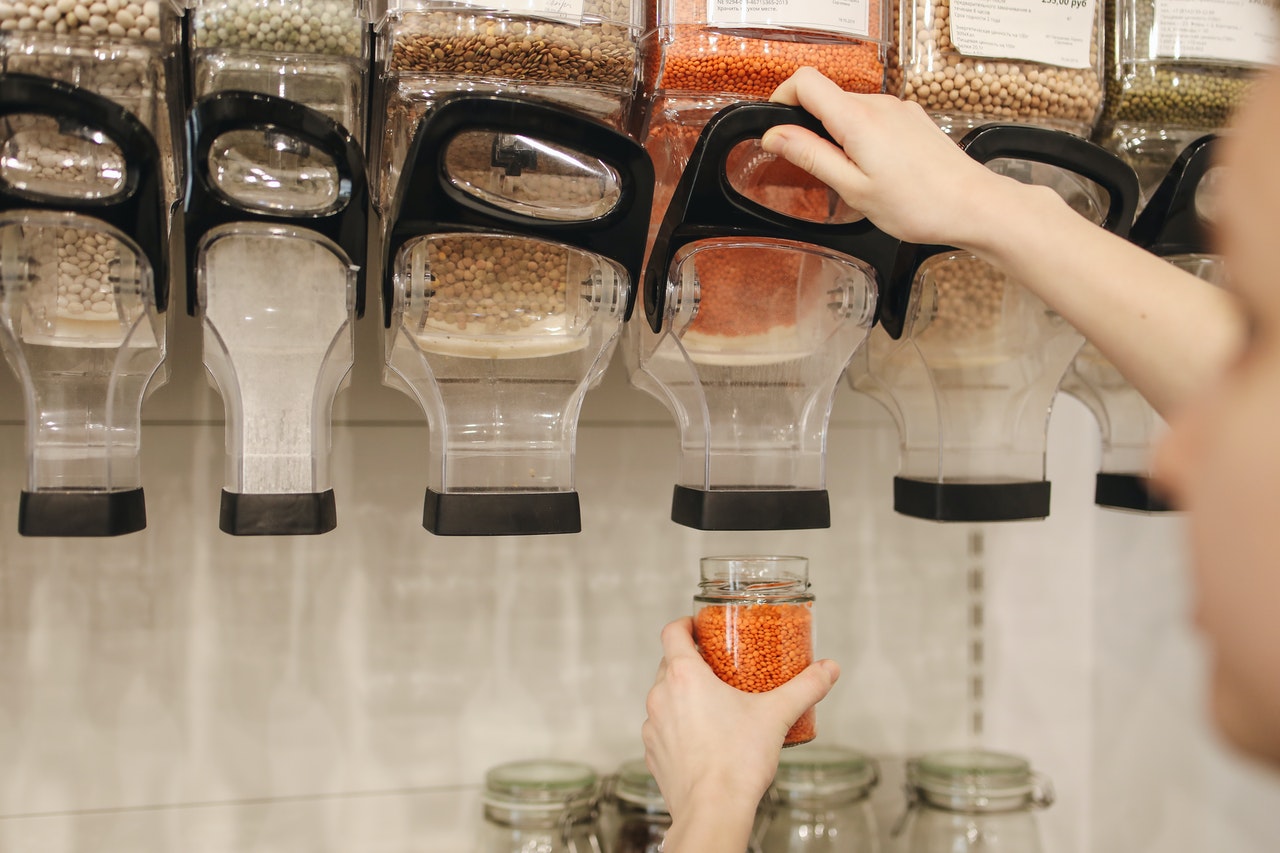
Buy in bulk & use your own containers! This doesn’t just go for cleaning products but also your food! Did you know that bulk stores often allow you to bring in your own containers such as jam jars? If you don’t have any reusable glass jars on hand or want an upgrace, check out a few of my favorite eco-friendly glass container options here.
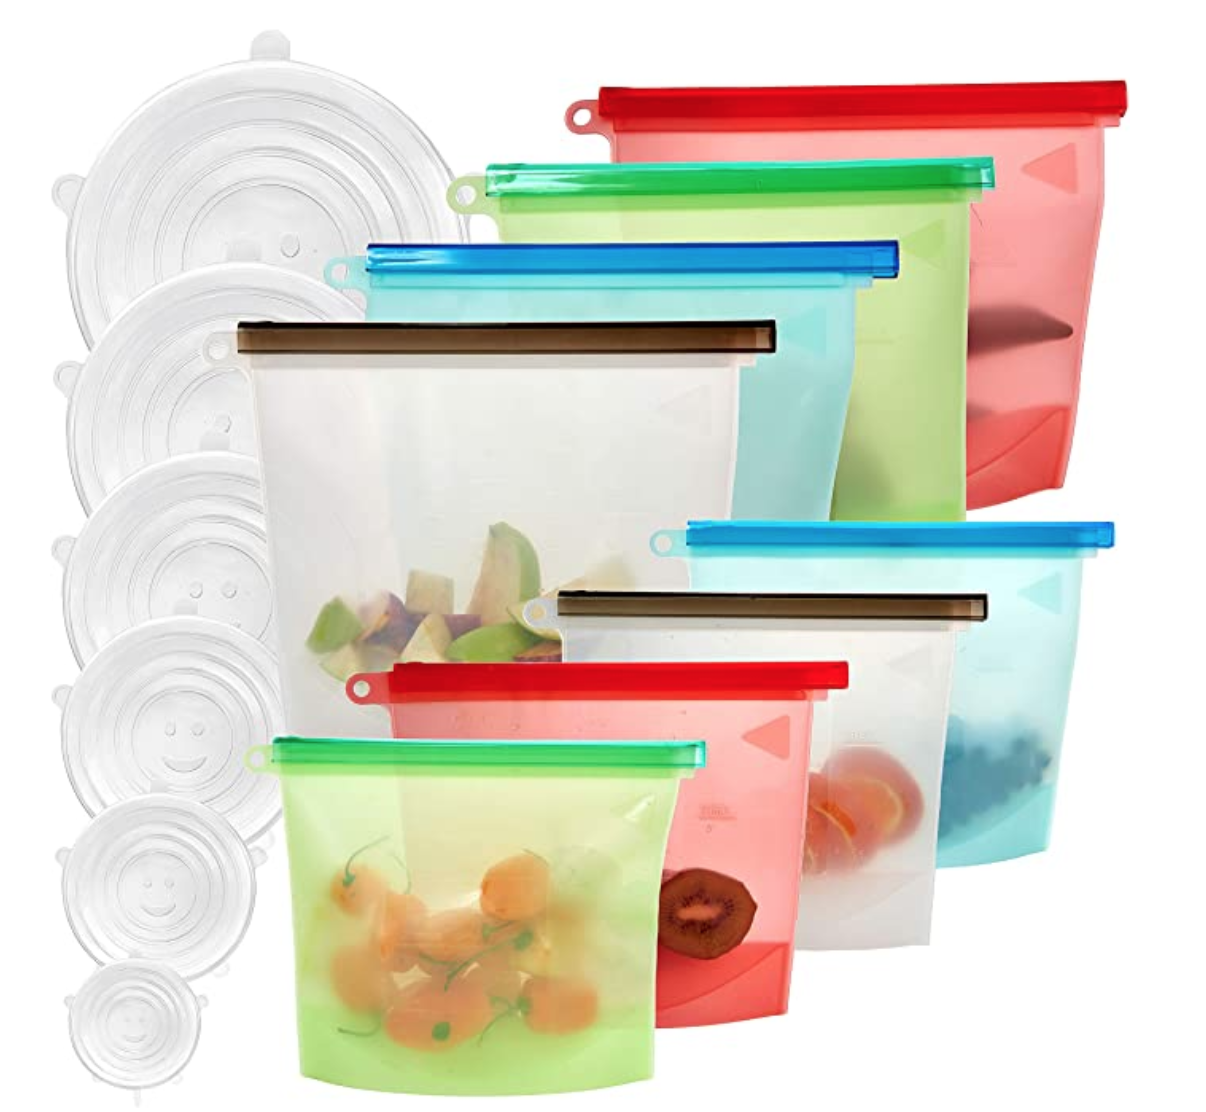
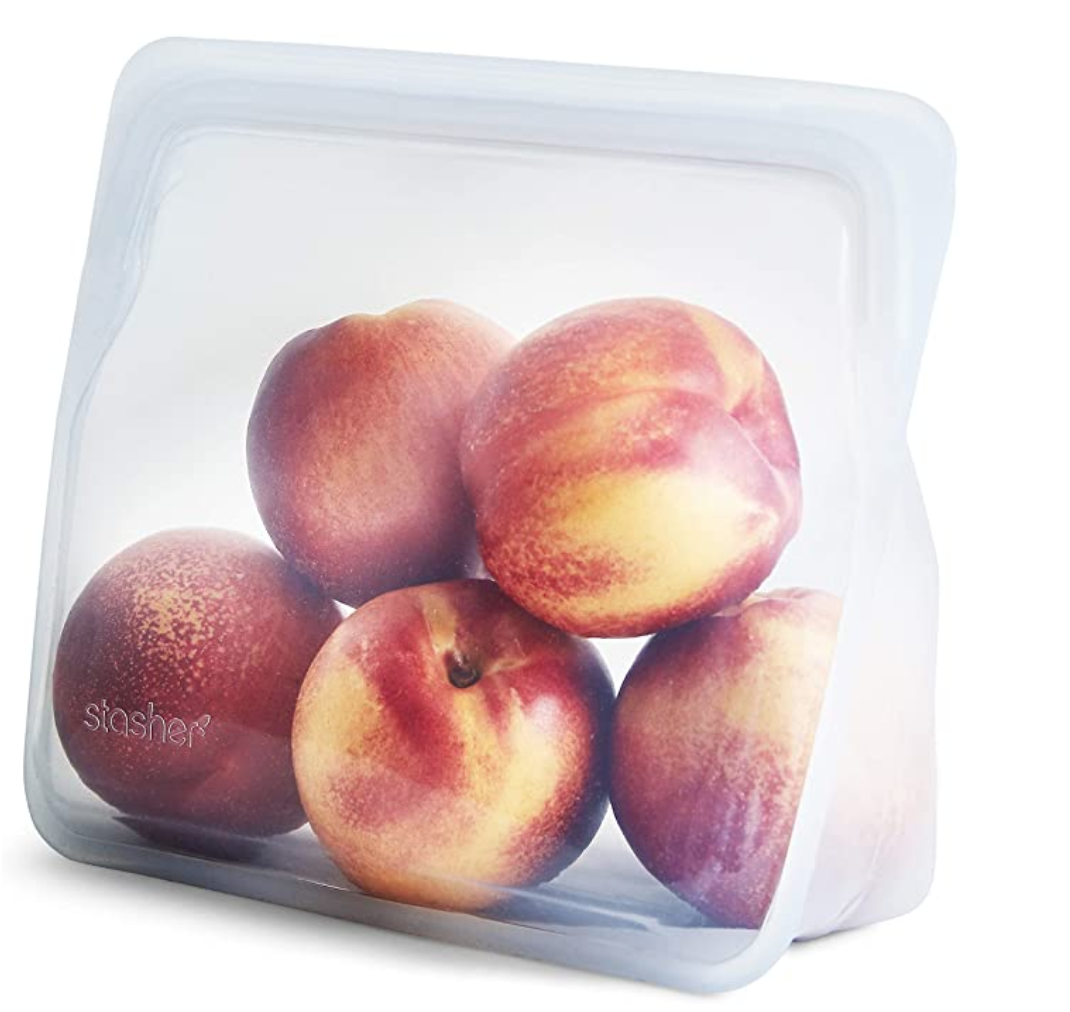
Say bye-bye to ziplock bags! These reusable ziplocks are my FAVORITE swap of all! I used to try to wash and reuse regular ziplocks (because I hated the thought of throwing them away after one use) but they never dried and were such a hassle. Plus, they never looked clean. Now I have several sets of different reusable ziplocks! For clear, regular looking ziplocks click here. For watertight, large, silicon ziplocks check these out.
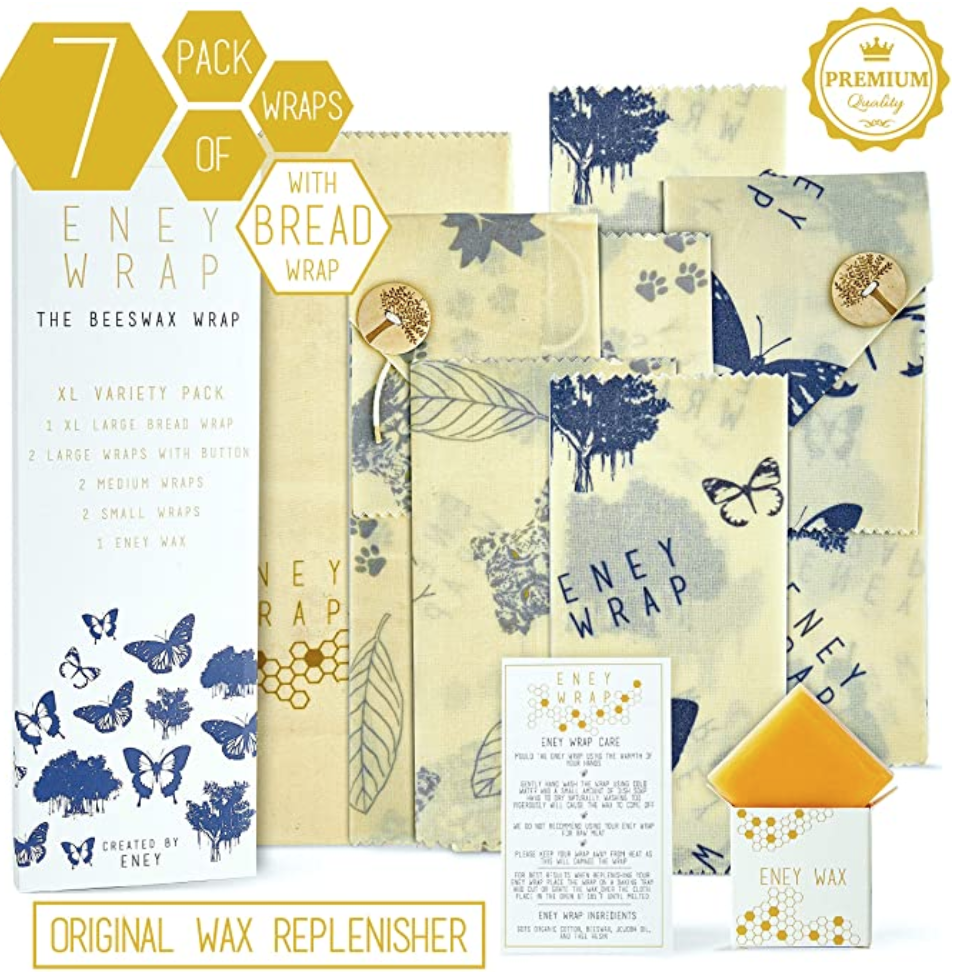
Glad wrap or sad wrap? Glad wrap, plastic wrap, or cling film. However you want to say it, it’s a huge waste of plastic and can easily be replaced with beeswax wraps. Once you’re done using them, just give them a rinse and use again. Check out these gorgeous designs.
Link to silicon ziplock bags
Link to beeswax wraps
Link to bag pictured
Baking paper ➡️ baking silicon! We use this tray liner that can be reused again and again. Nothing ever sticks to it so it’s a great replacement for baking paper or tinfoil.
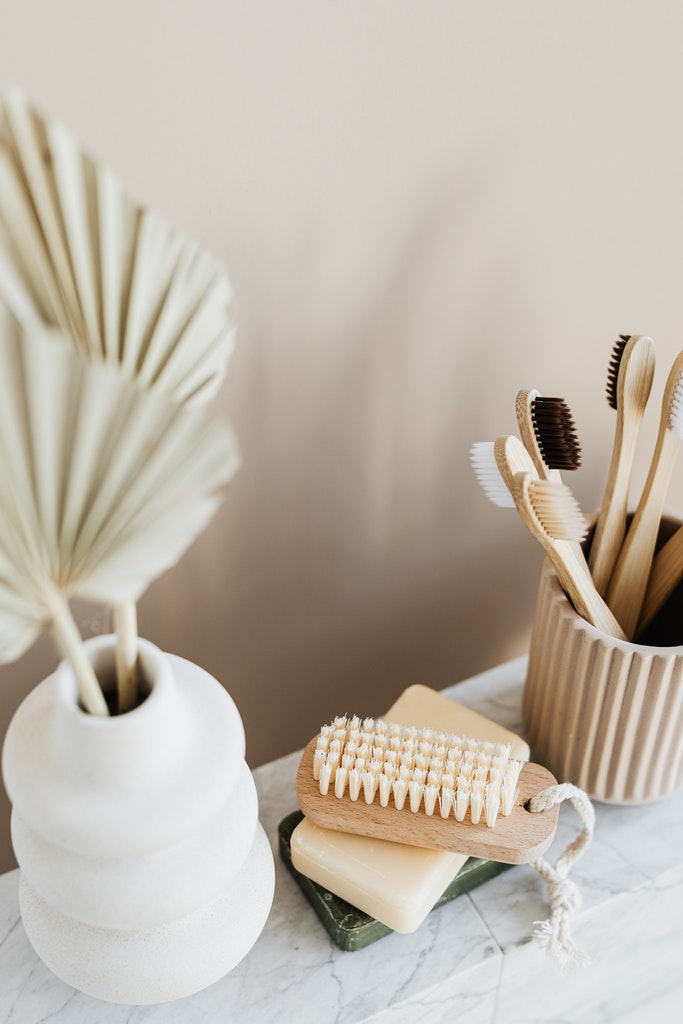
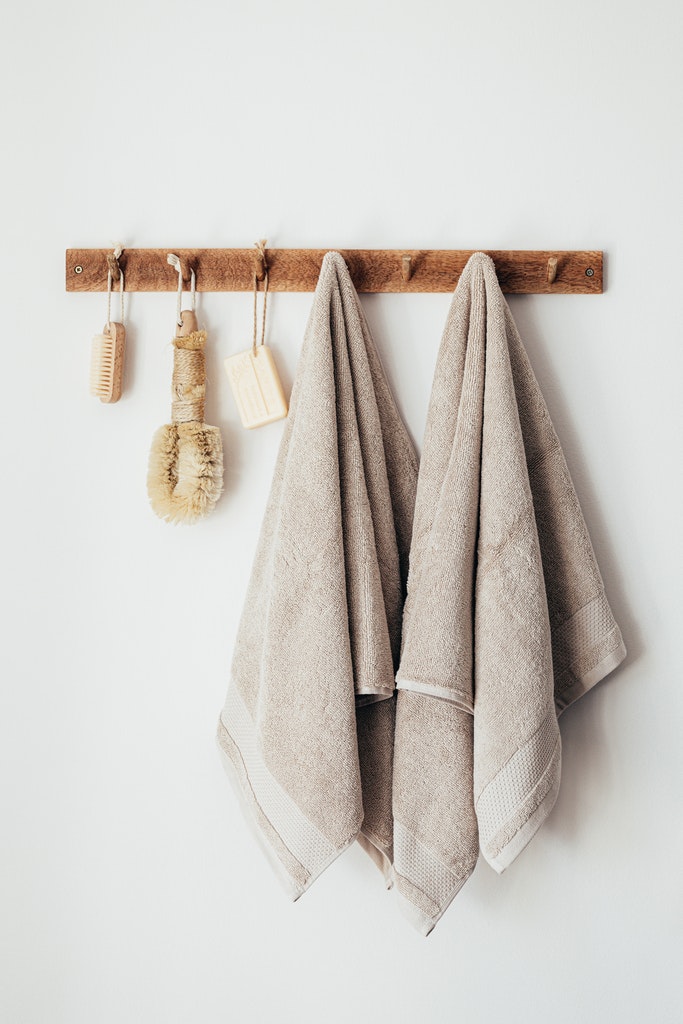
Skip the plastic toys, decor, and household items! Although most of these items aren’t one time use plastics (like takeaway containers and straws are), they’re still contributing to the pass amount of plastic production and waste in the world. Opt for wood items such as toys, toothbrushes, hooks, hangers,
Check out these inspirational home images below and click on any of them (or click here) to see my shopping list of eco-friendly home items.
Link to Eco-Home Purchases
Link to Eco-Home Purchases
Link to Eco-Home Purchases
Do you have any other eco-friendly swap ideas for us? Tag me in your eco-friendly home inspiration on Instagram @its.mary.taylor and on Facebook here. I can’t wait to see how you use these ideas and your own ideas to create your eco-friendly, green home!
If you enjoyed reading this and would like more information on home, lifestyle, advice, tips, tricks, and more, follow me on Instagram @Its.Mary.Taylor and on Facebook at Mary Taylor! I can’t wait to see you there!
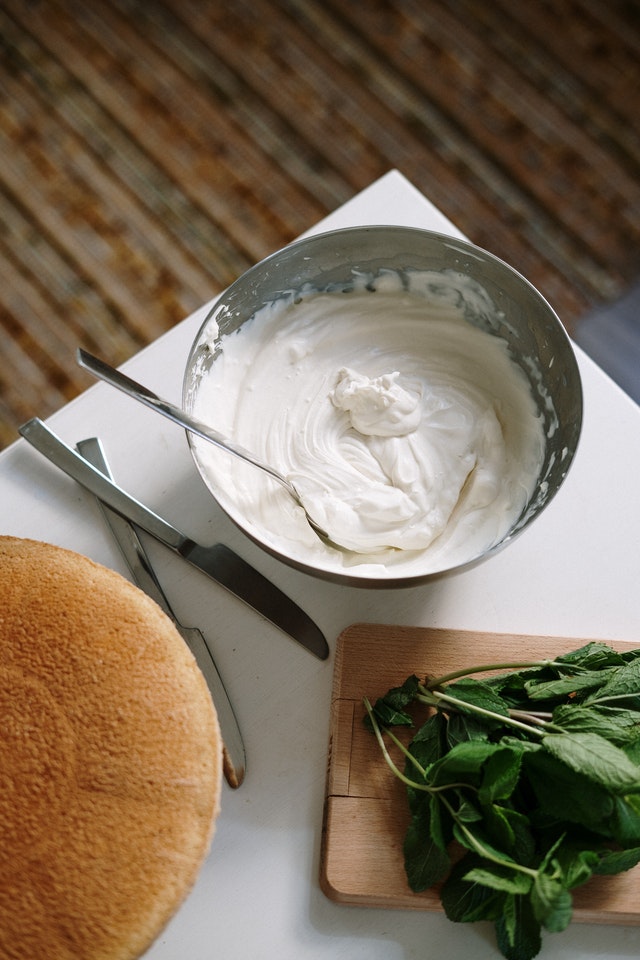
One night we were making a chocolate cake when I realized we didn’t have anything to go on top! We didn’t have cream cheese, butter, sour cream, or whipping cream.
As usual, I looked around the kitchen trying to see what I could turn into frosting. I wanted something creamy and rich. That’s when I thought of a vegan coconut chocolate frosting using coconut cream. There are so many ways you can change up this recipe too. Make it vanilla flavored instead of chocolate, add in a different kind of sweetener (like maple syrup or stevia), or even use other extracts or essential oils to make it peppermint, strawberry, or citrus flavored.
Feel free to experiment and let me know what you do to make it yours! Do you prefer it to be stiffer and colder? What additions or changes did you make to the flavors?
If you want to use coconut milk instead of coconut cream, just put your coconut milk in the fridge for 1-3 days before you use it. There are a few benefits of using coconut milk instead of coconut cream. Coconut milk hardens more when chilled and yields about twice as much as coconut cream. I used coconut cream for my recipe and loved it. Plus it was the perfect amount for a full cake. But, use whichever you prefer or have around.
As an Amazon associate, I may earn from qualifying purchases. It doesn’t cost you anything extra and I cannot see who makes purchases.
Make sure that your coconut cream is chilled. If you weren't able to put your coconut cream in the fridge overnight, place it into the freezer for around an hour. Make sure that it isn't mixed or shaken.
Scoop off the top of the coconut cream and place it into a freezer safe container. Leave the liquid in the bottle of the can.
Turn on oven for shredded coconut (you can toast the coconut now or later - see below).
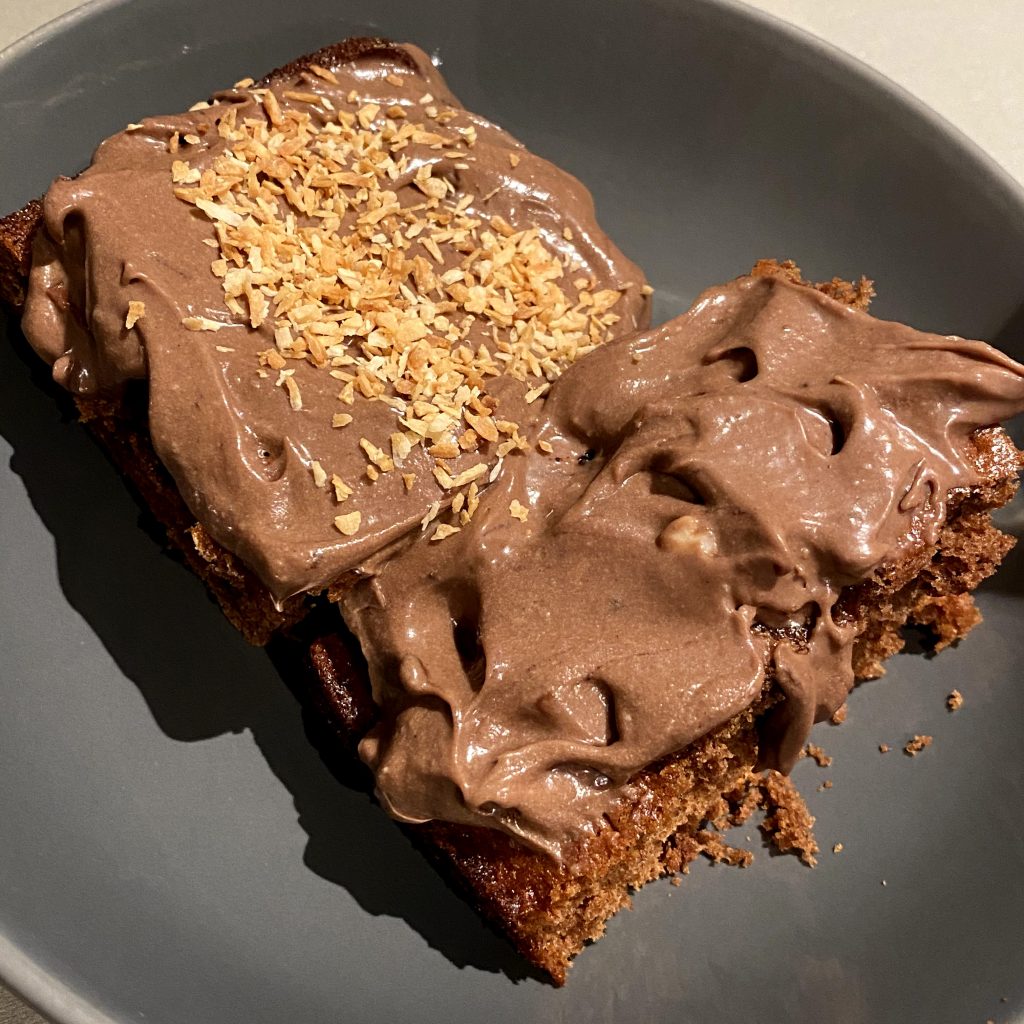
In a pot on the stove, melt chocolate with a little bit of coconut liquid from the coconut cream can. You can also use coconut milk if you prefer.
Add in cocoa powder. Continue to constantly mix!
Add in your desired amount of sugar * you can use coconut sugar, powdered sugar, or regular sugar. For a smoother texture, make sure if you use a coarse sugar, like regular sugar, that it melts completely. You can do this separately to make a simple syrup and add that in. If you're using this as a frosting, you may need more sugar but if you're eating as a pudding, you may want less sugar.
Let cool for a little while (but make sure the chocolate doesn't solidify).
While the mixture is cooling, put your shredded coconut into the oven to bake. It will be done once it's at a golden brown color. Watch it closely!
Then, pour the chocolate mixture into the bowl with the coconut cream and whip/stir.
Even if the coconut cream melts, keep whipping/stirring until all of the ingredients are blended. Now is a good time to taste test it and see if you need more sugar. Then, place the mixture into the freezer until it solidifies more. If you want it to be fluffier, you can take it out and whip it more or leave as is (depending on your preference and what you're using it for).
Then, sprinkle toasted coconut ontop and enjoy!
If you make this recipe, please tag me on Facebook or Instagram so I can see your creations!
If you enjoyed reading this and would like more information on home, lifestyle, advice, tips, tricks, and more, follow me on Instagram @Its.Mary.Taylor and on Facebook at Mary Taylor! I can’t wait to see you there!
While we lived with grandparents (and parents), I kept thinking about the day we would finally be in our own place so I could start living as eco-friendly as possible. One thing about being an adult is getting excited for weird things like organization and DIY cleaning products. Surely I am not alone! There’s just something special about an eco home. In our rental, we tried our best (only produced 7 bags of trash a year and used “eco-friendly” products) but I wanted to take it the next step. This meant no paper towels, no tissues, no makeup wipes, and no more purchasing cleaning products that I could make (which is pretty much all of them)!
As an Amazon associate, I may earn from your purchases through my links; however, it doesn’t affect how much you pay and I cannot see who makes a purchase.
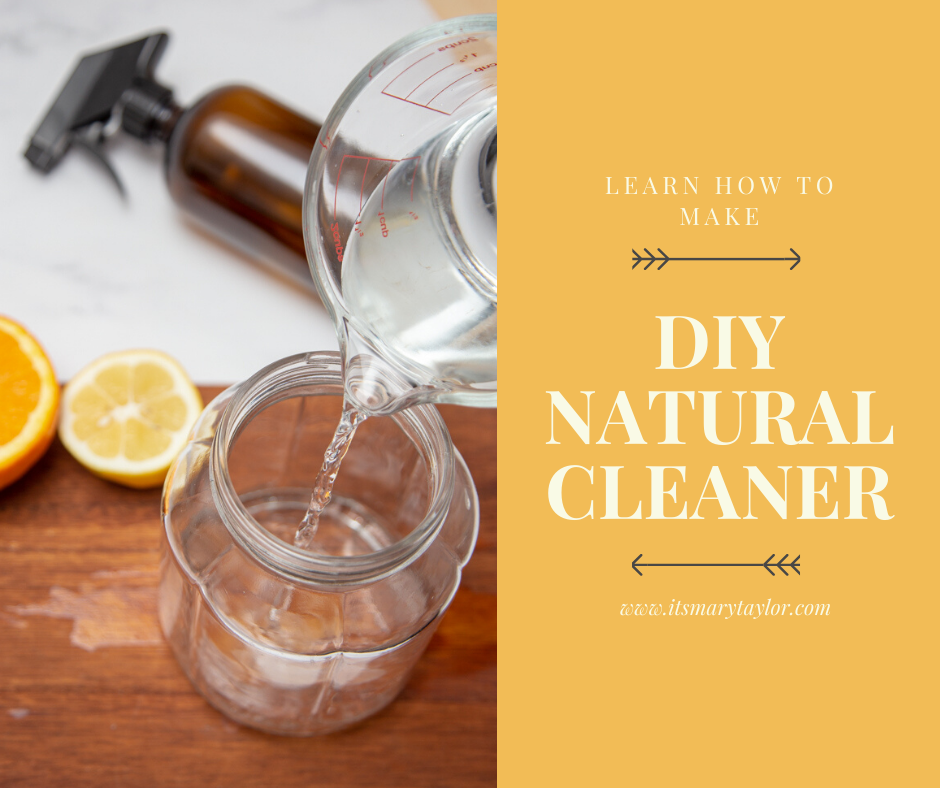
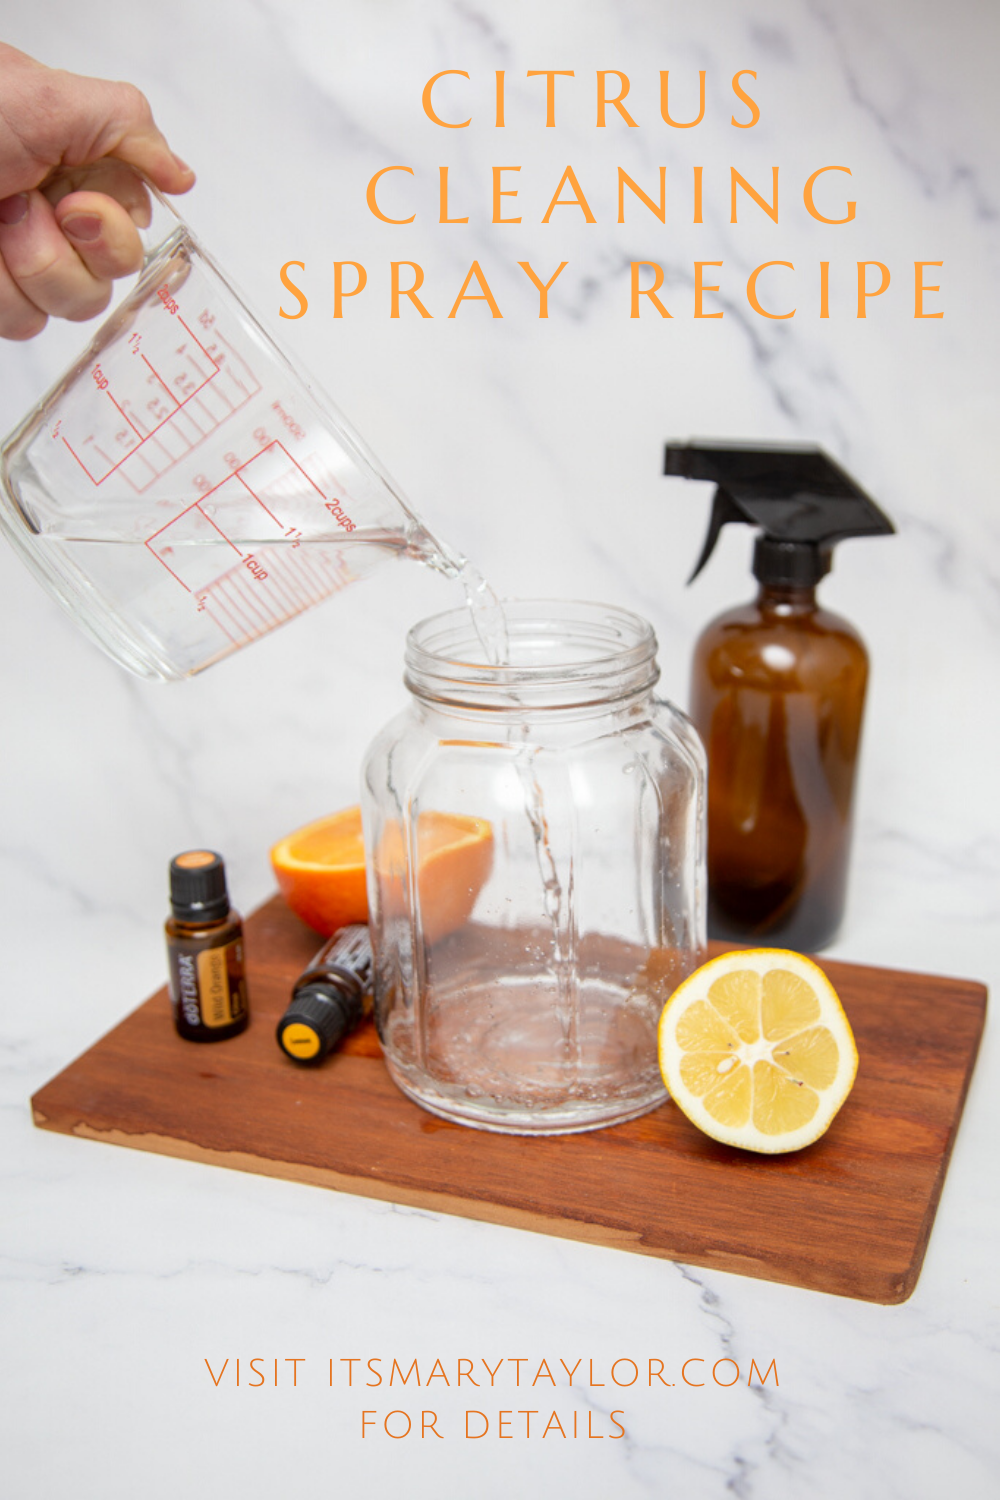
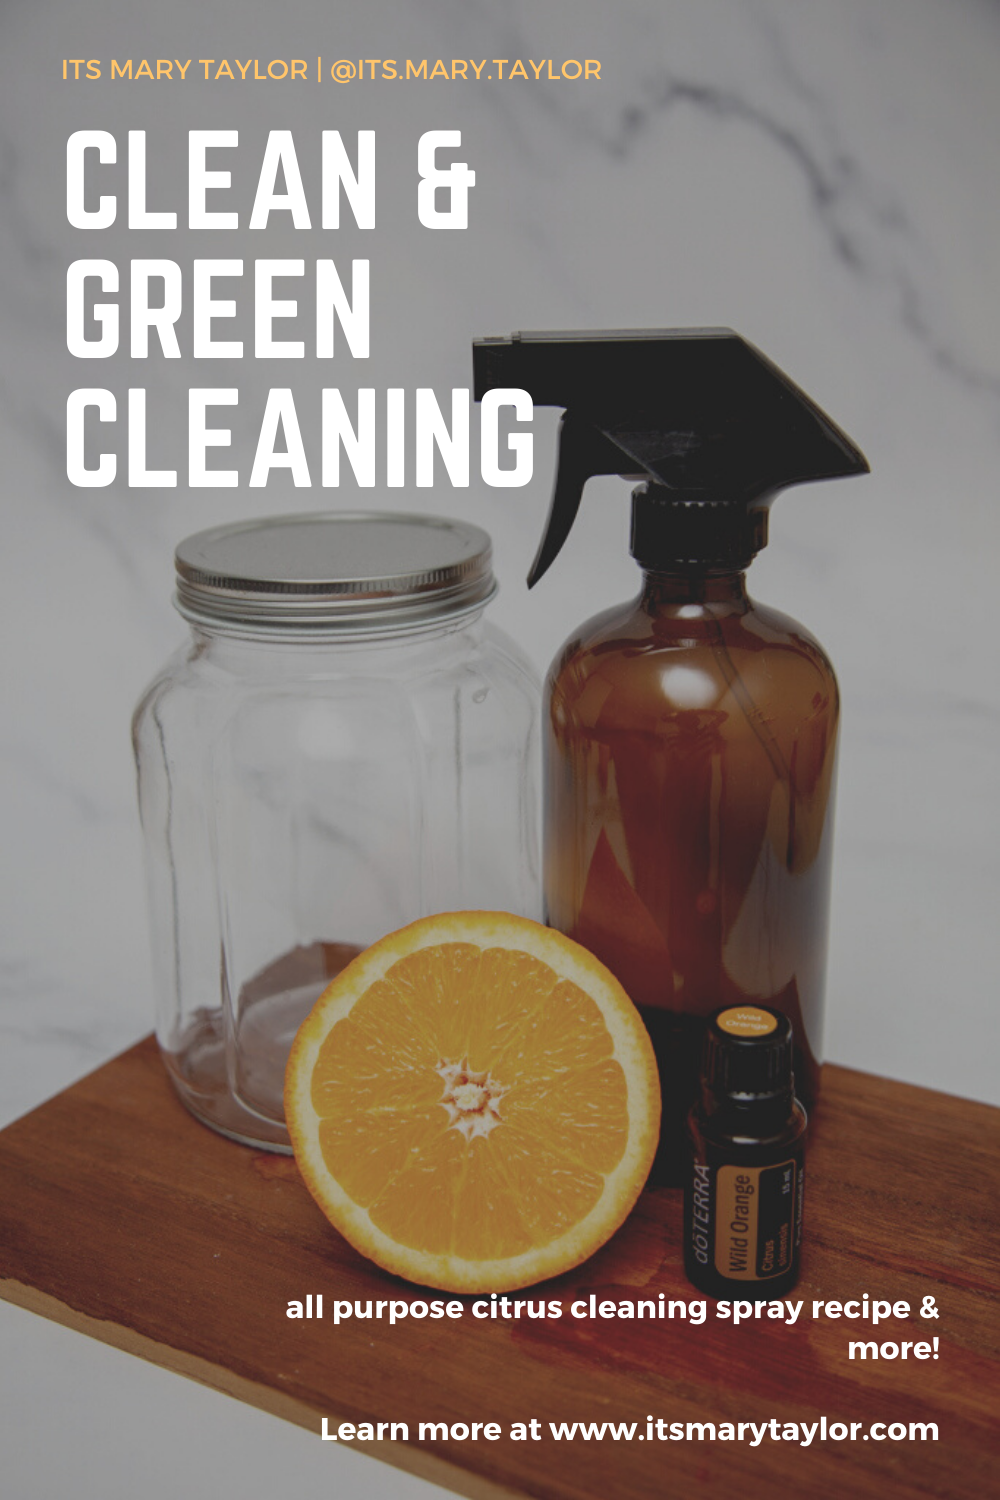
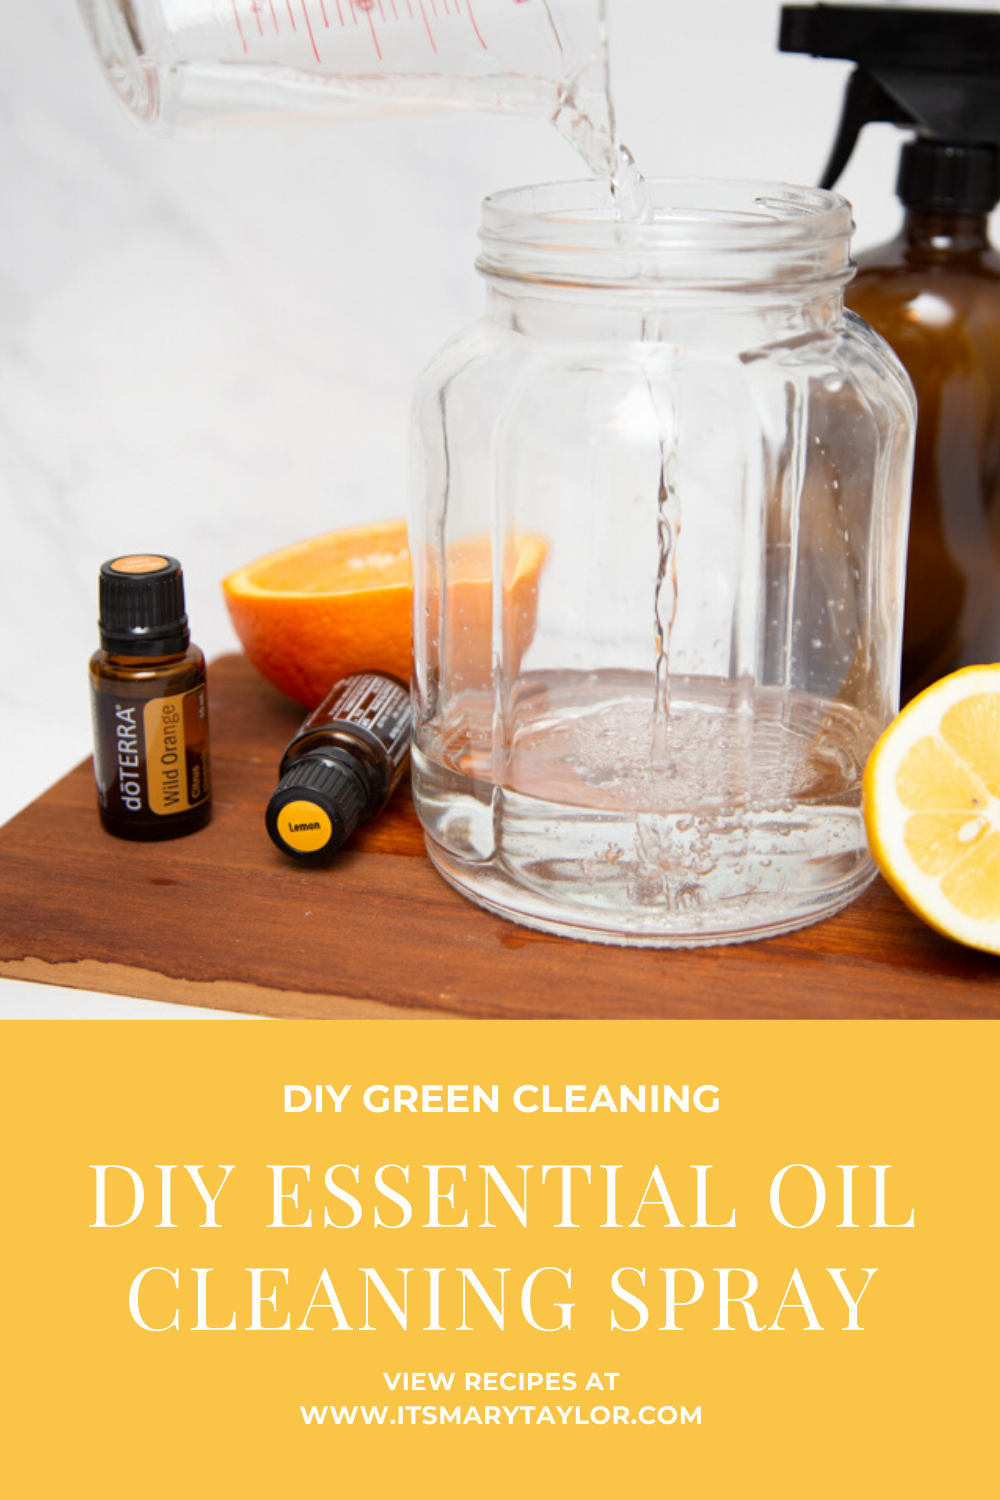
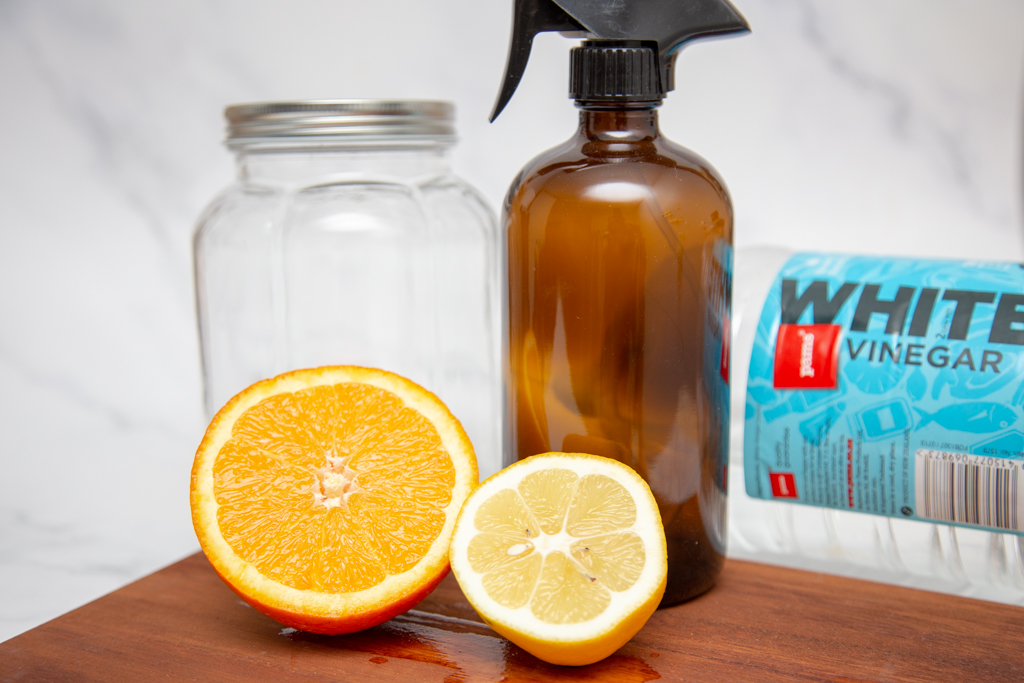
So the journey really began. I stocked up on glass bottles, which if you’re US based, you can purchase here. And I set out to make my own DIY natural all-purpose cleansing spray with what I had at home. You’re going to be shocked at how easy this recipe is.
Here’s what you need to make your own DIY citrus cleaning spray:
✧ Let sit for up to 7 days (minimum 3 days) in a cool, dark place – Shake the jar every day if you remember
✧ Strain the vinegar into your spray bottle
✧ Toss out the peels (or even better, put them in your insinkerator/garbage disposal to clean the inside of your sink & freshen it up)
✧ Optional: add in water to fill your spray bottle or if your vinegar is too strong you can add water
✧ Store in a cool, dark place and use on everywhere from your kitchen to your bathroom
** Extra tip… Enjoy the fruit first! To create even less waste, make this from orange and lemon peels you would have otherwise just thrown away.
If you learned something new and enjoyed this blog, don’t forget to like me on Facebook and follow me on Instagram. I would love to see your homemade DIY cleaning sprays you make so tag me so I can reshare!
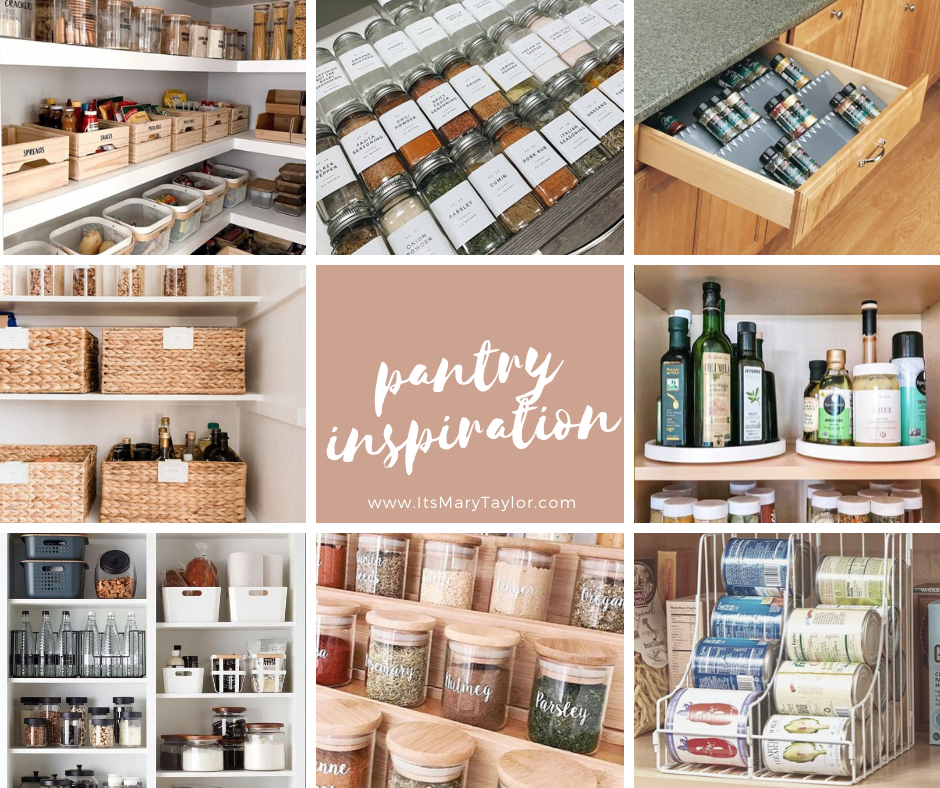
Being an adult can get weird sometimes right? To be honest, one of the things that I was (and am) most excited about for our new house is our pantry organization. Don’t worry, I totally know how weird it sounds.
I am going to dive right into my first home inspiration blog post since I released our home building process blog last week.
If you haven’t seen on Instagram, we actually recently moved into a temporary apartment until our home is built. So, we got to dive into pantry organization before our new house – granted, this apartment has NO storage so it doesn’t quite feel (or look) the same that I want it to. But, I know it will some day!
To see where you can buy similar (or the same) products that are featured in all of my home inspiration posts as well as all credits on images, head to my inspiration shop here.
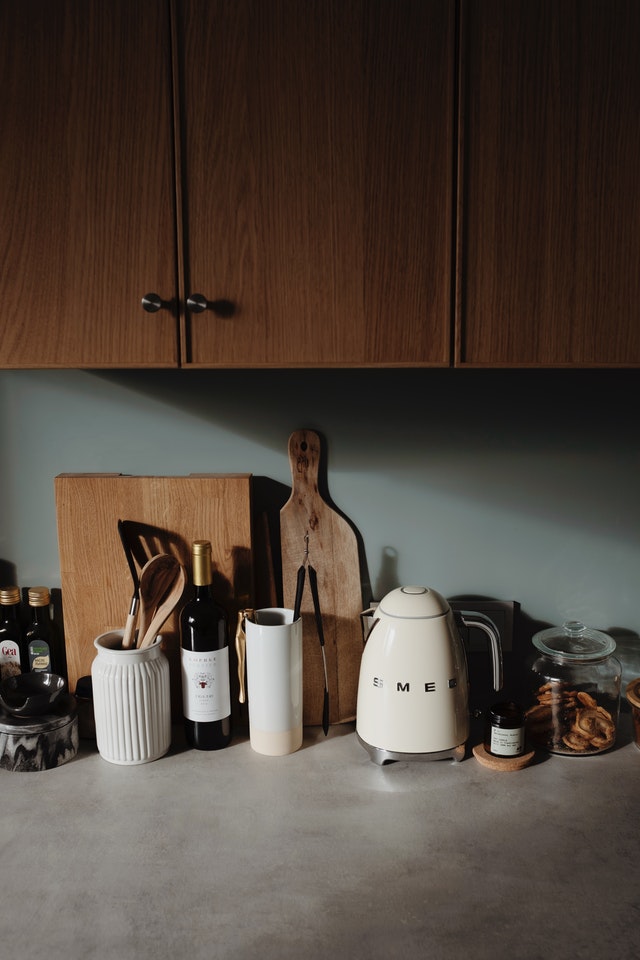
What’s your favorite room in the house? Are you like me and the kitchen is your favorite spot? It’s probably because I love cooking, hence why I share recipes on the blog! When we finally decided we were going to build a house, I was super excited about all the things I could do in the kitchen. Given that our home won’t actually be THAT big and definitely lacks some storage space, I want to make sure we have amazing organization and a place for everything.
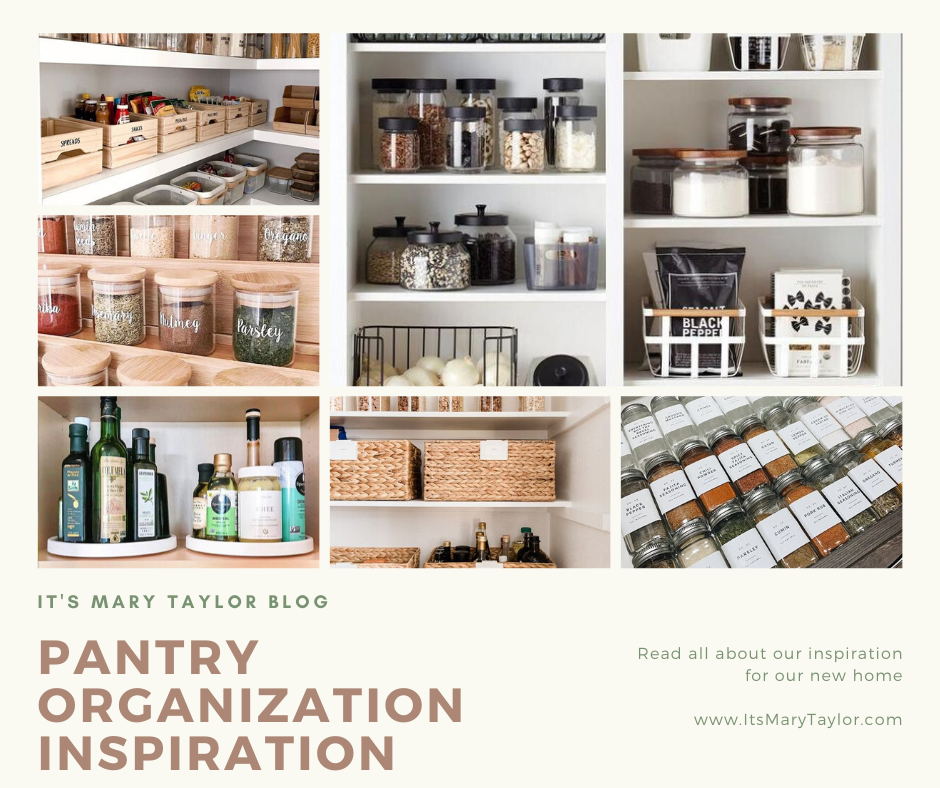
Check out my inspiration board and ideas and let me know what you think! What does your kitchen organization look like? I’d love to see your before and afters – especially if this blog helped you to find some tips, tricks, or a company that you now love! Check below for tips on making your kitchen pantry organized, beautiful, and maximized.
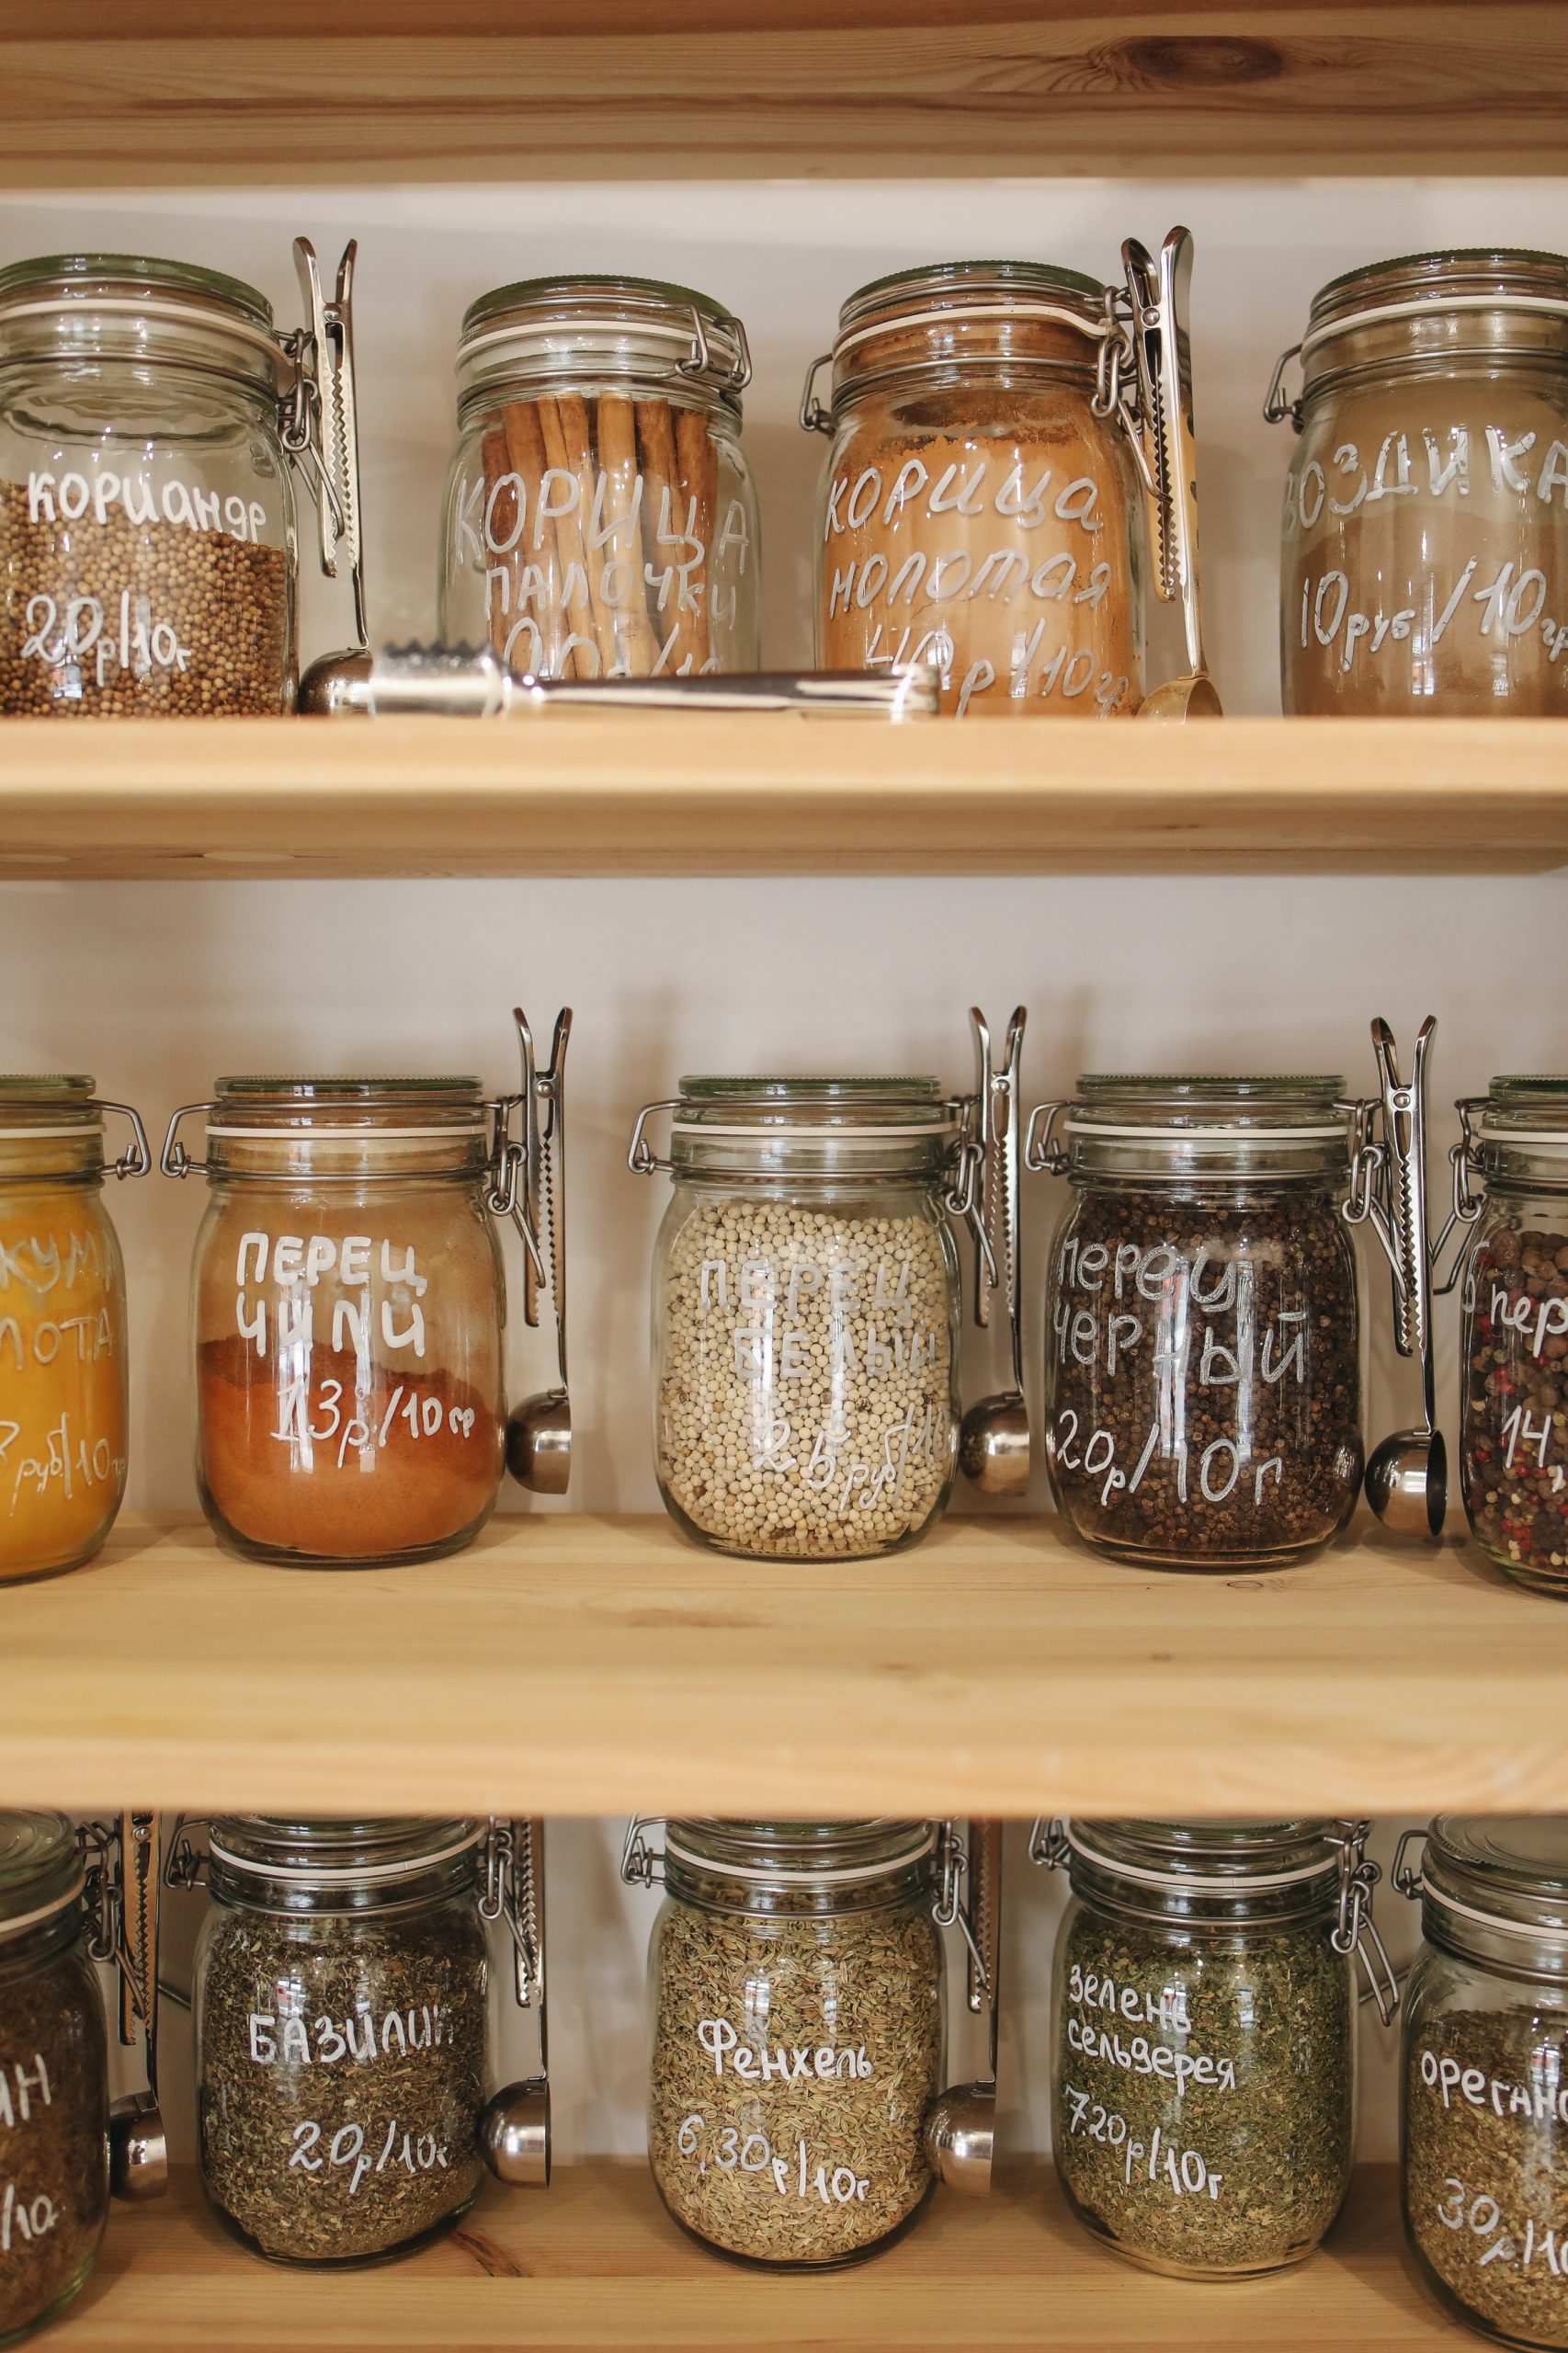
My number one tip for organizing your pantry is having designated, labeled baskets. This will help you sort items so they’re easy to find. It also reduces the look of clutter!
One thing we recently did was have a basket for opened “snacks” (chips, candy, nuts, etc) and one for unopened snacks. This not only helps us stay organized but also helps us reduce waste and buy less. If our opened snacks box is full, we should not be opening up more snacks!
My next suggestion is to have stackable containers so that you can maximize your space – especially if you have small cabinets or cupboards. If possible, purchase matching containers and stick to a theme (color, material, and style) to create consistency and elegance.
If you have deep corners or deep shelves, think about getting a lazy susan for inside your pantry. This not only helps with cleaning (because you can easily wipe, wash, or remove the lazy susan) but also helps you to be able to see everything without removing what’s in front. This is particularly handy for tall items such as sauces, oils, and vingers.
These few tips will help you take your current pantry from unorganized, sloppy, and difficult to utilize to clean, professional, and usable.
If you enjoyed reading this and would like more information on home, lifestyle, advice, tips, tricks, and more, follow me on Instagram @Its.Mary.Taylor and on Facebook at Mary Taylor! I can’t wait to see you there!
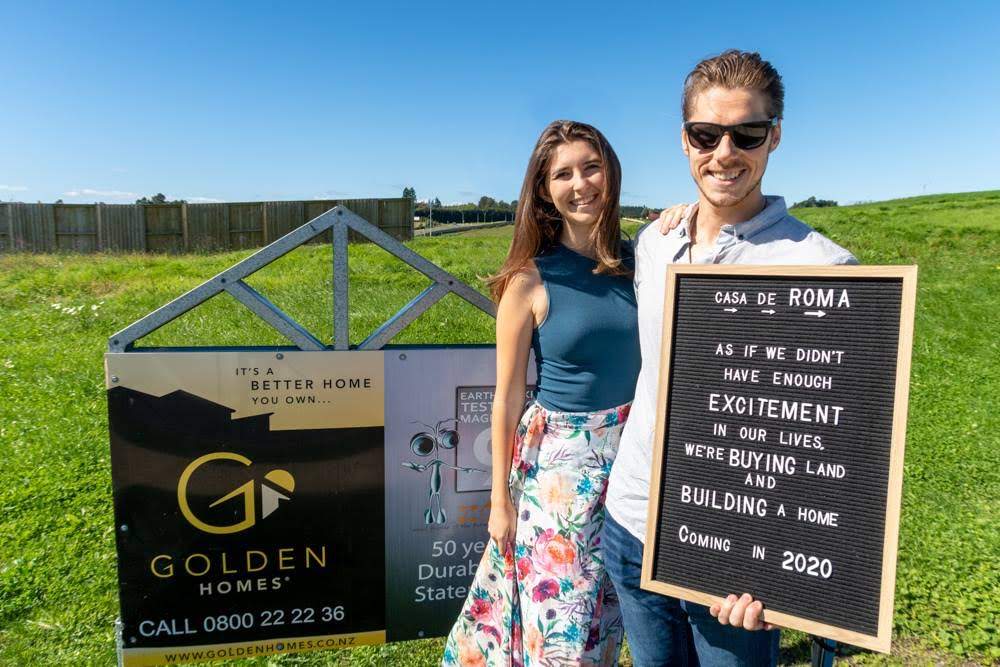
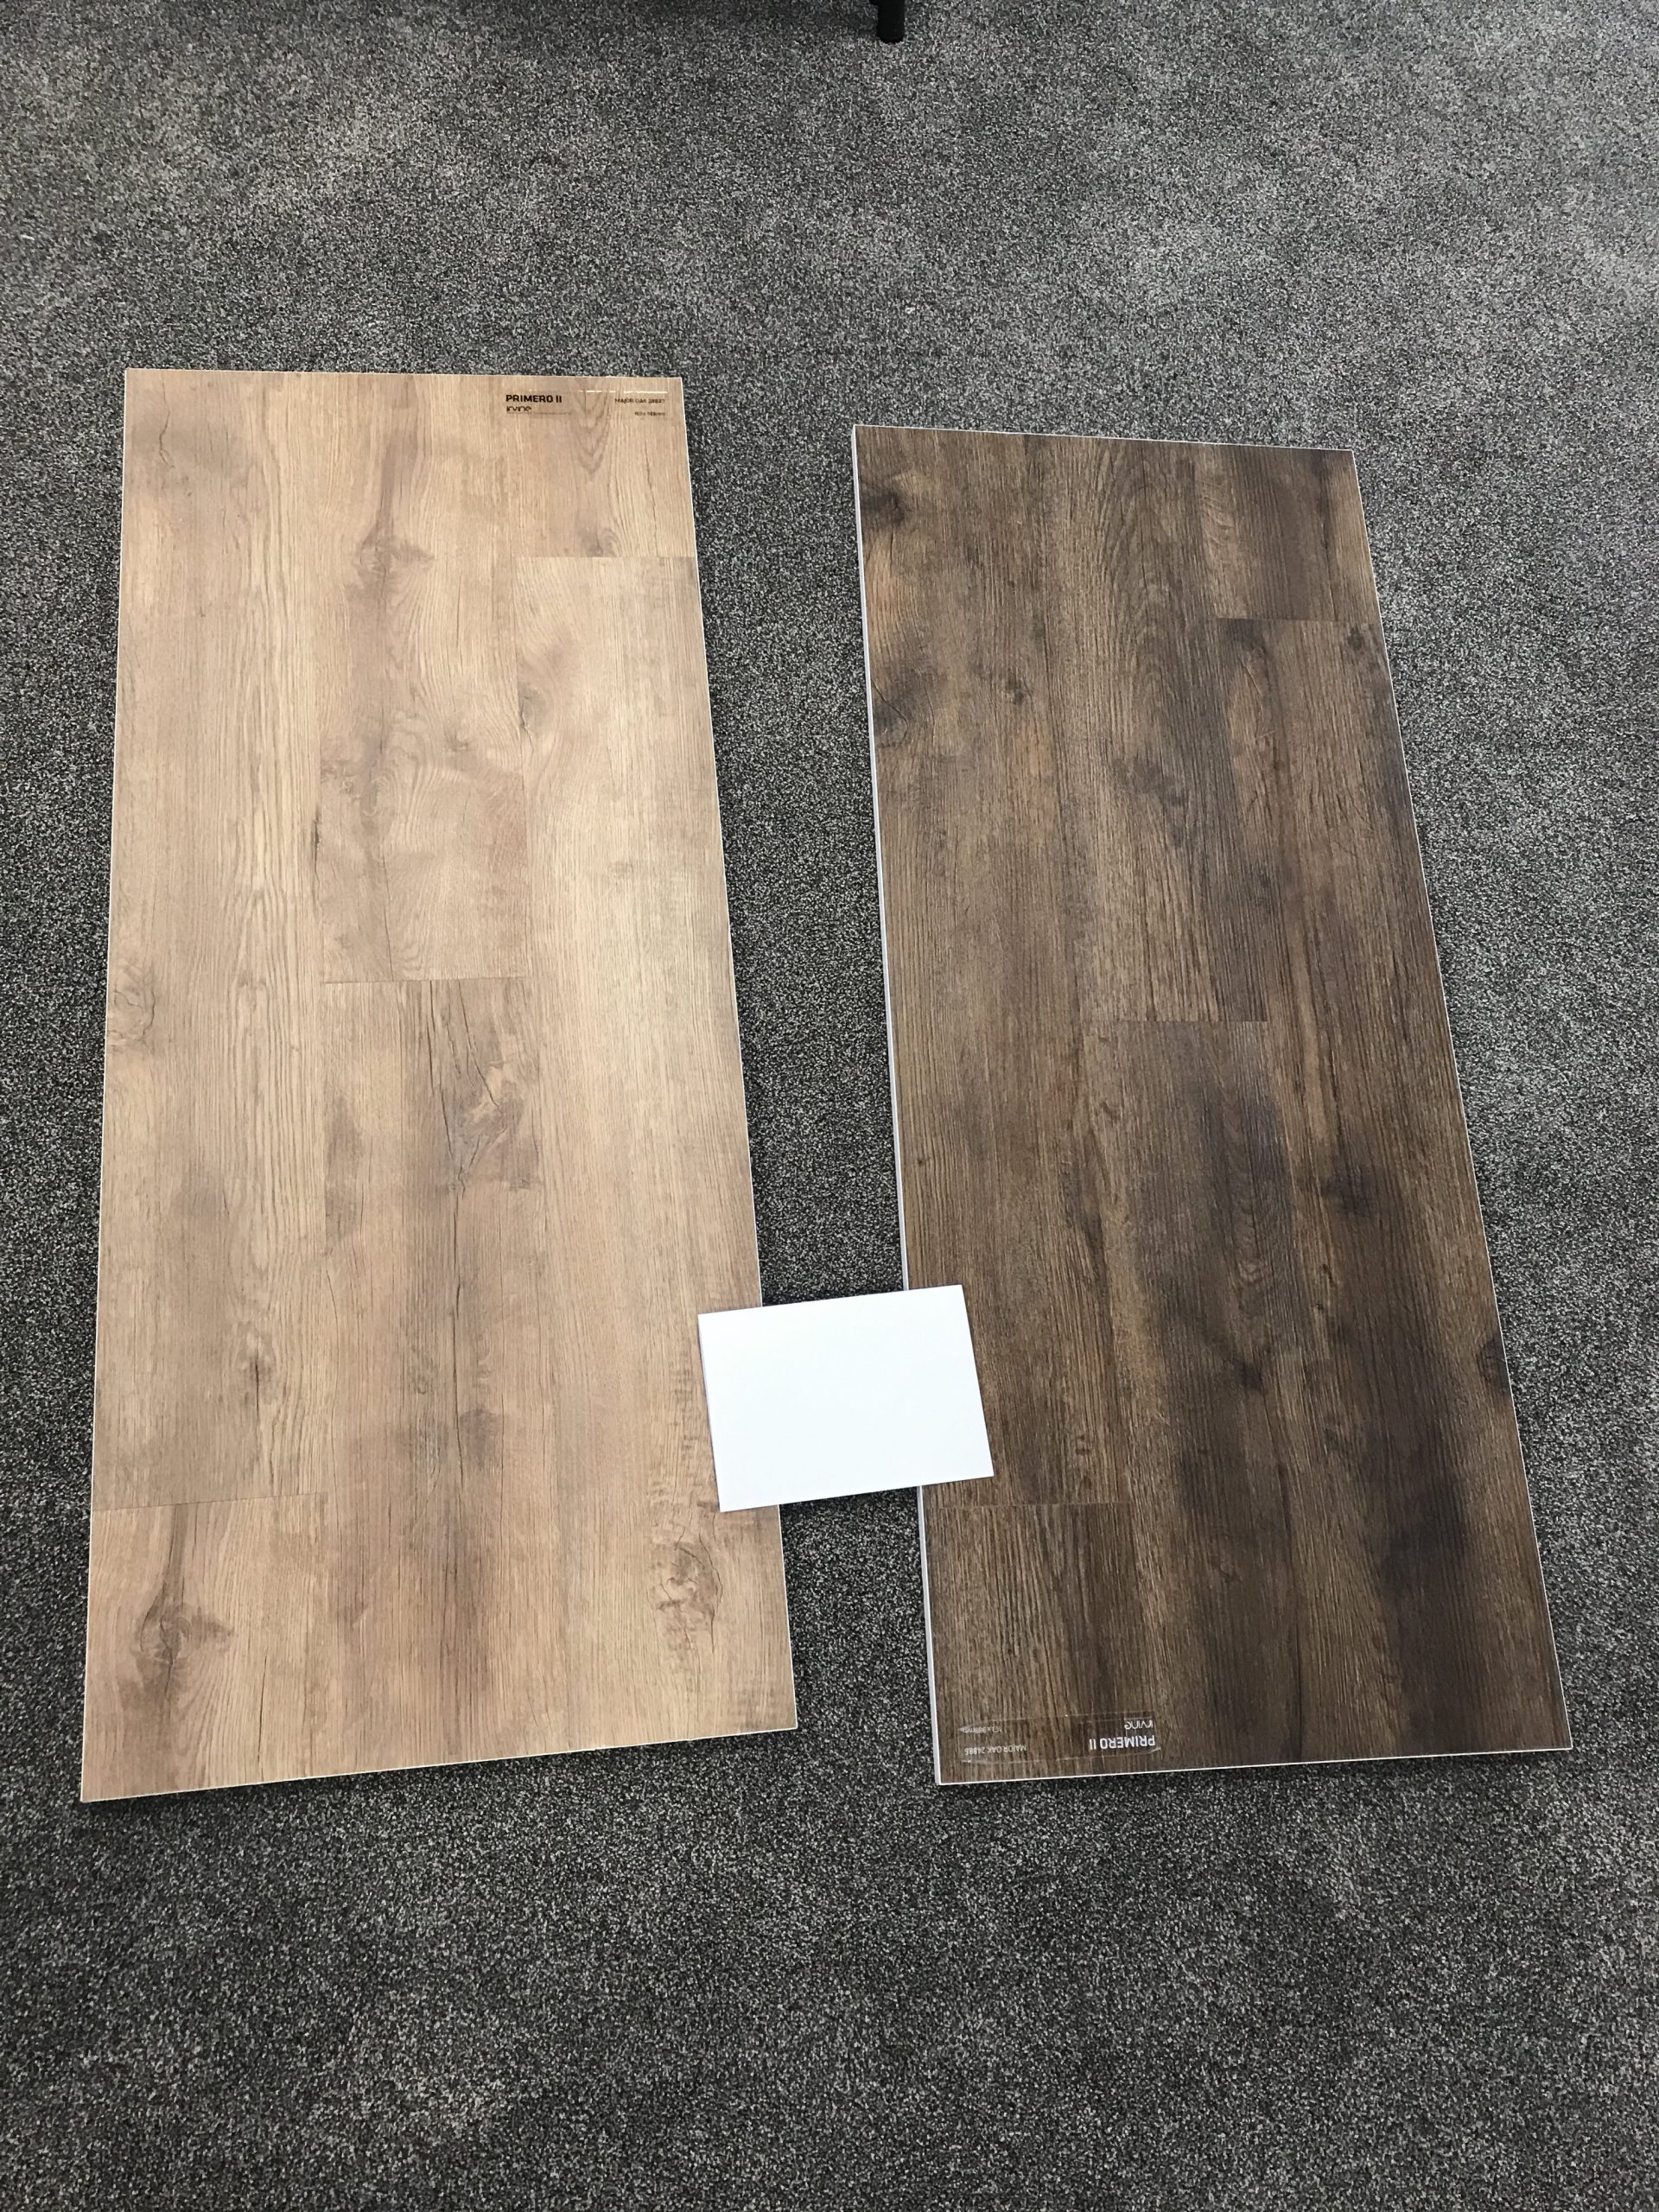
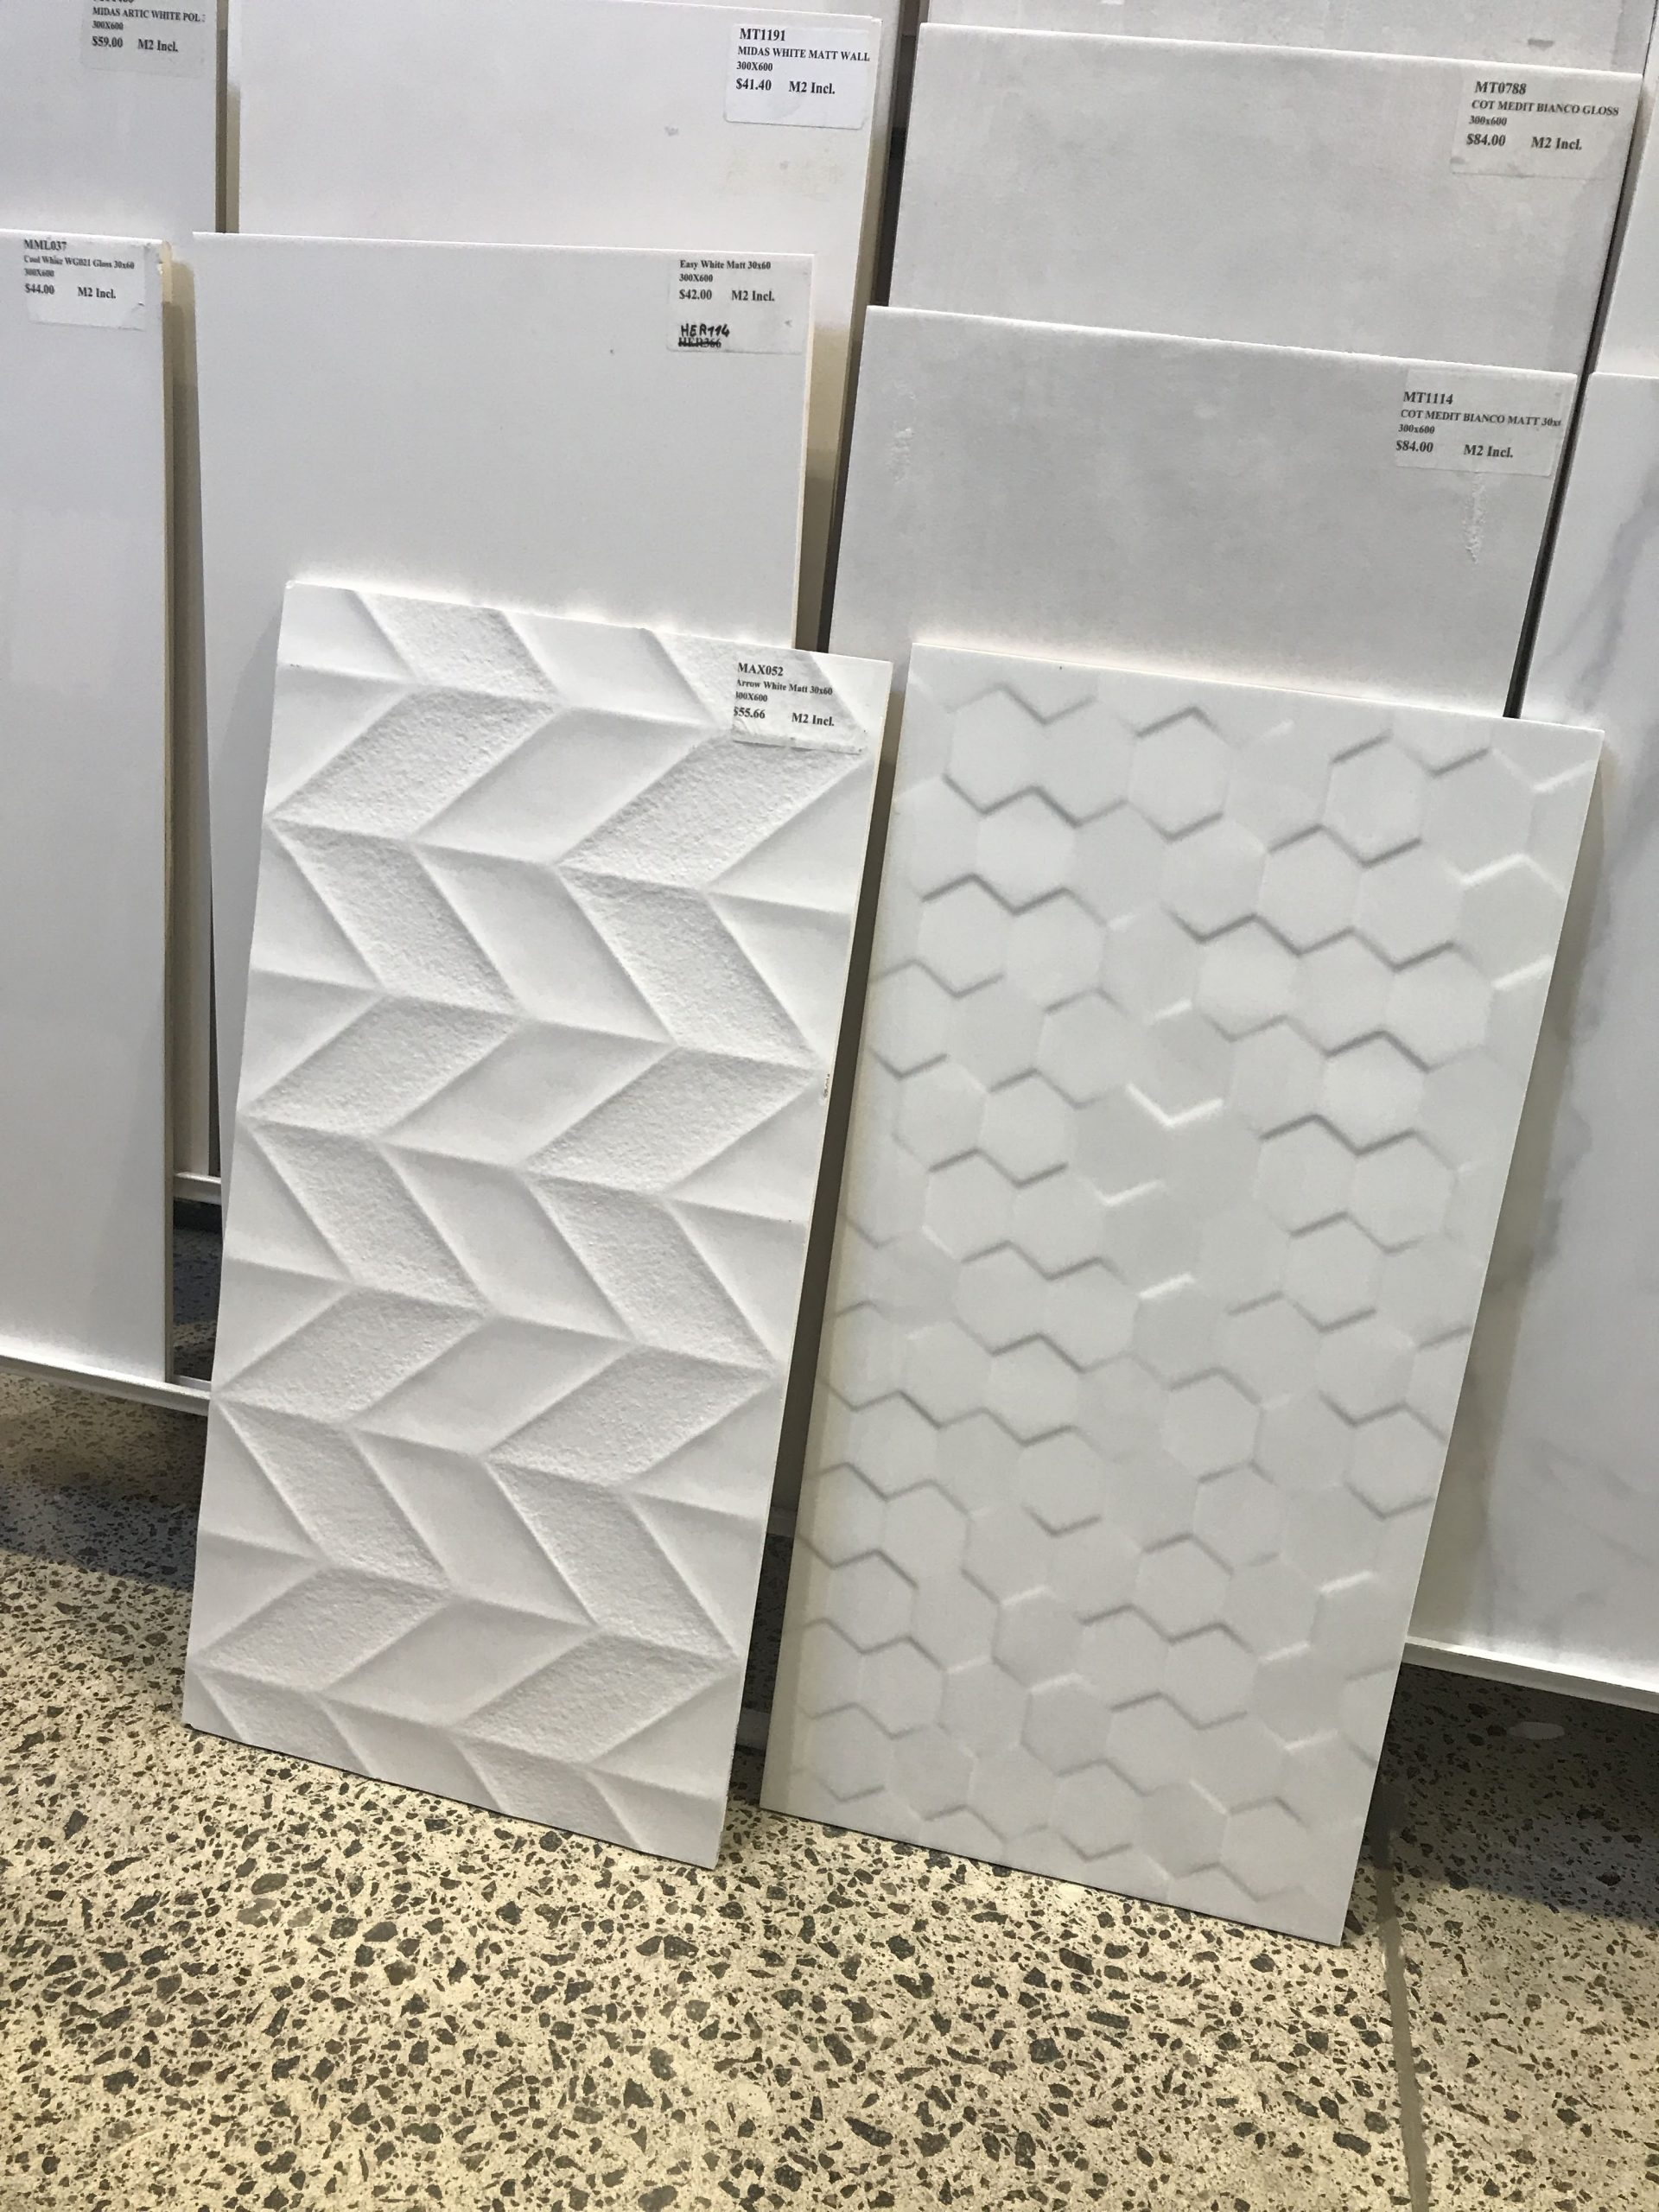
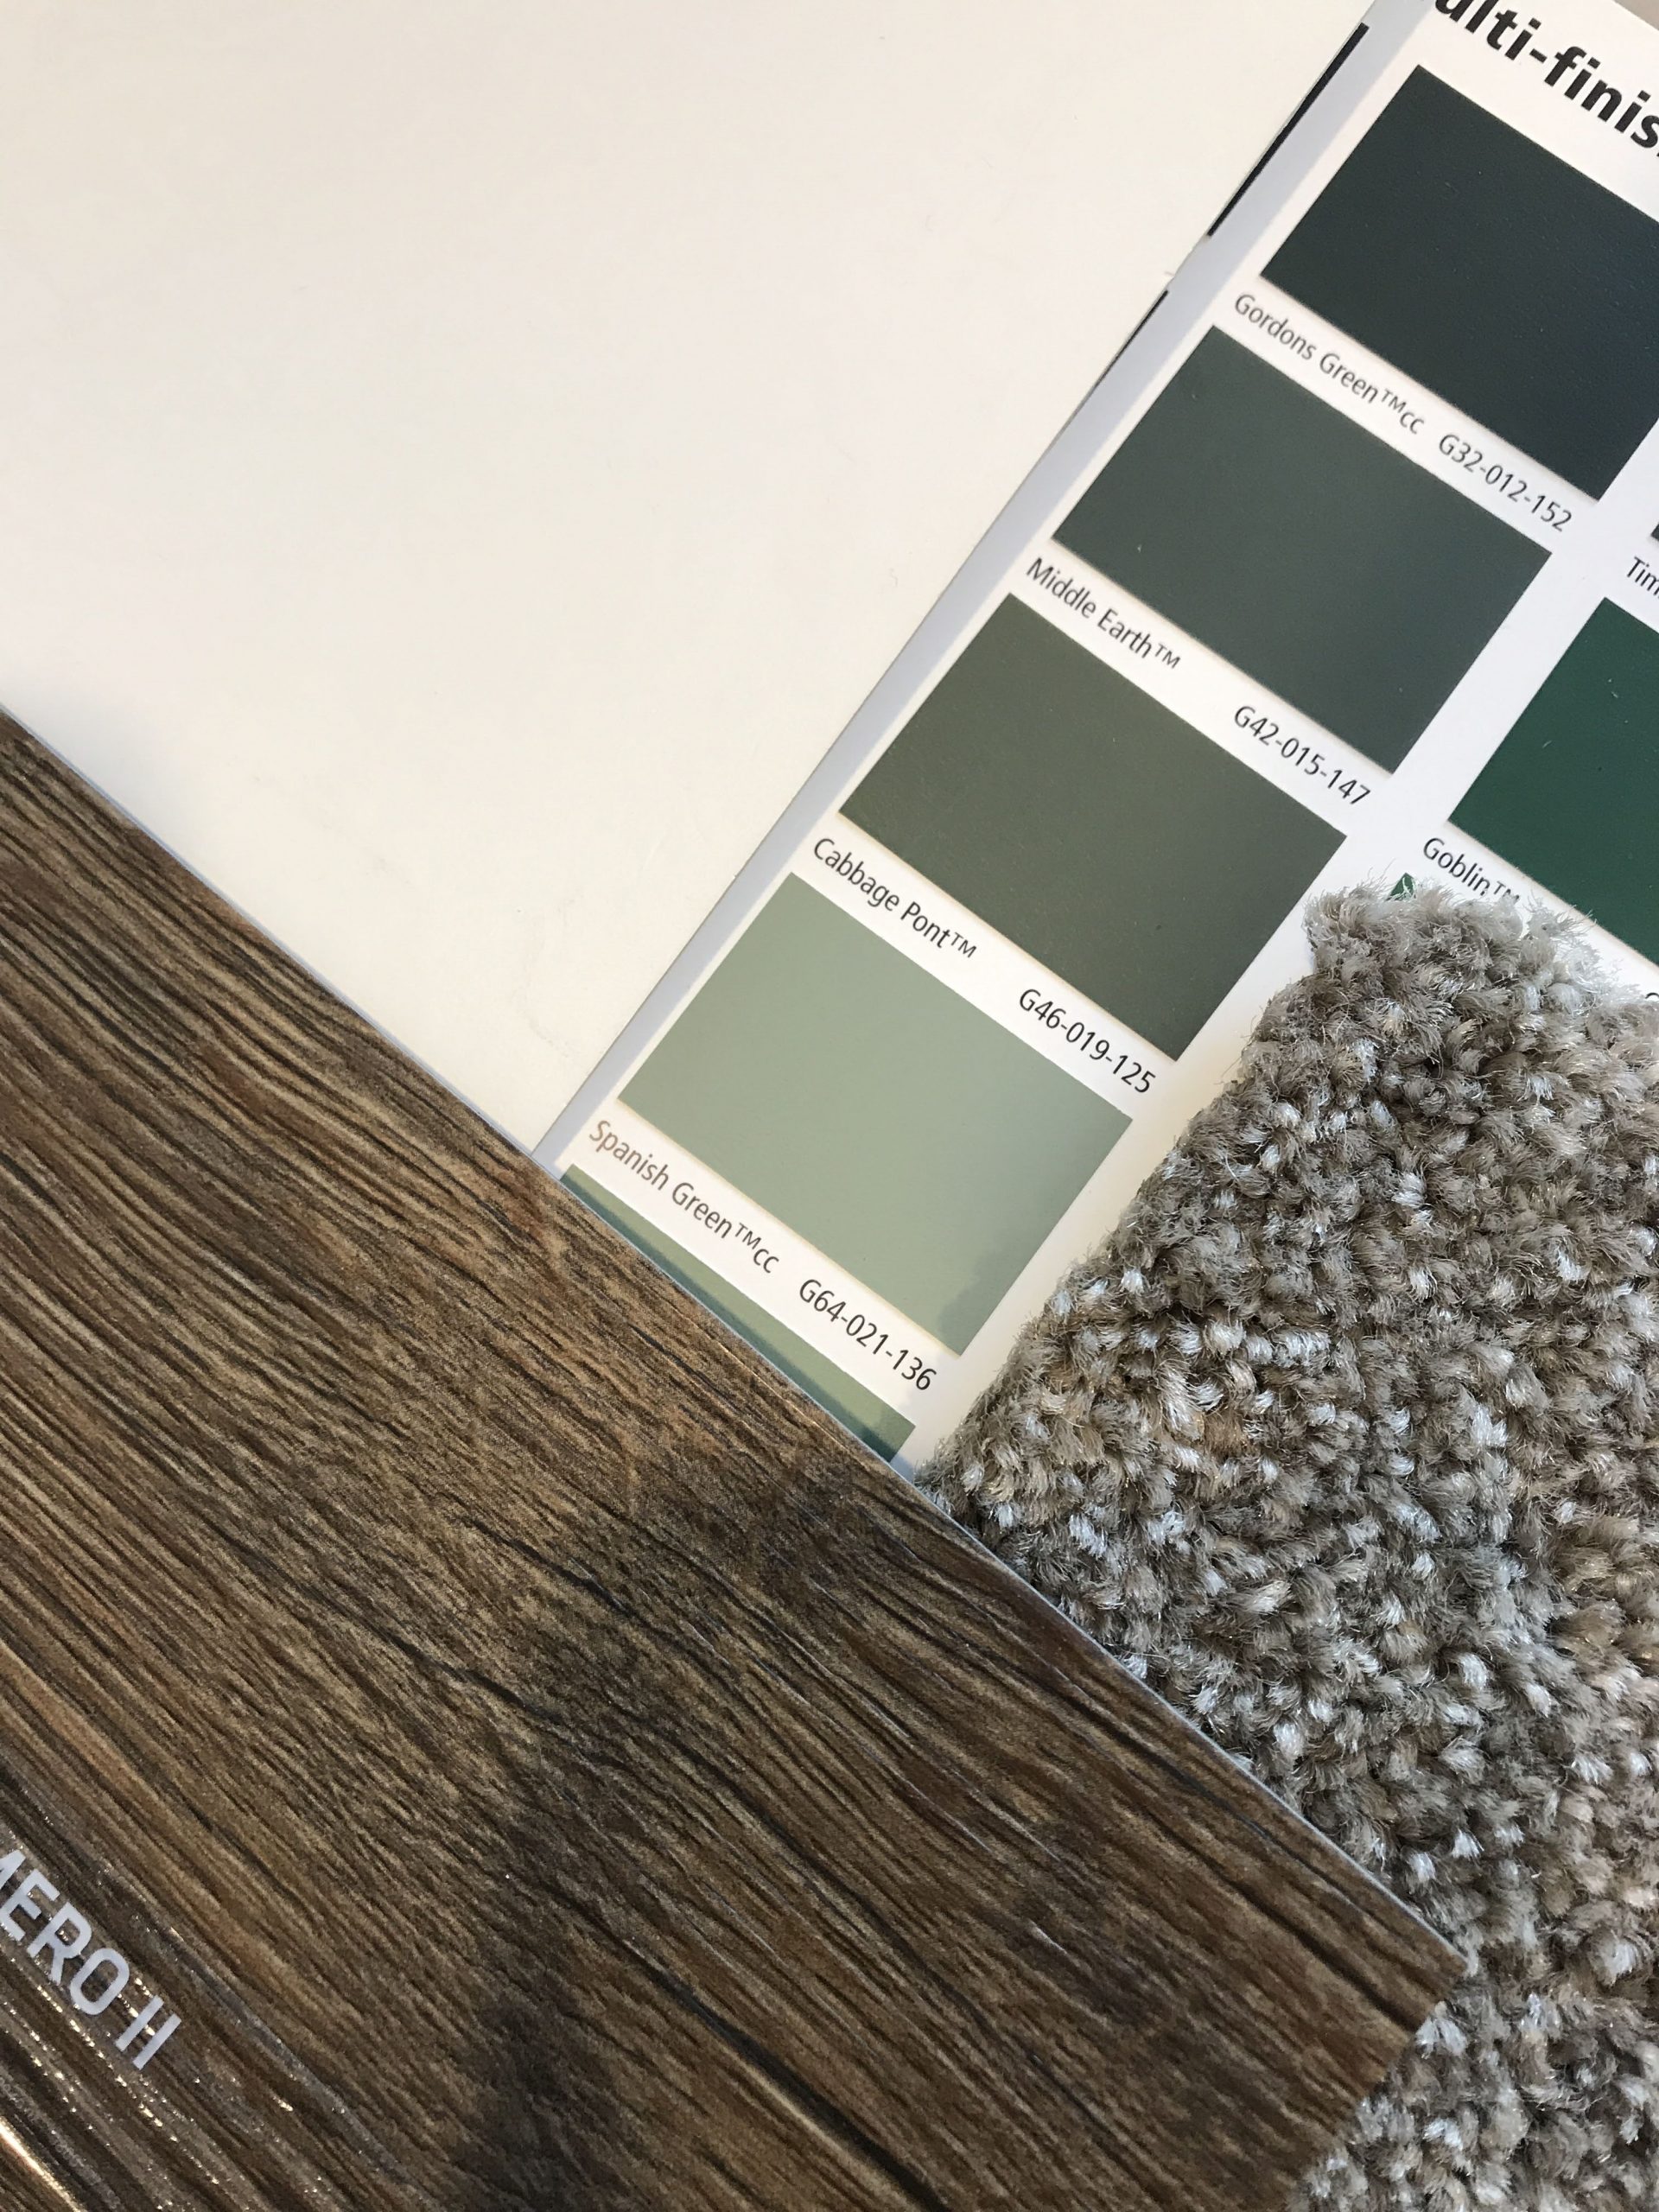
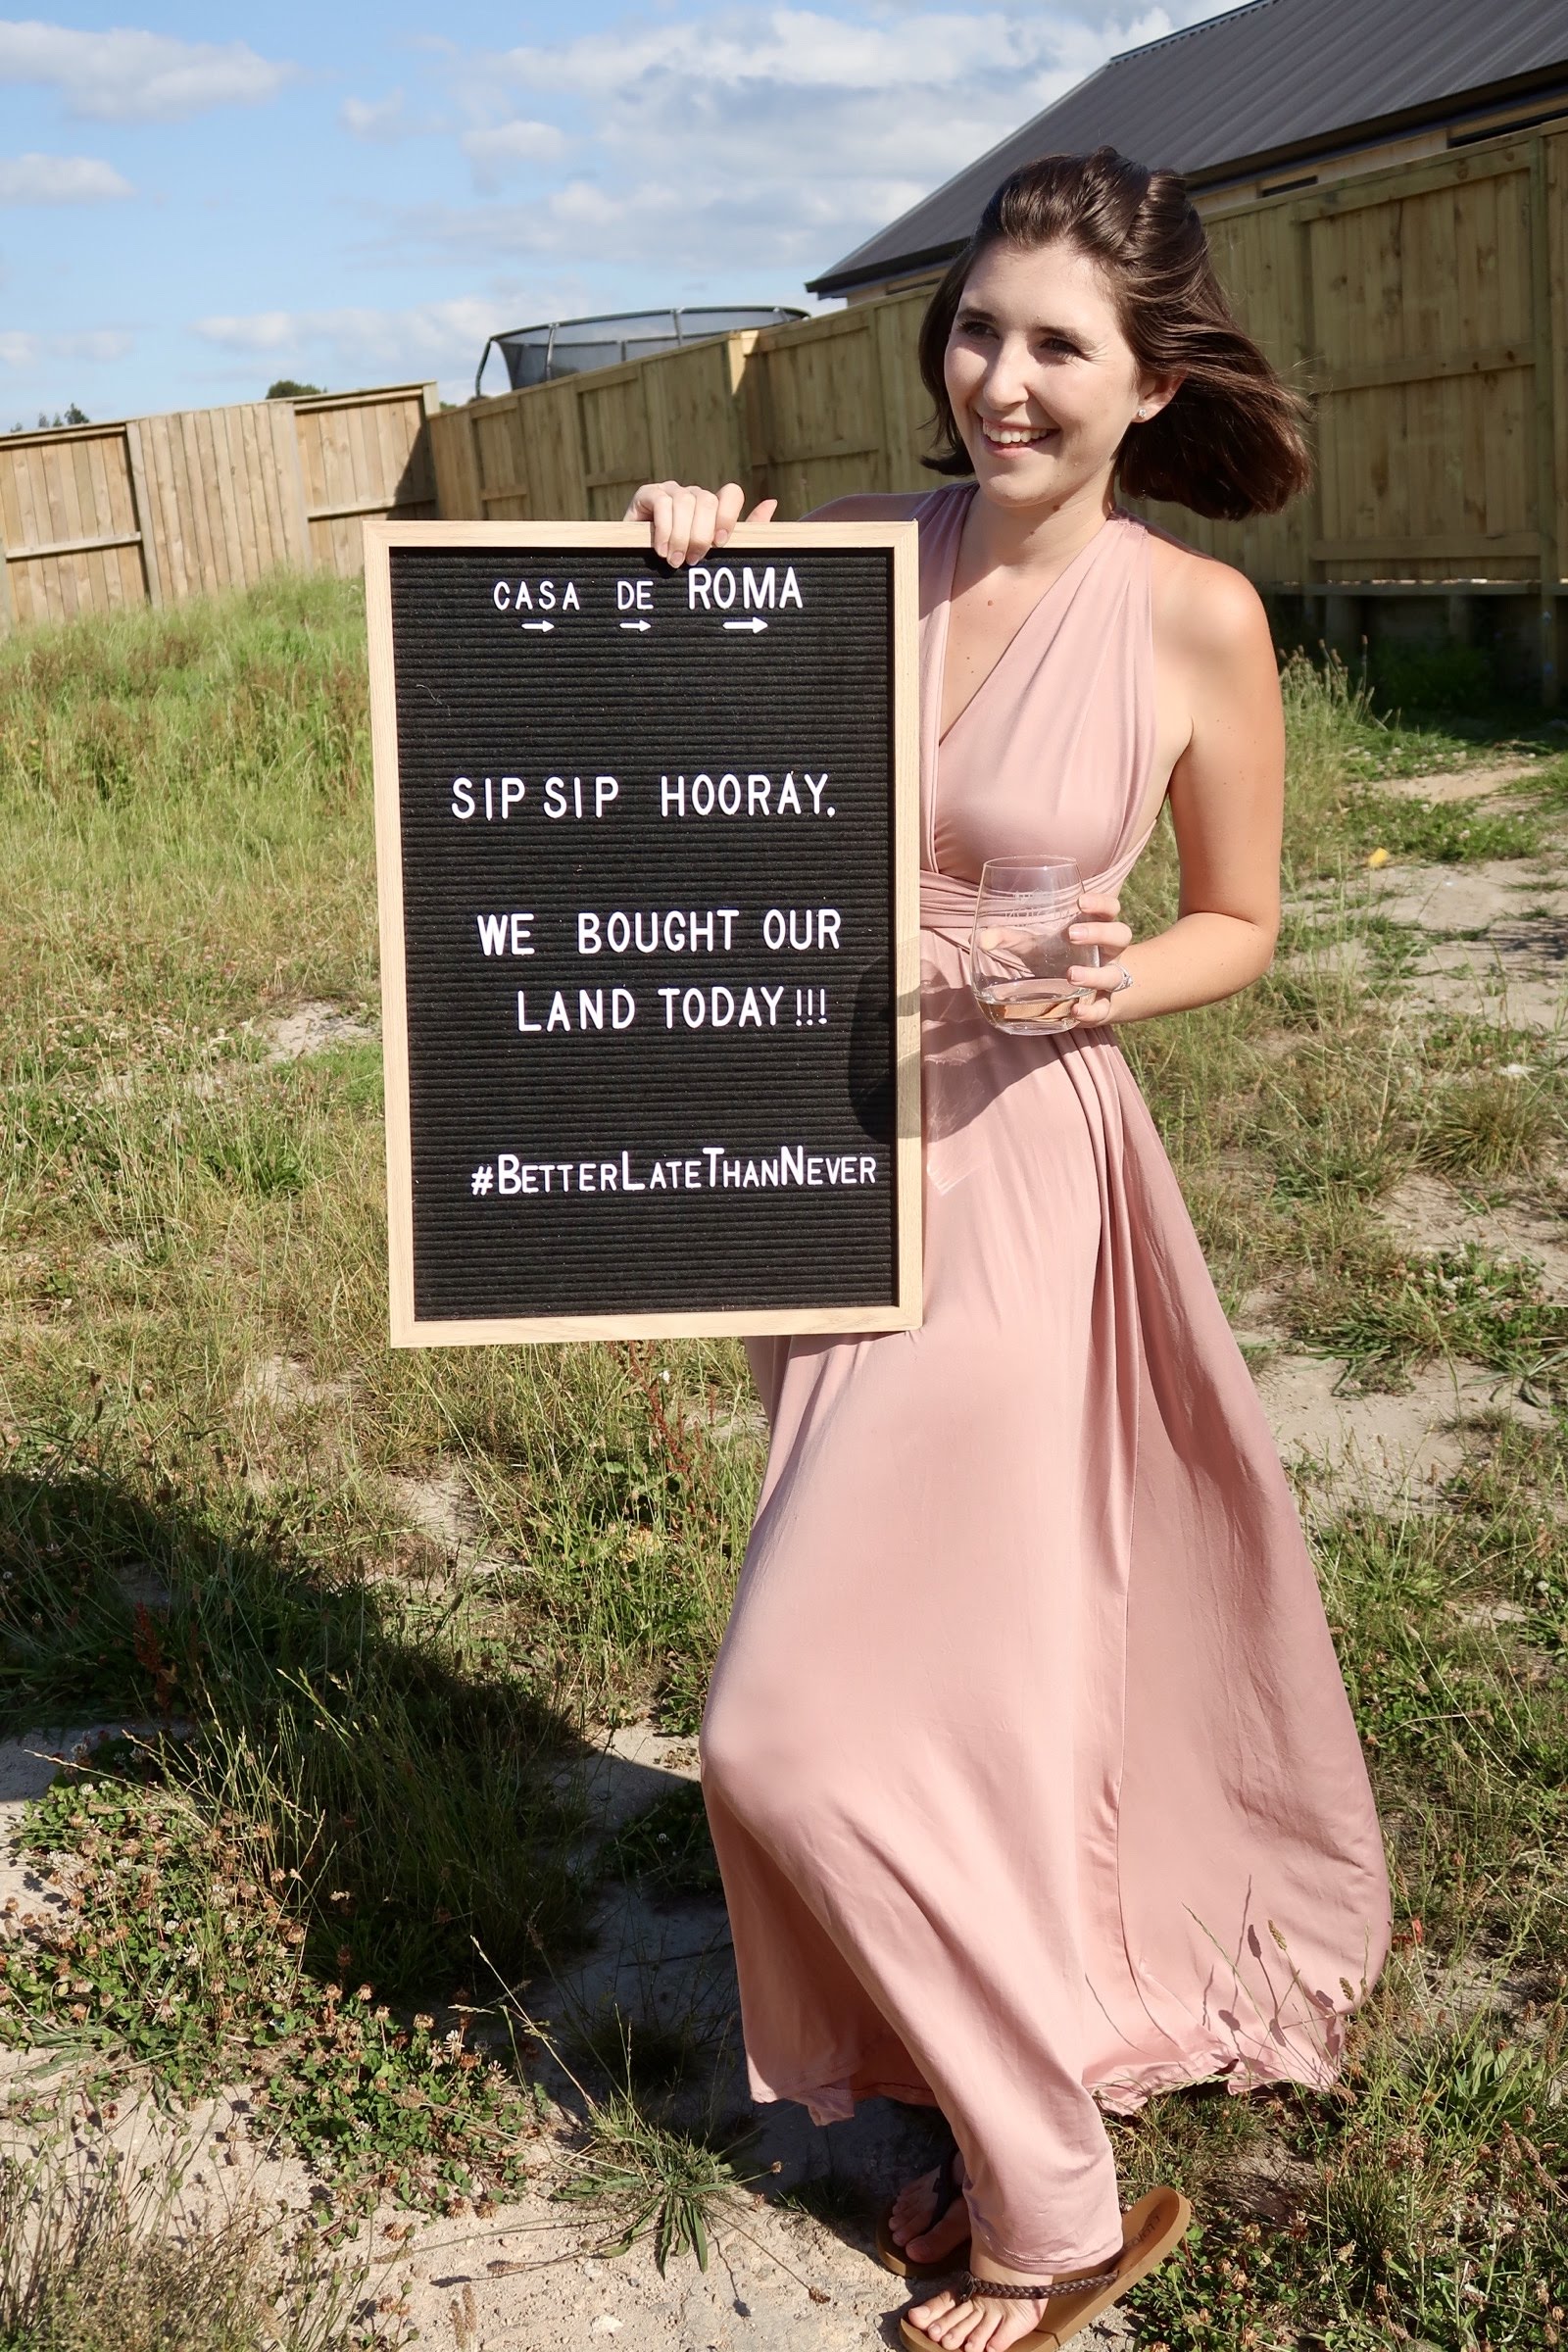
My first post about buying and building our home is going to be all about the process so far (or at least some of it). Let’s face it, I have been putting it off because that’s kind of the boring and stressful part (unless you’re new to building as well – then, it would actually be really useful). It was supposed to be fun but I will preface this by saying it most definitely has not been fun the last 10+ months.
About a year and a half ago we decided we wanted to buy a home so that when our rental agreement expired, we could move into our own house! It would have been perfect timing since our wedding (which you can read about here) and month away in California was going to be the month after we moved out. We searched for months but didn’t come across anything that was the right fit. If you’ve bought a home before or you’re currently looking, you know when you see something that’s “perfect” but then it already has offers on it or it’s the right house but it needs to be moved in right away and you can’t do that yet? There’s a fine line between planning ahead and looking too early. If you’re in the same situation we were in, don’t worry! It’s not just you – it’s actually really common. Like many other things in life, timing is everything but it doesn’t always work out as you might hope.
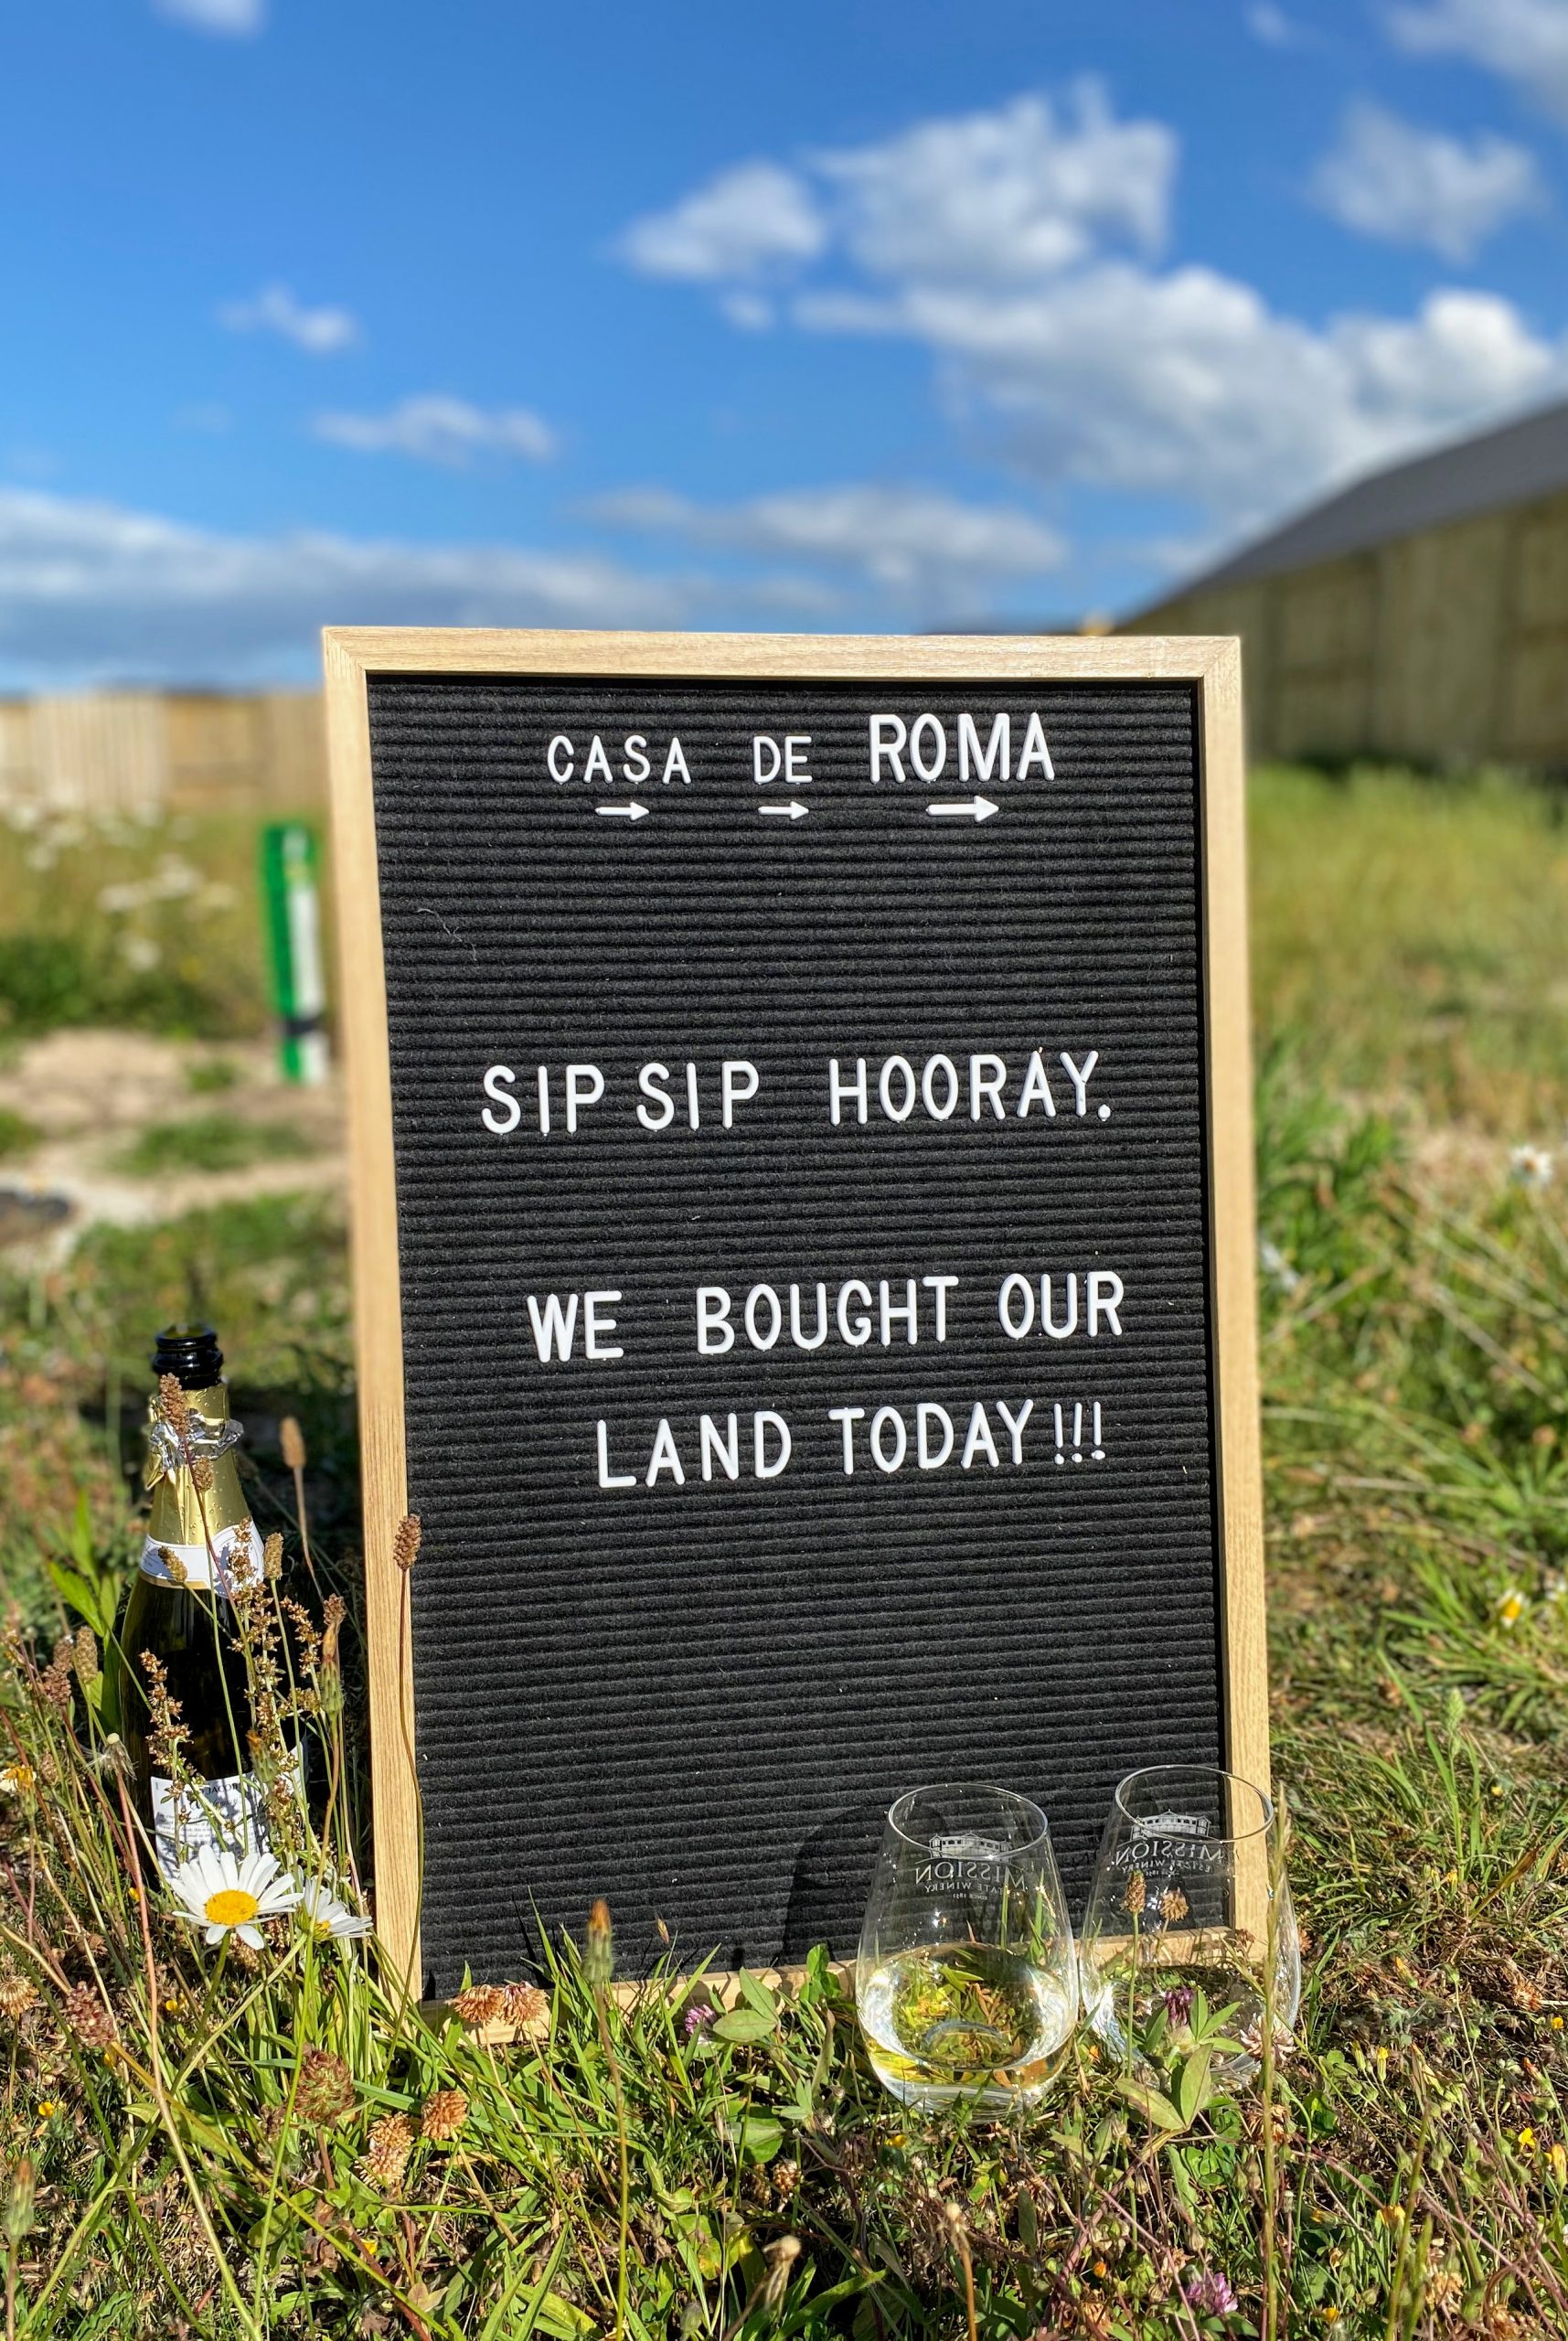
One day while looking for homes online, I saw the option for a land and home package. It was a bit more than our budget at the time but it was exactly what we were looking for – three bedroom, two bathroom home in a good neighborhood. I got in touch with the company and found out that that particular home wasn’t available anymore but they had similar homes in the same area.
When you buy a land and home package, at least with the company we went with, you get one week to decide if you want to move forward with it before it moves onto the next person/people. The problem was, it was the last home available and had people who were interested in it. They had a few days remaining to give their answer and we were next on the list (with a whole list behind us who wanted the property). To our surprise, they didn’t respond so the home got defaulted to us. In that first week we weighed up all our options, talked about specifications, viewed their showhomes again, and spoke with the developer. We finally made our decision. We were buying land and building a home!
I should note before we get into too much that we are extremely lucky to have found a land and build project in the area we did for the price we did. Our builders subdivided three pieces of land to create four pieces instead. Meaning each of us get our land and home package for cheaper. So although our neighbors have bigger properties and homes, we still get to live in the same neighborhood for less! Thank goodness because it was the only way we would have been able to afford it!
Everything felt like it was aligning well. A brand new home, only slightly more expensive but comes with more guarantees and warranties, in an amazing area with a brand new school, customized to fit our lifestyle, and so much more. Although it wouldn’t be done by August 2019, it was supposed to be done by January 2020 which meant our month in California we didn’t need to pay rent and when we returned home from our wedding we would have to/be able to live with grandparents until January. As March moved into April and so forth, we were starting to hear that my mom and step-dad wanted to come visit us in summer 2020 (which is January/February/March). We talked with our building company and they said the home would be done in March at the latest. We shifted our thinking and planned to be all moved in by March 2020. A few more months for our “dream” home… we could do it! Everything was signed, finalized, and major deposits made in August before we headed to Cali for our wedding. They said they might even start building while we are away (which is why they said we needed to get everything done before we left). We had both been traveling around the world for a few years so settling into somewhere we could call our own meant the world to us. This was the home that we pictured having our first child in, bringing a dog home to, and really, officially, settling into New Zealand.
Now come October is when things began to get tricky. Less communication from the building company, lots of money (and time, hope, excitement) invested at this point, and nothing but a contract (which we didn’t quite understand to the extent we thought we did) to show for everything. We still hadn’t been able to purchase the land due to the title being held up in council (because remember how I said that they split the original land? That meant that our land didn’t even have a title yet!).
Fast forward a few more months of disappointment and little to no answers, it was time to make our decision regarding our sunset clause. “Simply put, a sunset clause stipulates the date by which the sun sets on the agreement allowing the property contract to be voided and the deposit be returned to the buyer. It is commonly inserted into agreements over properties that are not yet capable of being conveyed – i.e. in the absence of a title (new development or subdivision),” (https://www.apia.org.nz/apia-blog/what-is-a-sunset-clause). We couldn’t find, remember, or get in contact with anyone to let us know when that date was. Until our lawyer called up and said something like, “Today is your sunset date. You have 24 hours to decide if you’d like to keep the home or pull out of the contract and receive some of your money back.”
That 24 – 48 hours were some of the worst hours of our lives. How do you make that big of a decision – something you’ve spent almost the last year designing, hoping for, and getting excited for – without knowing anything exactly? No one could tell us how much of our deposit we would get back or if we waited (extended the sunset clause) when title would come out. Dates were being flung around on when we would move in but changed each time we had a call with our builders. How do estimates change by months in a matter of a week?
Ultimately we couldn’t make a decision that huge without any real information so we decided to allow the sunset clause to be extended. There’s a few big parts missing from the story but given that it’s just additional heartbreak and frustration, I will leave it out for now. Long story short, we extended the sunset clause. Luckily, right before Christmas break, title came out. We thought, “Finally! Things will start to progress!” But right when you think the building process is going to start to look up from here, it smacks you back down.
We officially received title in mid-January (2020) and we were meant to be able to start building, “Right away!” However, consent was filed incorrectly (i.e was missing information) from the building company and here we are the middle of May still without consent and unable to build. We are hoping that consent will be approved within the next week (although it’s already at least a week late…go figure).
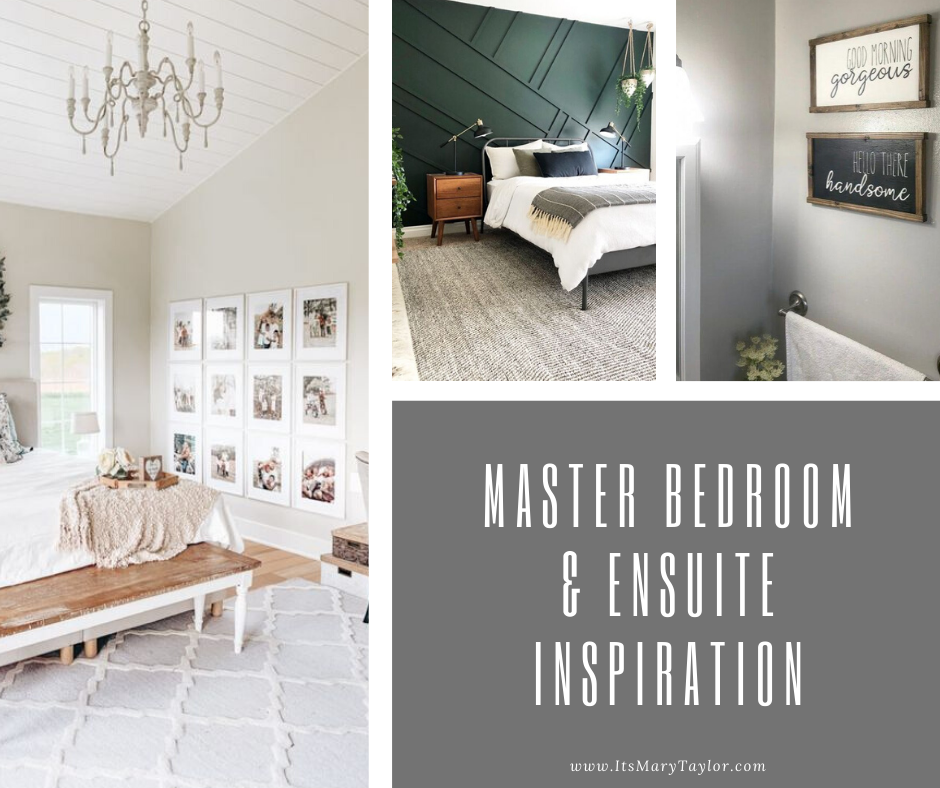
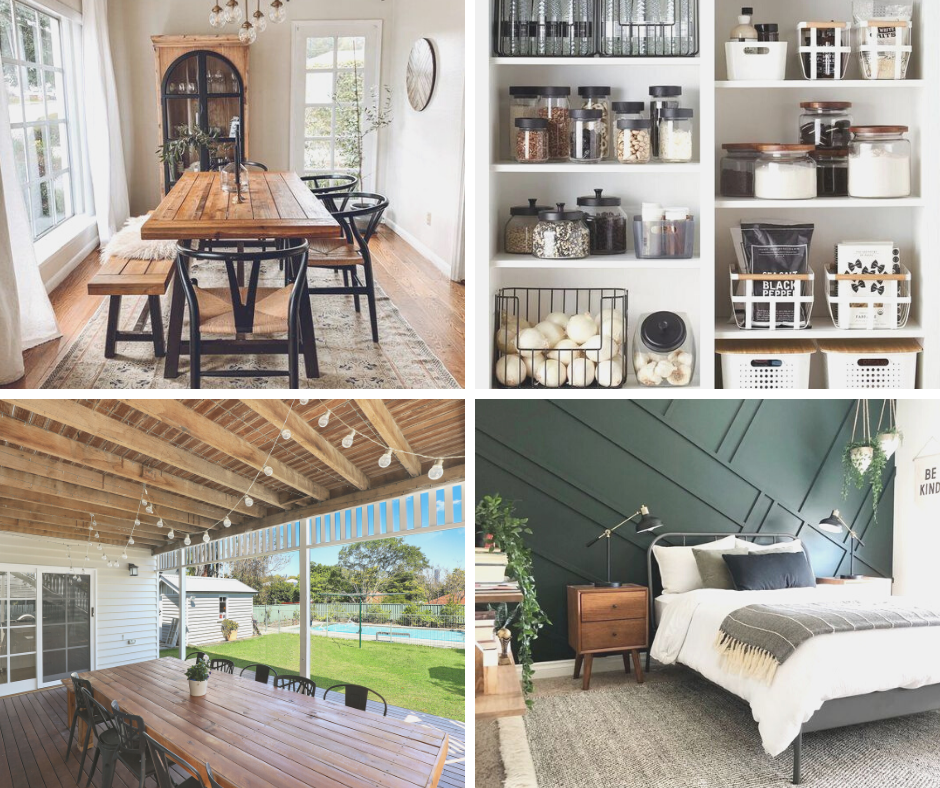
Anyways, thanks to those that have stuck around to read this and those that have offered their love and support (and even their homes). It has been a really long, tough, and unfortunate journey. We continue to search for hope and try to make other aspects of the process fun whenever possible (right now that means creating vision boards and designing spaces virtually – see above). You can check out my home inspiration shop to see where to purchase items from my inspiration boards and see where the images came from within the boards themselves. Look out for more blogs about inspiration, where we are at now, etc.
I’m always looking to connect with local New Zealand businesses who specialize in home decor, eco-friendly products, or organizational products, I would love to follow them on Instagram! If you know of anyone that fits that description or something similar, feel free to reach out and mention them in this Instagram post.
To read about where we are at now search the building tag here to see the latest blogs about our building process!
If you enjoyed reading this and would like more information on home, lifestyle, advice, tips, tricks, and more, follow me on Instagram @Its.Mary.Taylor and on Facebook at Mary Taylor! I can’t wait to see you there!